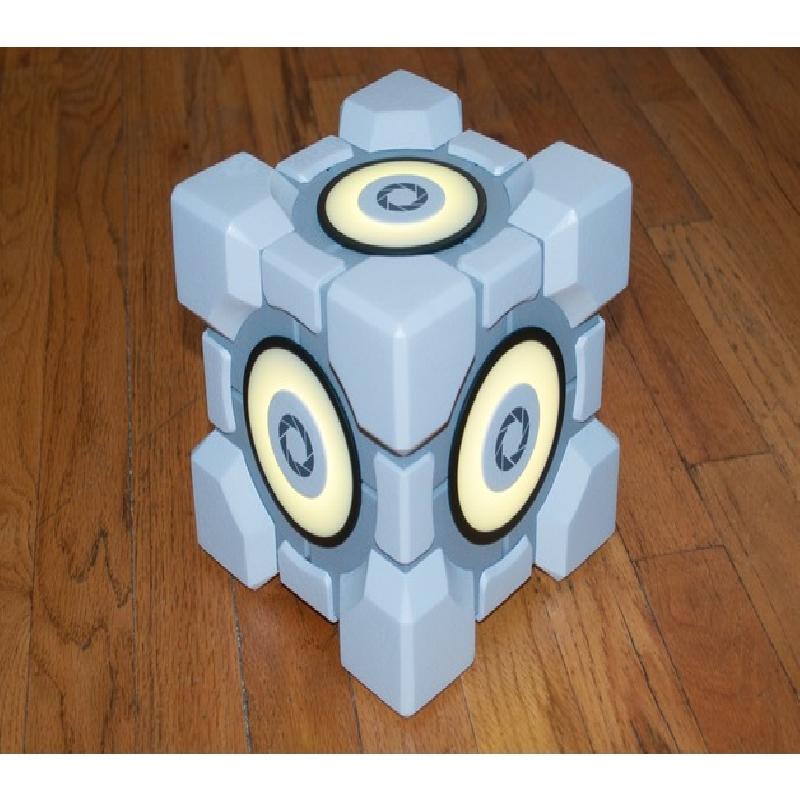
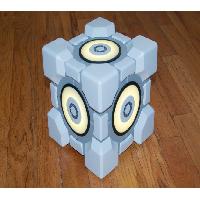
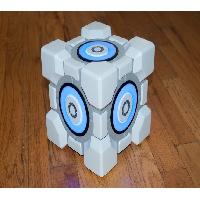
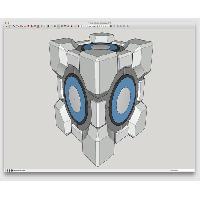
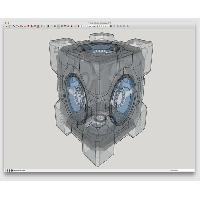
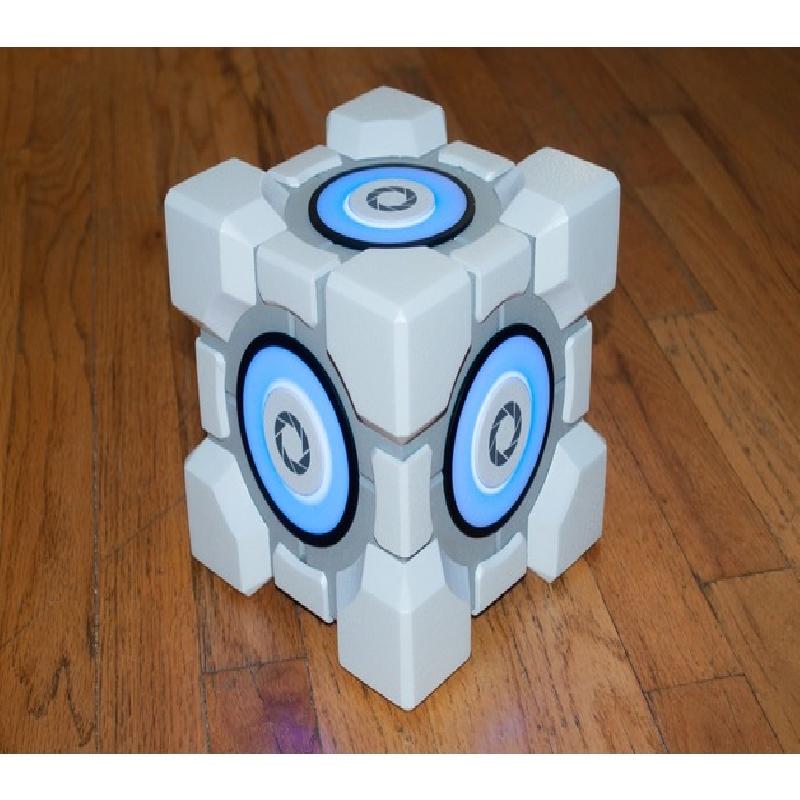
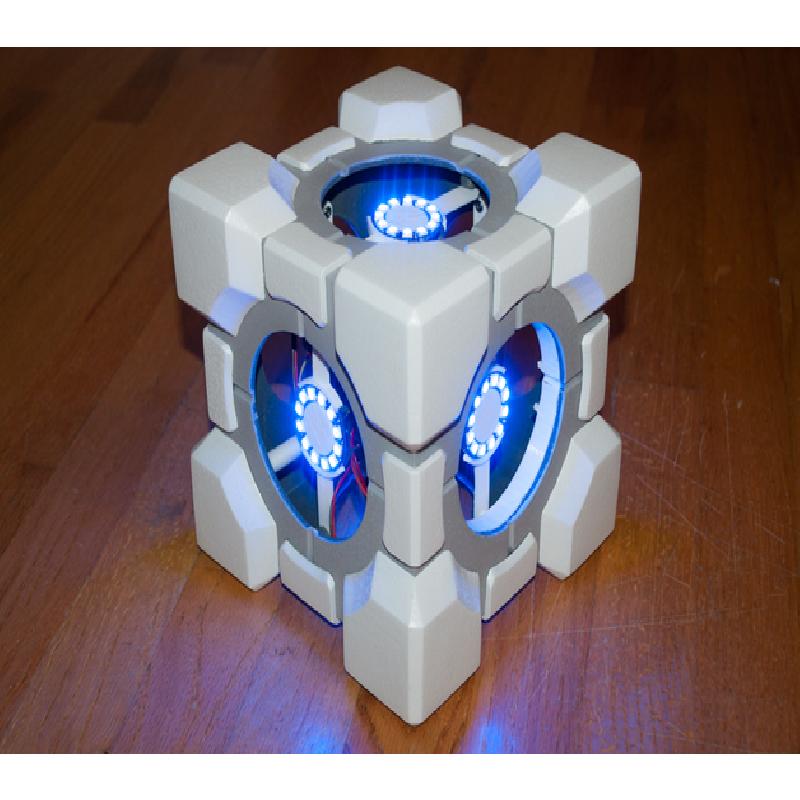
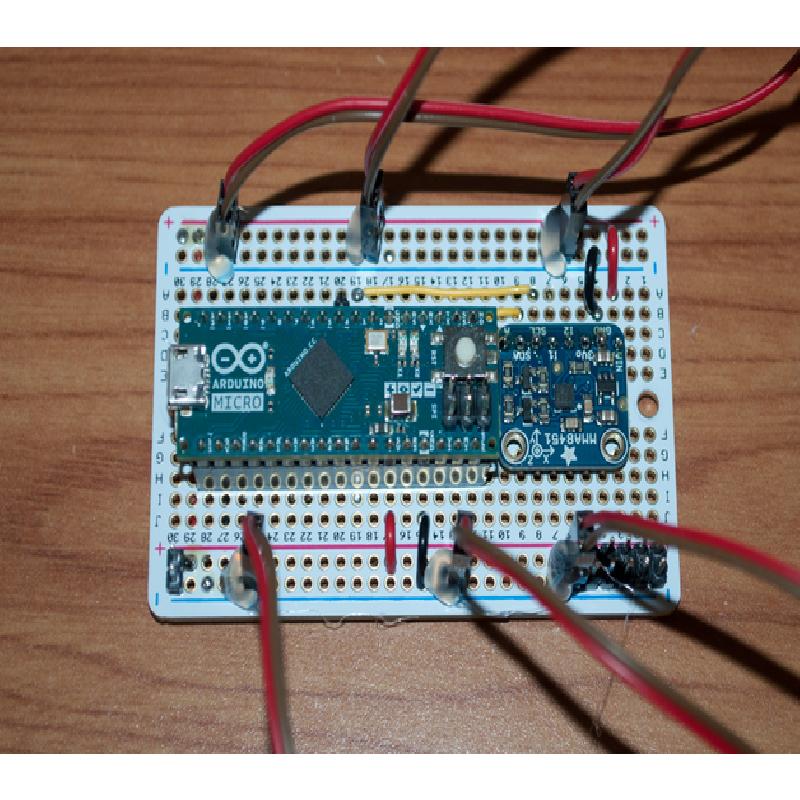
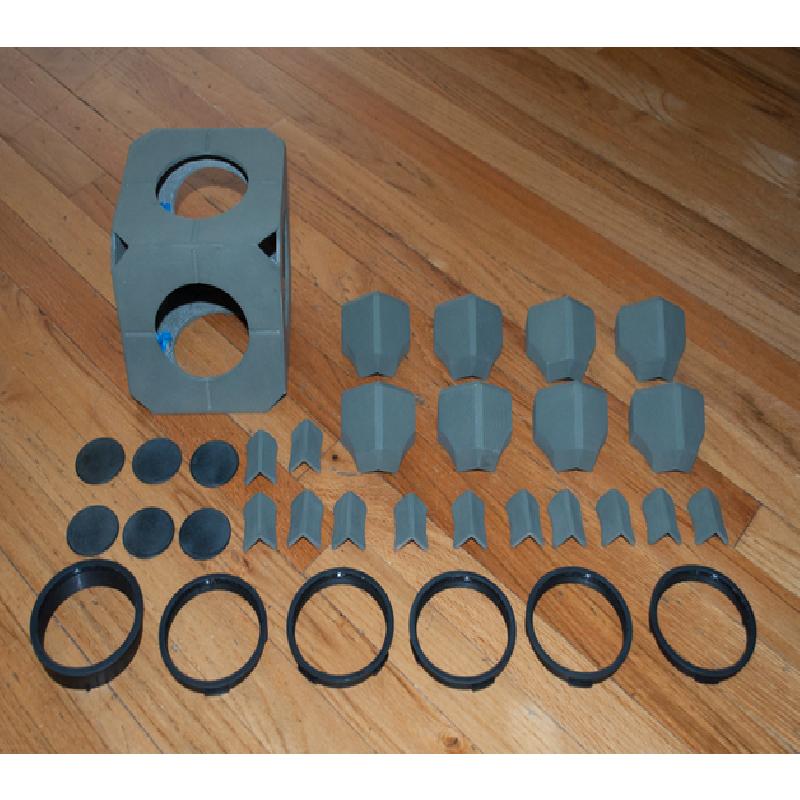
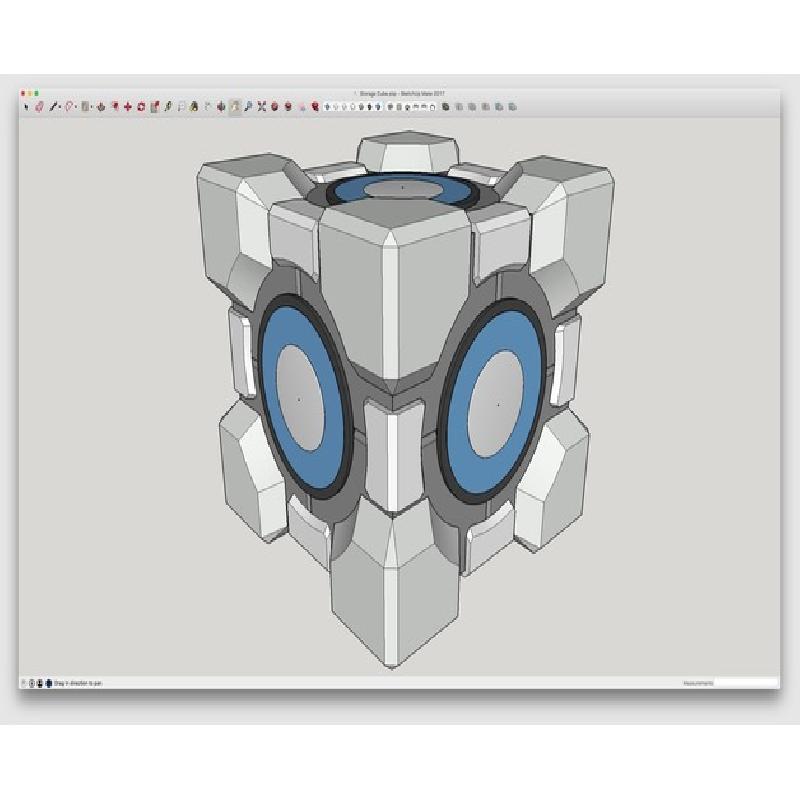
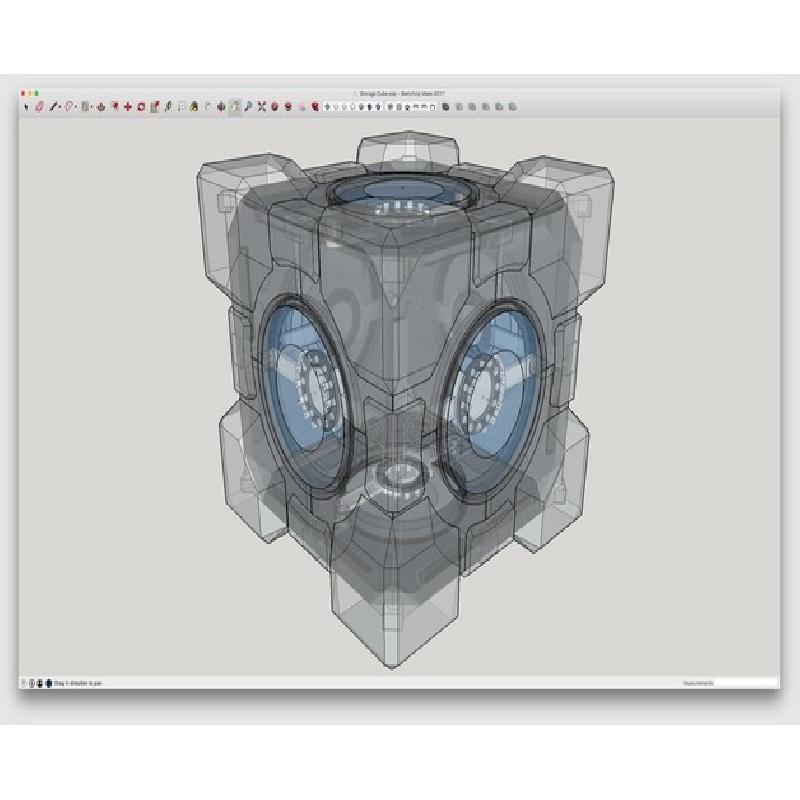
This is my take on the Portal 2 Weighted Storage Cube. I designed it in SketchUp. It measures 7" x 7". This is complex model that requires almost 2 rolls of filament, electronics assembly, the Arduino platform, and some sanding and painting. You'll need, at minimum, an Arduino micro, 6 Adafruit Neopixel rings, and an accelerometer. You'll also need some 4-40 threaded inserts, some screws, and some tiny magnets. Several pieces need to be glued together. You could also forgo the use of the 4-40 screws and inserts for the LED holders and just glue the whole thing together. Your choice. Other electronics are also required: battery pack, prototype board, wires, etc. (See the 5-part blog on my website for more details. The link is below.)
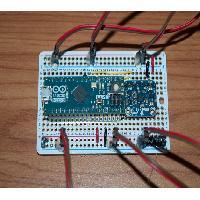
It runs off a 3 x AA battery pack, although with 72 LEDs and an Arduino, the batteries do not last long at all. So feel free to improve the battery pack and/or power management.
The acrylic centers need to be laser cut. I've included the SVG file. The stencil for the Aperture Science logos also needs to be laser cut. That file has also been included. The Arduino code is also included. However, if you plan on implementing the electronics, you'll also need to download the Neopixel and MMA8451 libraries from Adafruit.com.
I have a 5-part blog post on my website detailing the design and assembly of the cube from start to finish. This may offer more instruction and guidance that can be detailed here. http://kevinrye.net/index_files/portal_cube_p1.php
I offer no tech support on this, so if you take this project on, it's on you to figure it out. Feel free to make any improvements you feel are necessary. Thanks for looking and happy building!
Printer Brand:
Robo 3D
Printer:
R1 ABS + PLA Model
Rafts:
Yes
Supports:
Yes
Resolution:
Medium
Infill:
20%
Notes:
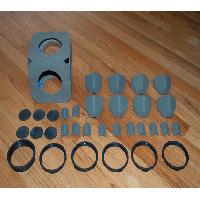
Printing the side panels face down on a raft makes a mess when peeling them away from the raft, and makes it that much harder to sand. Parts were printed face up with supports. This will result in you using twice the amount of material. You will burn through almost a whole roll just printing the 6 side panels. You'll need another roll, maybe 2, for all the corners, edges, bezels, and LED holders.
Corners printed one side down with supports and rafts.
Edges printed one side down with rafts.
LED holders printed face up with rafts.
Bezels were printed face up with rafts and support.
PCB mounts and base with rafts.
Post printing
Parts were sanded down to 400 grit, then primed with self-etching primer.
Parts were then painted with acrylic paint that was mixed to match. (dark gray and white) Paint was applied with a paint roller to give it a slight texture. It was then given a light sanding with 400 grit paper, and then sprayed with a matte clear coat.
Although the corners were secured with 4-40 threaded inserts and screws, some of the corners still wiggled a little bit. I went ahead and glued them down, along with the edges, with some Loctite 2-part plastic epoxy.