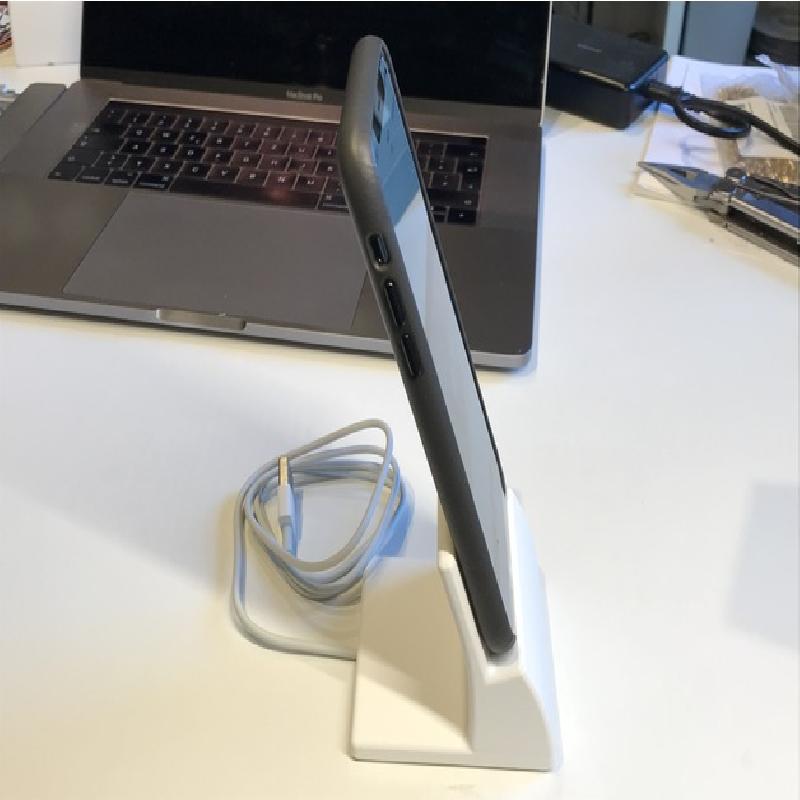
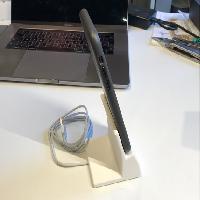
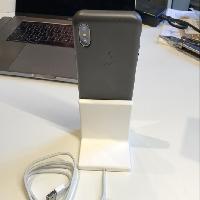
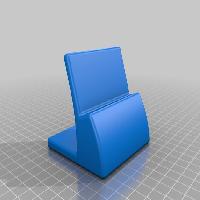
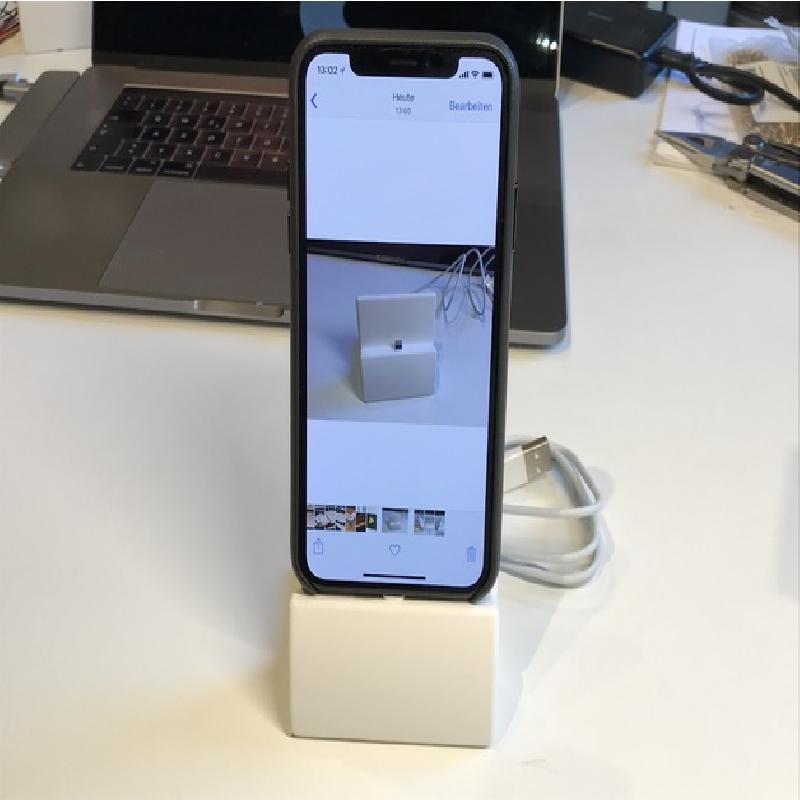
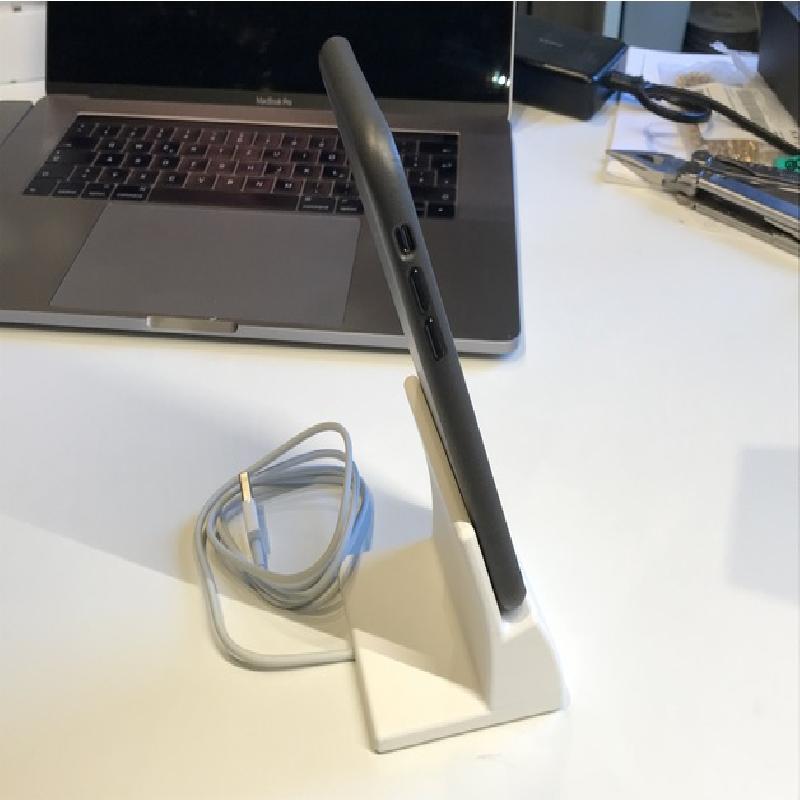
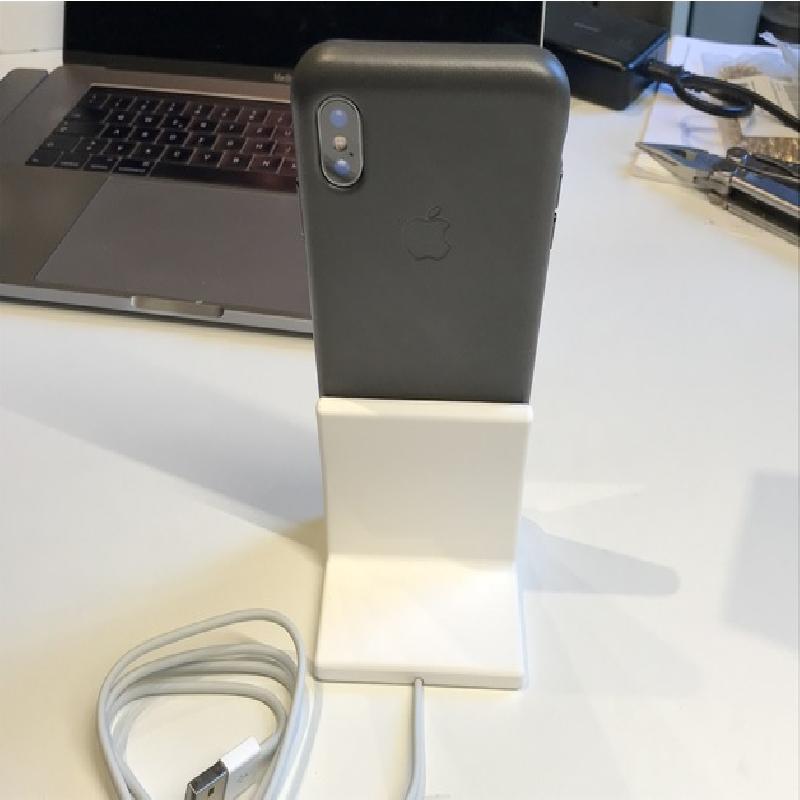
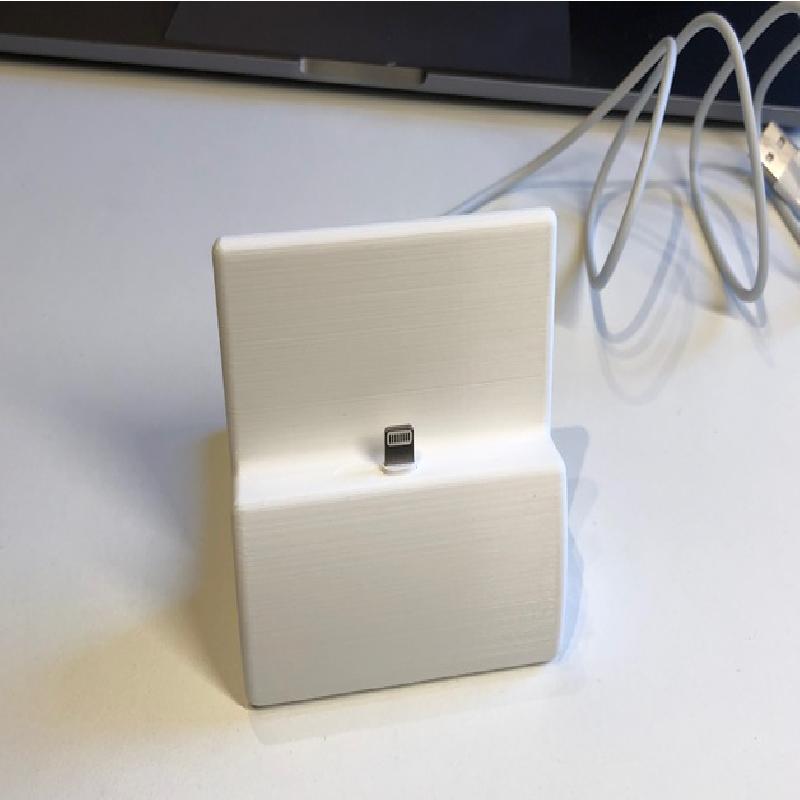
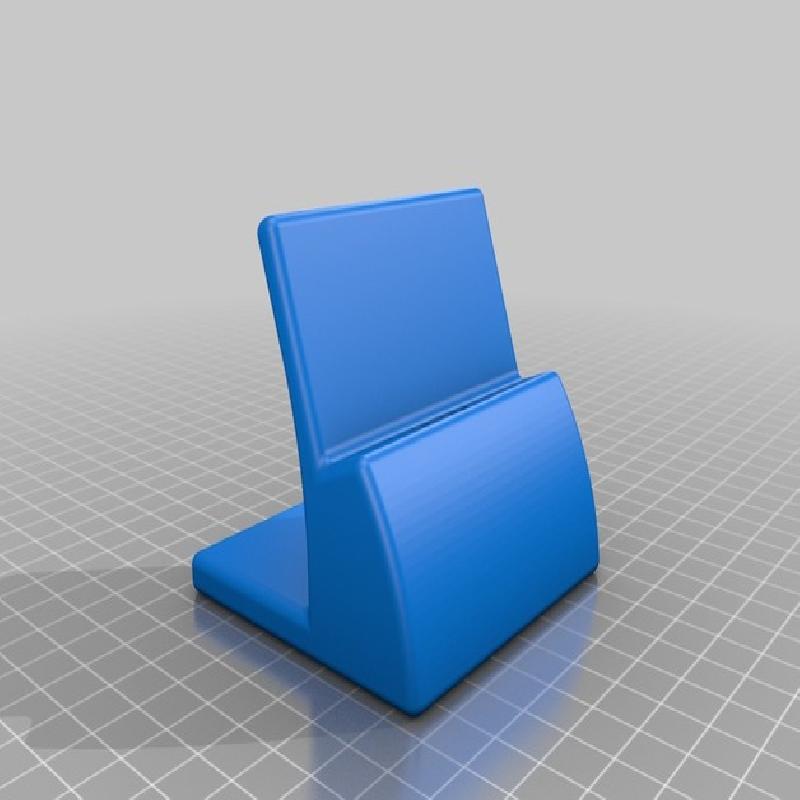
Designed for iPhone X with the Apple leather cover.
Why another phone dock?
The new iPhone X is a few mm taller than the previous phones, so my old printed iPhone dock didn't work anymore. After some browsing I could not find any other dock I liked. The one I liked that doesn't fit does not exist for the X and I dislike mods on STLs/OBJs. The generic ones are typically clumsy or have other issues.
So I decided to design one quickly from scratch. Here's the result I would like to share.
I think there are not enough phone docks out there yet! :-)
Assembly
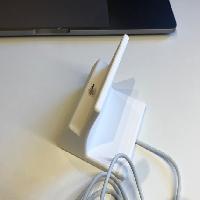
You need a standard apple lightning cable, that works for sure. Others are unclear, I have read the Amazon essentials lightning cables might work as well. The plugs plastic part needs to have the same oval shape, diameter and length.
Put the lightning plug through the larger hole from the bottom to the top, then pull it sideways and push the plug into the smaller hole, ideally with flat pliers. If you are perfectionist protect the metal plug with some tape to not scratch it with the pliers.
It's a very tight fit by fractions of 10ths of mm. Possibly you need to work on the hole a little bit with sandpaper or a file. The tight fit is important that the plug is not pulled out if you take the phone off the dock.
It's by design that the plastics of the plug stand out for about 1mm - the Apple leather phone cover needs 1-1.5mm at the bottom and if it didn't stand out there was no connection of the plug.
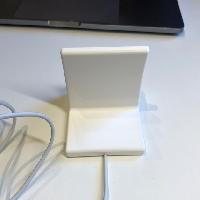
Put the cable into the cable guide at the bottom. Also very tight fit, you might need your fingernails to press it in.
In the end you can push the "plug" into the larger hole for nicer optics. Use it print bottom down so that the surface is equal to the rest and not the shiny surface top. You might need to clean the "elephant foot" from the printing so that it goes in nicely.
Print parameters
The fit surely depends on print parameters and material, try slightly less extrusion / flow if you can't get it in.
I recommend to print with 0.4 nozzle and with 0.1mm layer height, everything else might change the measurements of the holes too much.
And don't forget to post a photo of your make! :-)
UPDATE 17 Dec 2017:
Upon user request I have added a version "iPhone_X_Dock_Lightning3mm.stl" where the Lightning plug stands out 3mm at the top instead of 1mm (depth of the plug cutout 9.2mm instead of 11.3mm).
That's intended for phone cases that add more at the bottom of the phone, like the Tech21 case.
Printer Brand:
Ultimaker
Printer:
Rafts:
No
Supports:
No
Resolution:
0.1mm layers, 0.4mm nozzle
Infill:
25%
Notes:
Printed with white PLA. No supports needed. 3 perimeters.
Make sure you have no over-extrusion happening, that will change the dimensions too much and the plug/cable will not fit.
Also other nozzle or layer height will change the measurements of the hole and cable guide.
Prints in about 10 hours. 65g of material if printed with 30% infill.