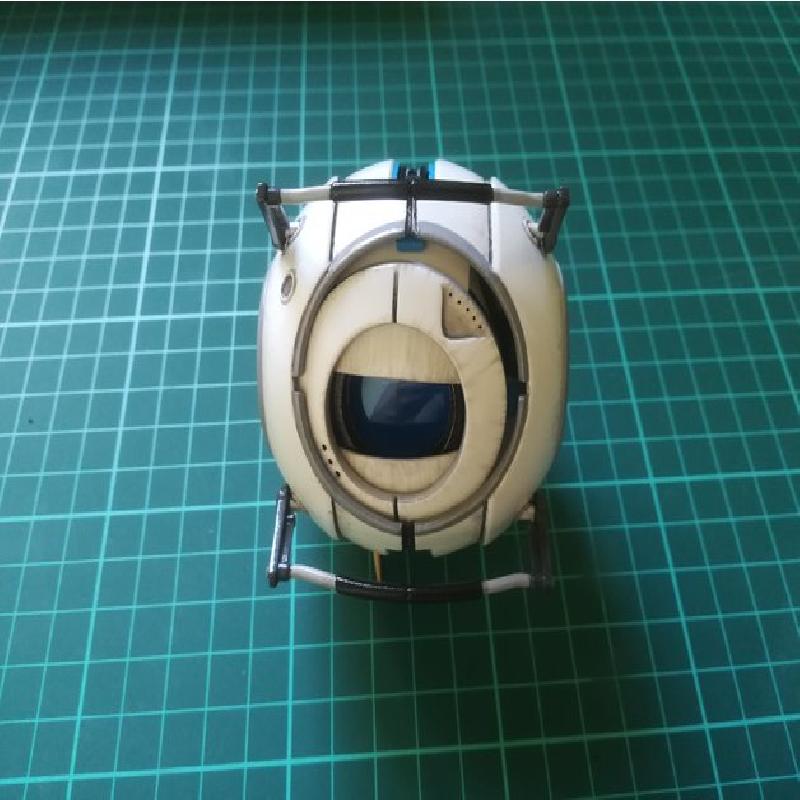
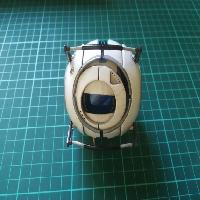
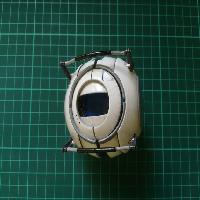
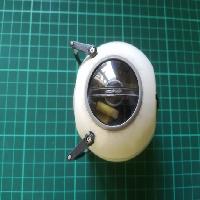
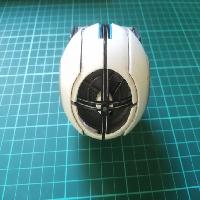
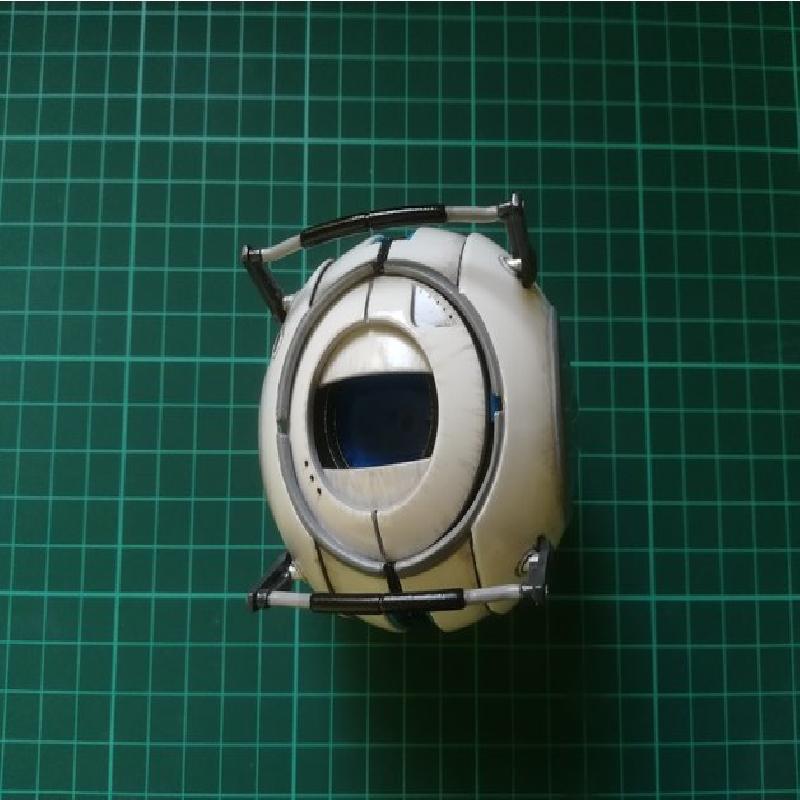
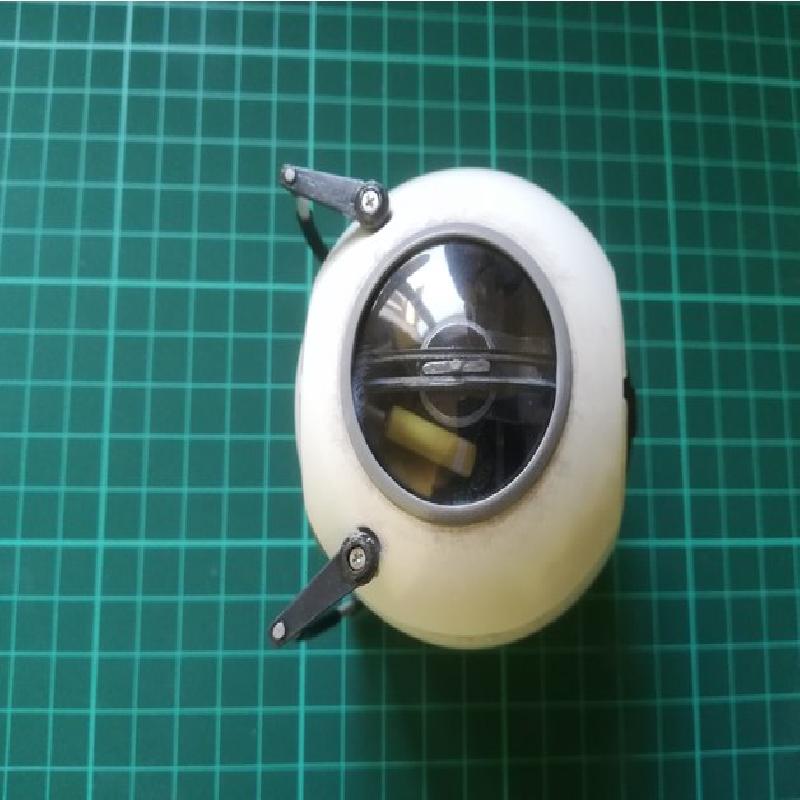
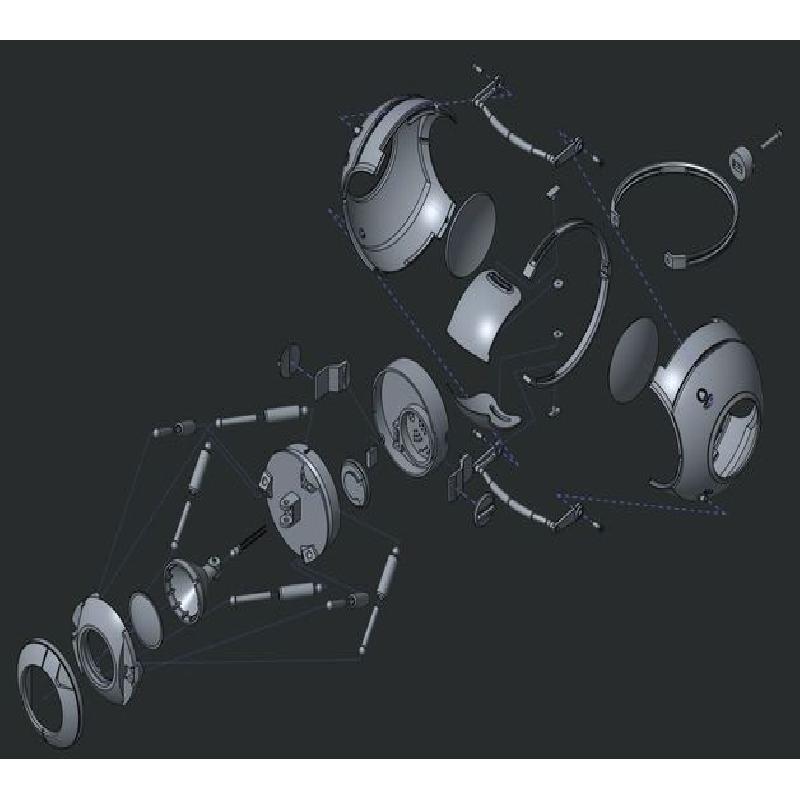
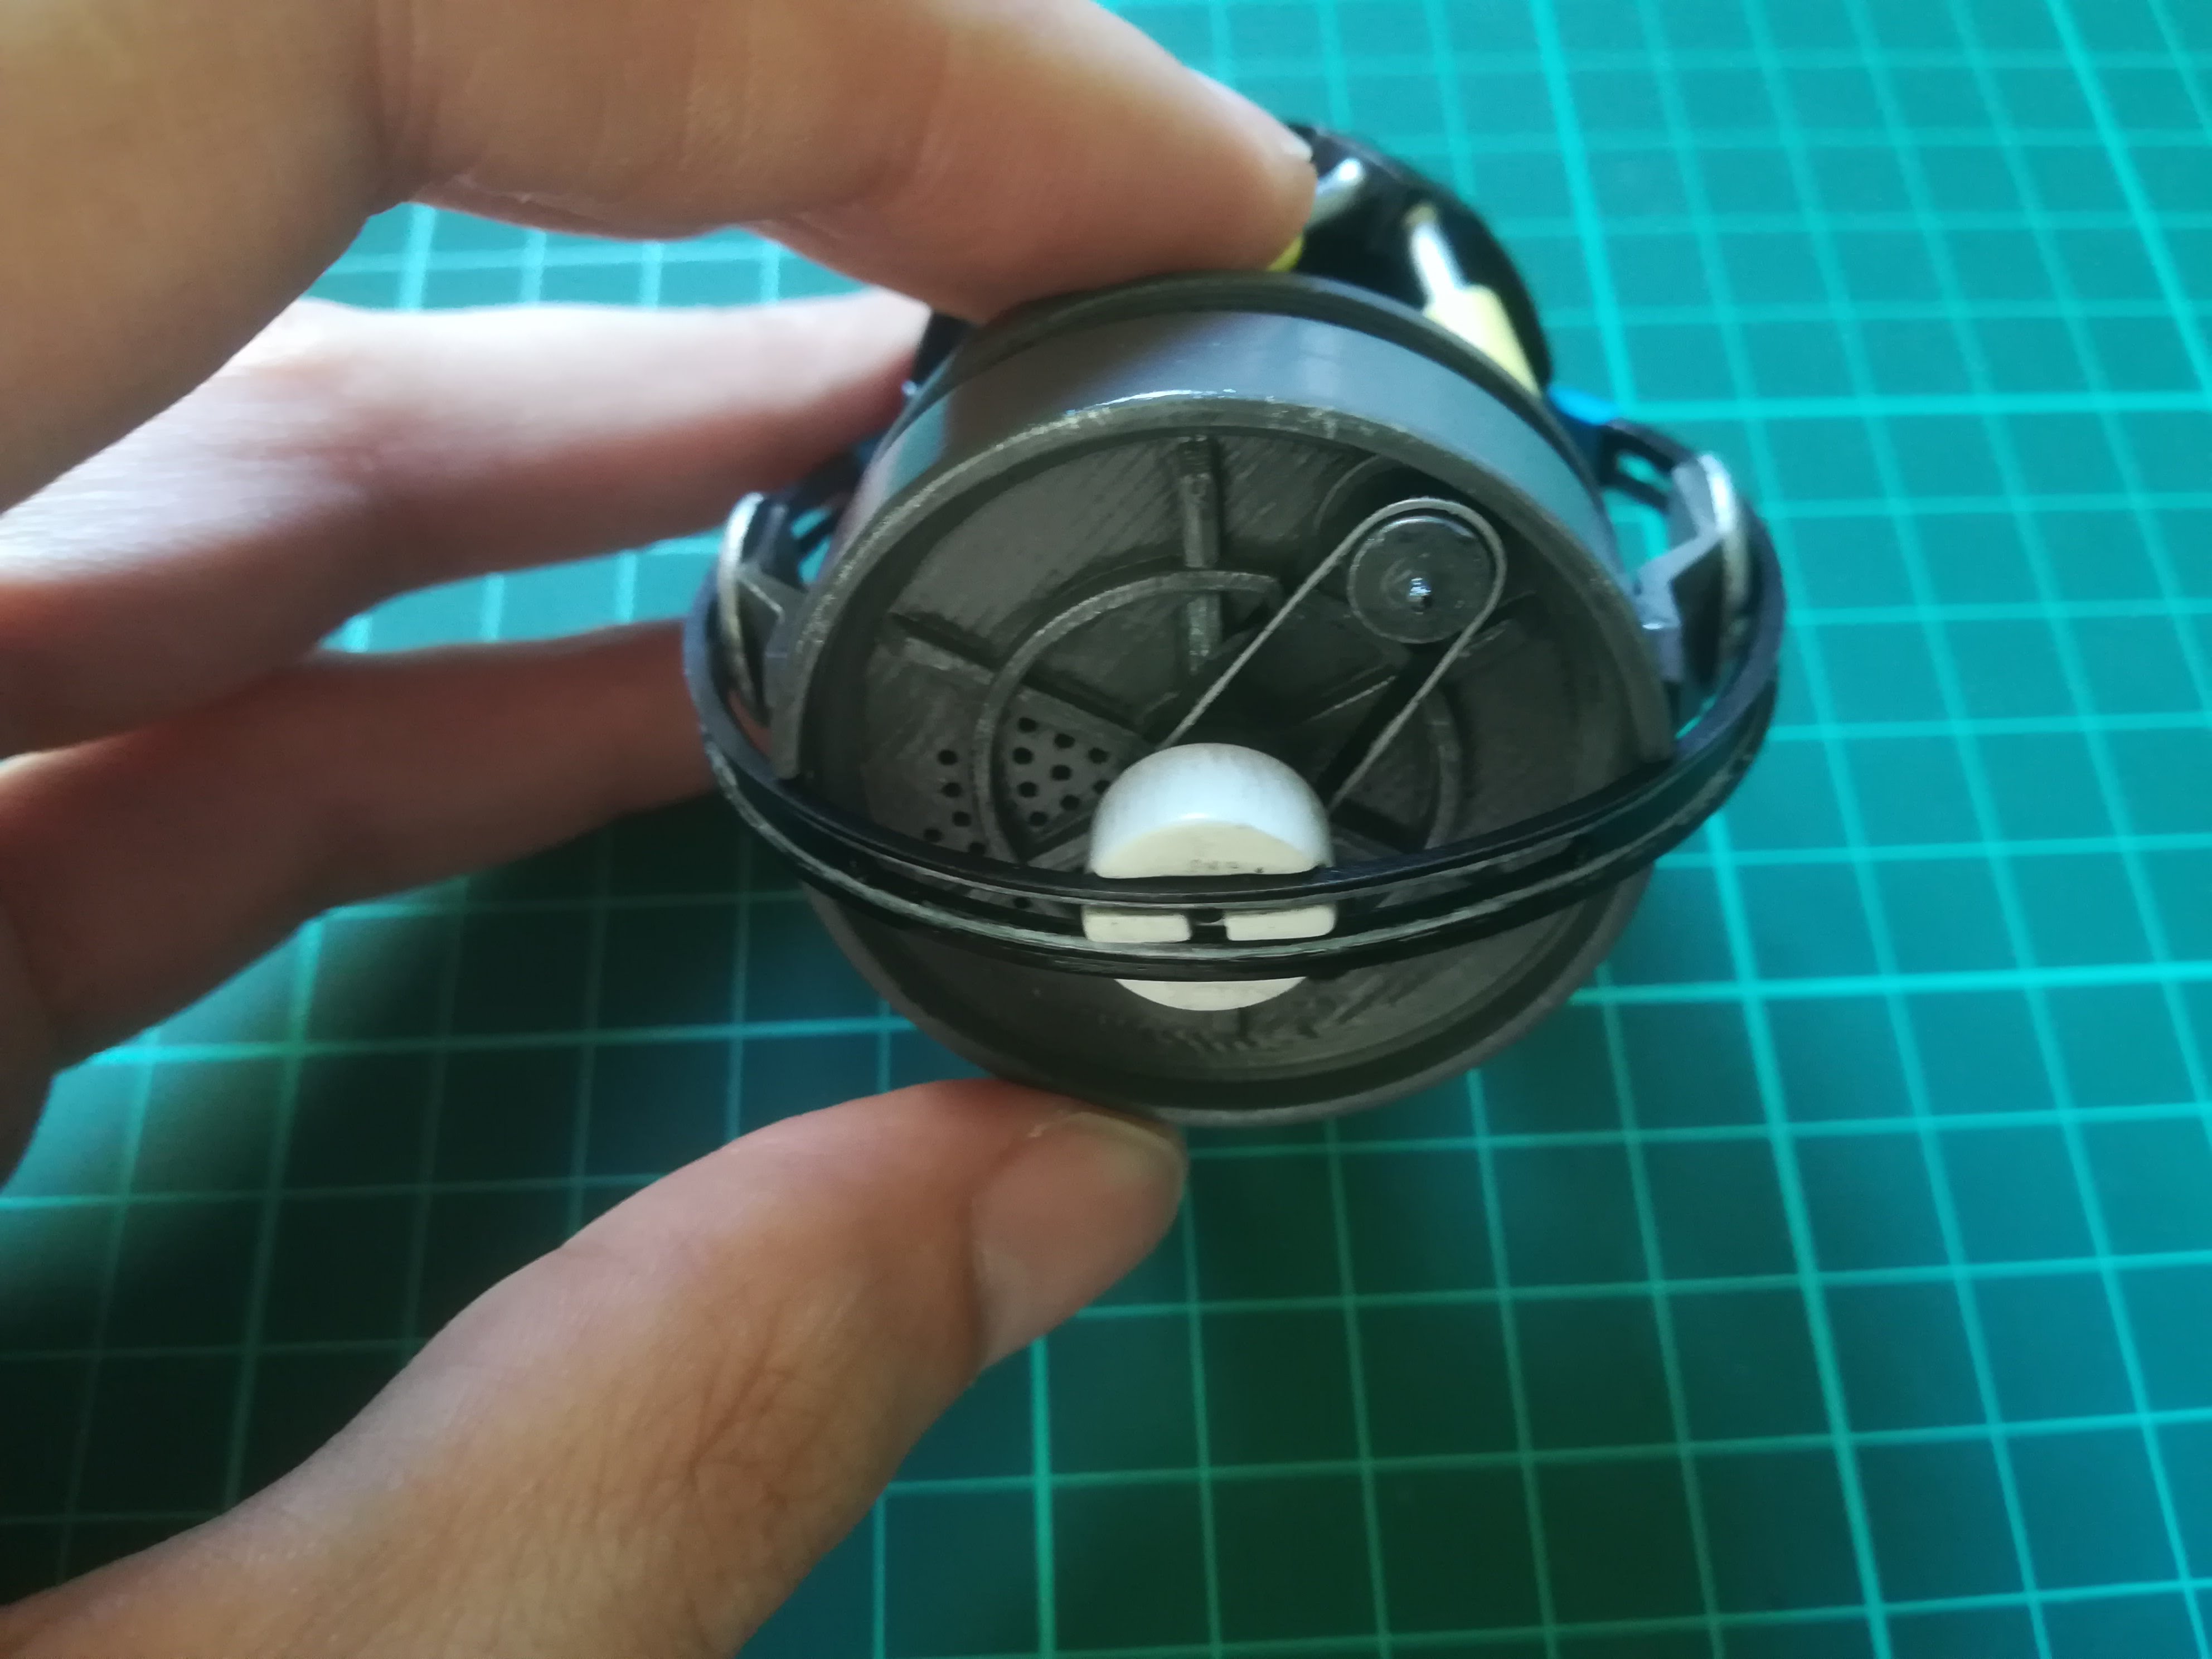
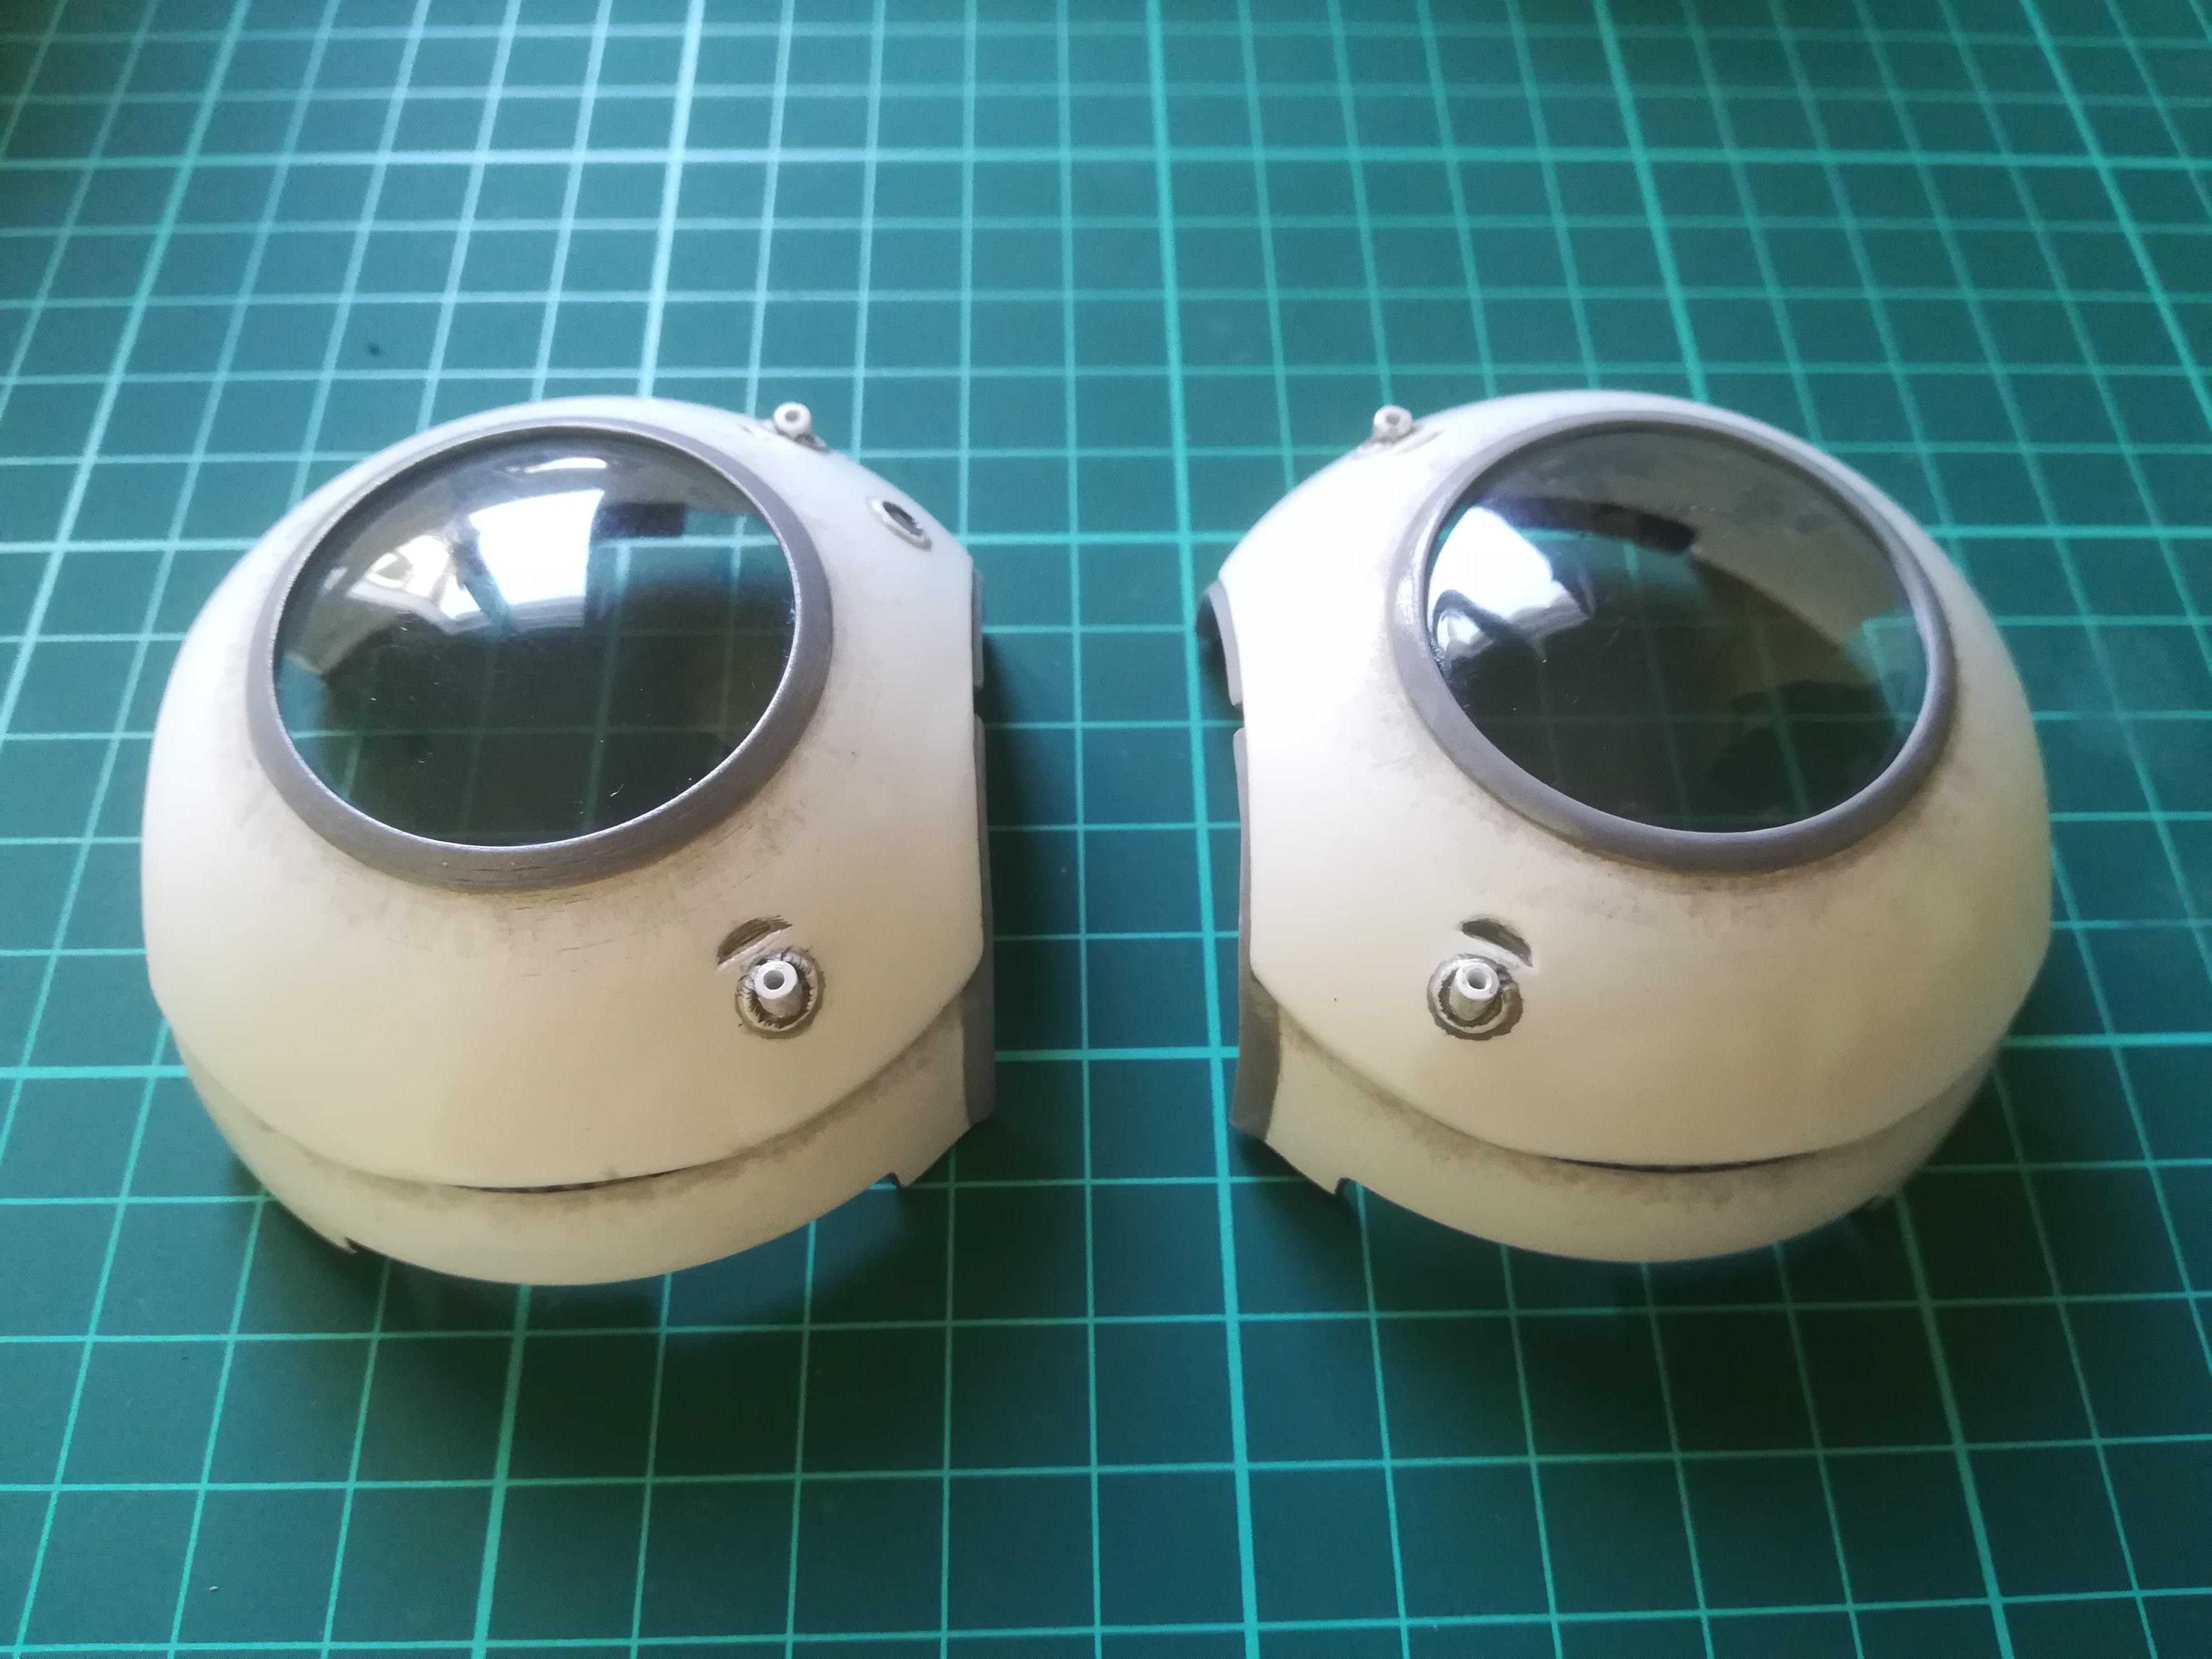
Intelligence Dampening Sphere, aka Wheatley as seen in the Portal 2 video game
As always, made to match the 1/10 scale of my Neca Portal 2 action figures
Sphère Cognitoréductrice plus connus sous le nom de Wheatley issu du jeu vidéo Portal 2
Comme mes projets précédents, il a été réalisé pour être à l'échelle 1/10 de mes figurines Portal 2 de Neca
Printer Brand:
eMotion Tech
Printer:
Prusa i3 Rework 1.5
Rafts:
No
Supports:
Yes
Resolution:
0.2 mm
Infill:
15%
Notes:
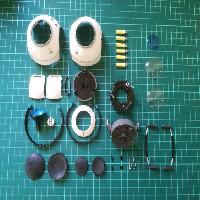
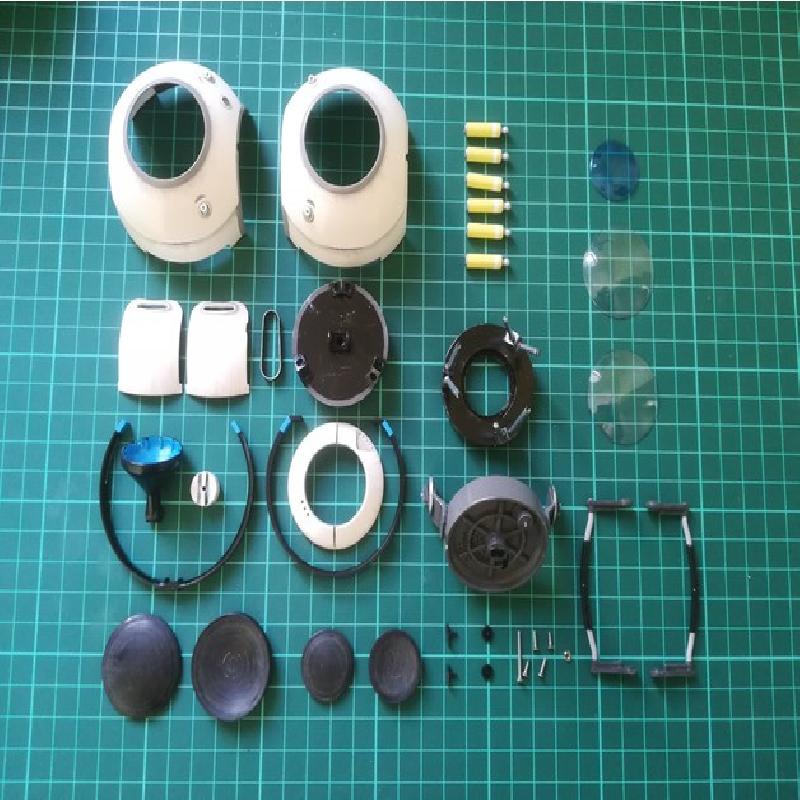
I cutted some (sourcil, support_verins_oeil) parts in halves to ensure better surfaces aspect or printability
J'ai coupé en deux motiés certaines pièces (sourcil, support_verins_oeil) pour garantir de meilleurs états de surfaces et/ou une facilité d'impression
Each part to be printed once except / Imprimer toutes les pièces en un exemplaire, sauf :
6x axe_verin
6x corps_verin
2x paupiere
2x pivot_paupiere
2x verrou_paupiere
2x support_oreille_coeur
2x oreille_coeur
2x sourcil
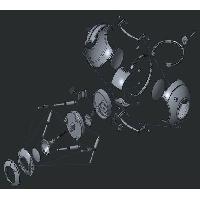
You'll have to glue each "oreille_coeur" on the "support_oreille_coeur", then both obtained parts on the "arriere_coeur"
The parts named "noyau_lentille", "empreinte_lentille", "noyau_hublot" and "empreinte_hublot" are for thermoforming of the eye lense and the to windows on the sides
I used a blue plastic bottle for the eye and some random transparent packaging for the windows
Just softened the sheets with heatgun before pressing it in the moulds previously printed and sanded for perfectly smooth surface
Il vous faudra coller chaque "oreille_coeur" sur le "support_oreille_coeu", puis les deux pièces ainsi obtenues sur la pièce "arriere_coeur"
Les pièces nommées "noyau_lentille", "empreinte_lentille", "noyau_hublot" et "empreinte_hublot" servent au thermoformage de la lentille de l'oeil et des fenêtres sur les cotés
J'ai utilisé une bouteille en plastique bleu (Rozana) pour l'oeil et un emballage quelconque pour les fenêtres
Après avoir ramolli à l'aide d'un décapeur thermique les feuilles de plastique, les presser entre les pièces de moule préalablement imprimées et lissées pour un état de surface sans défauts
Sanding & painting / Ponçage et peinture
As always, I spent a very looong time on sanding with files, 240 ans 600 sandpaper plus water for the finishing
Applied a plastic primer coat then 2 layers with matte spraypaint (black or white) before painting the details
After the undercoat, with help of reference pics, I painted with acrylic the base colors, then added some weathering with washes ans dry brush techniques, then some scratches with metallic paint
Comme d'habitude, j'ai passé beaucoup de temps sur le ponçage à l'aide de limes, de papier de verre grain 240 et 600 et d'eau pour la finition
Application d'une couche de primaire pour plastique puis 2 couches de peinture matte en bombe (noire ou blanche) avant de peindre les détails
Après la sous-couche, à l'aide d'images de référence, j'ai peint les couleurs de base, puis ajouté du "weathering" à l'aide de techniques de lavis et de brossage à sec, puis quelques marques de griffure avec de la peinture métallique
Construction steps / Etapes de montage
I recommend to follow the following steps for the construction
Je recommande de suivre les étapes suivantes pour le montage
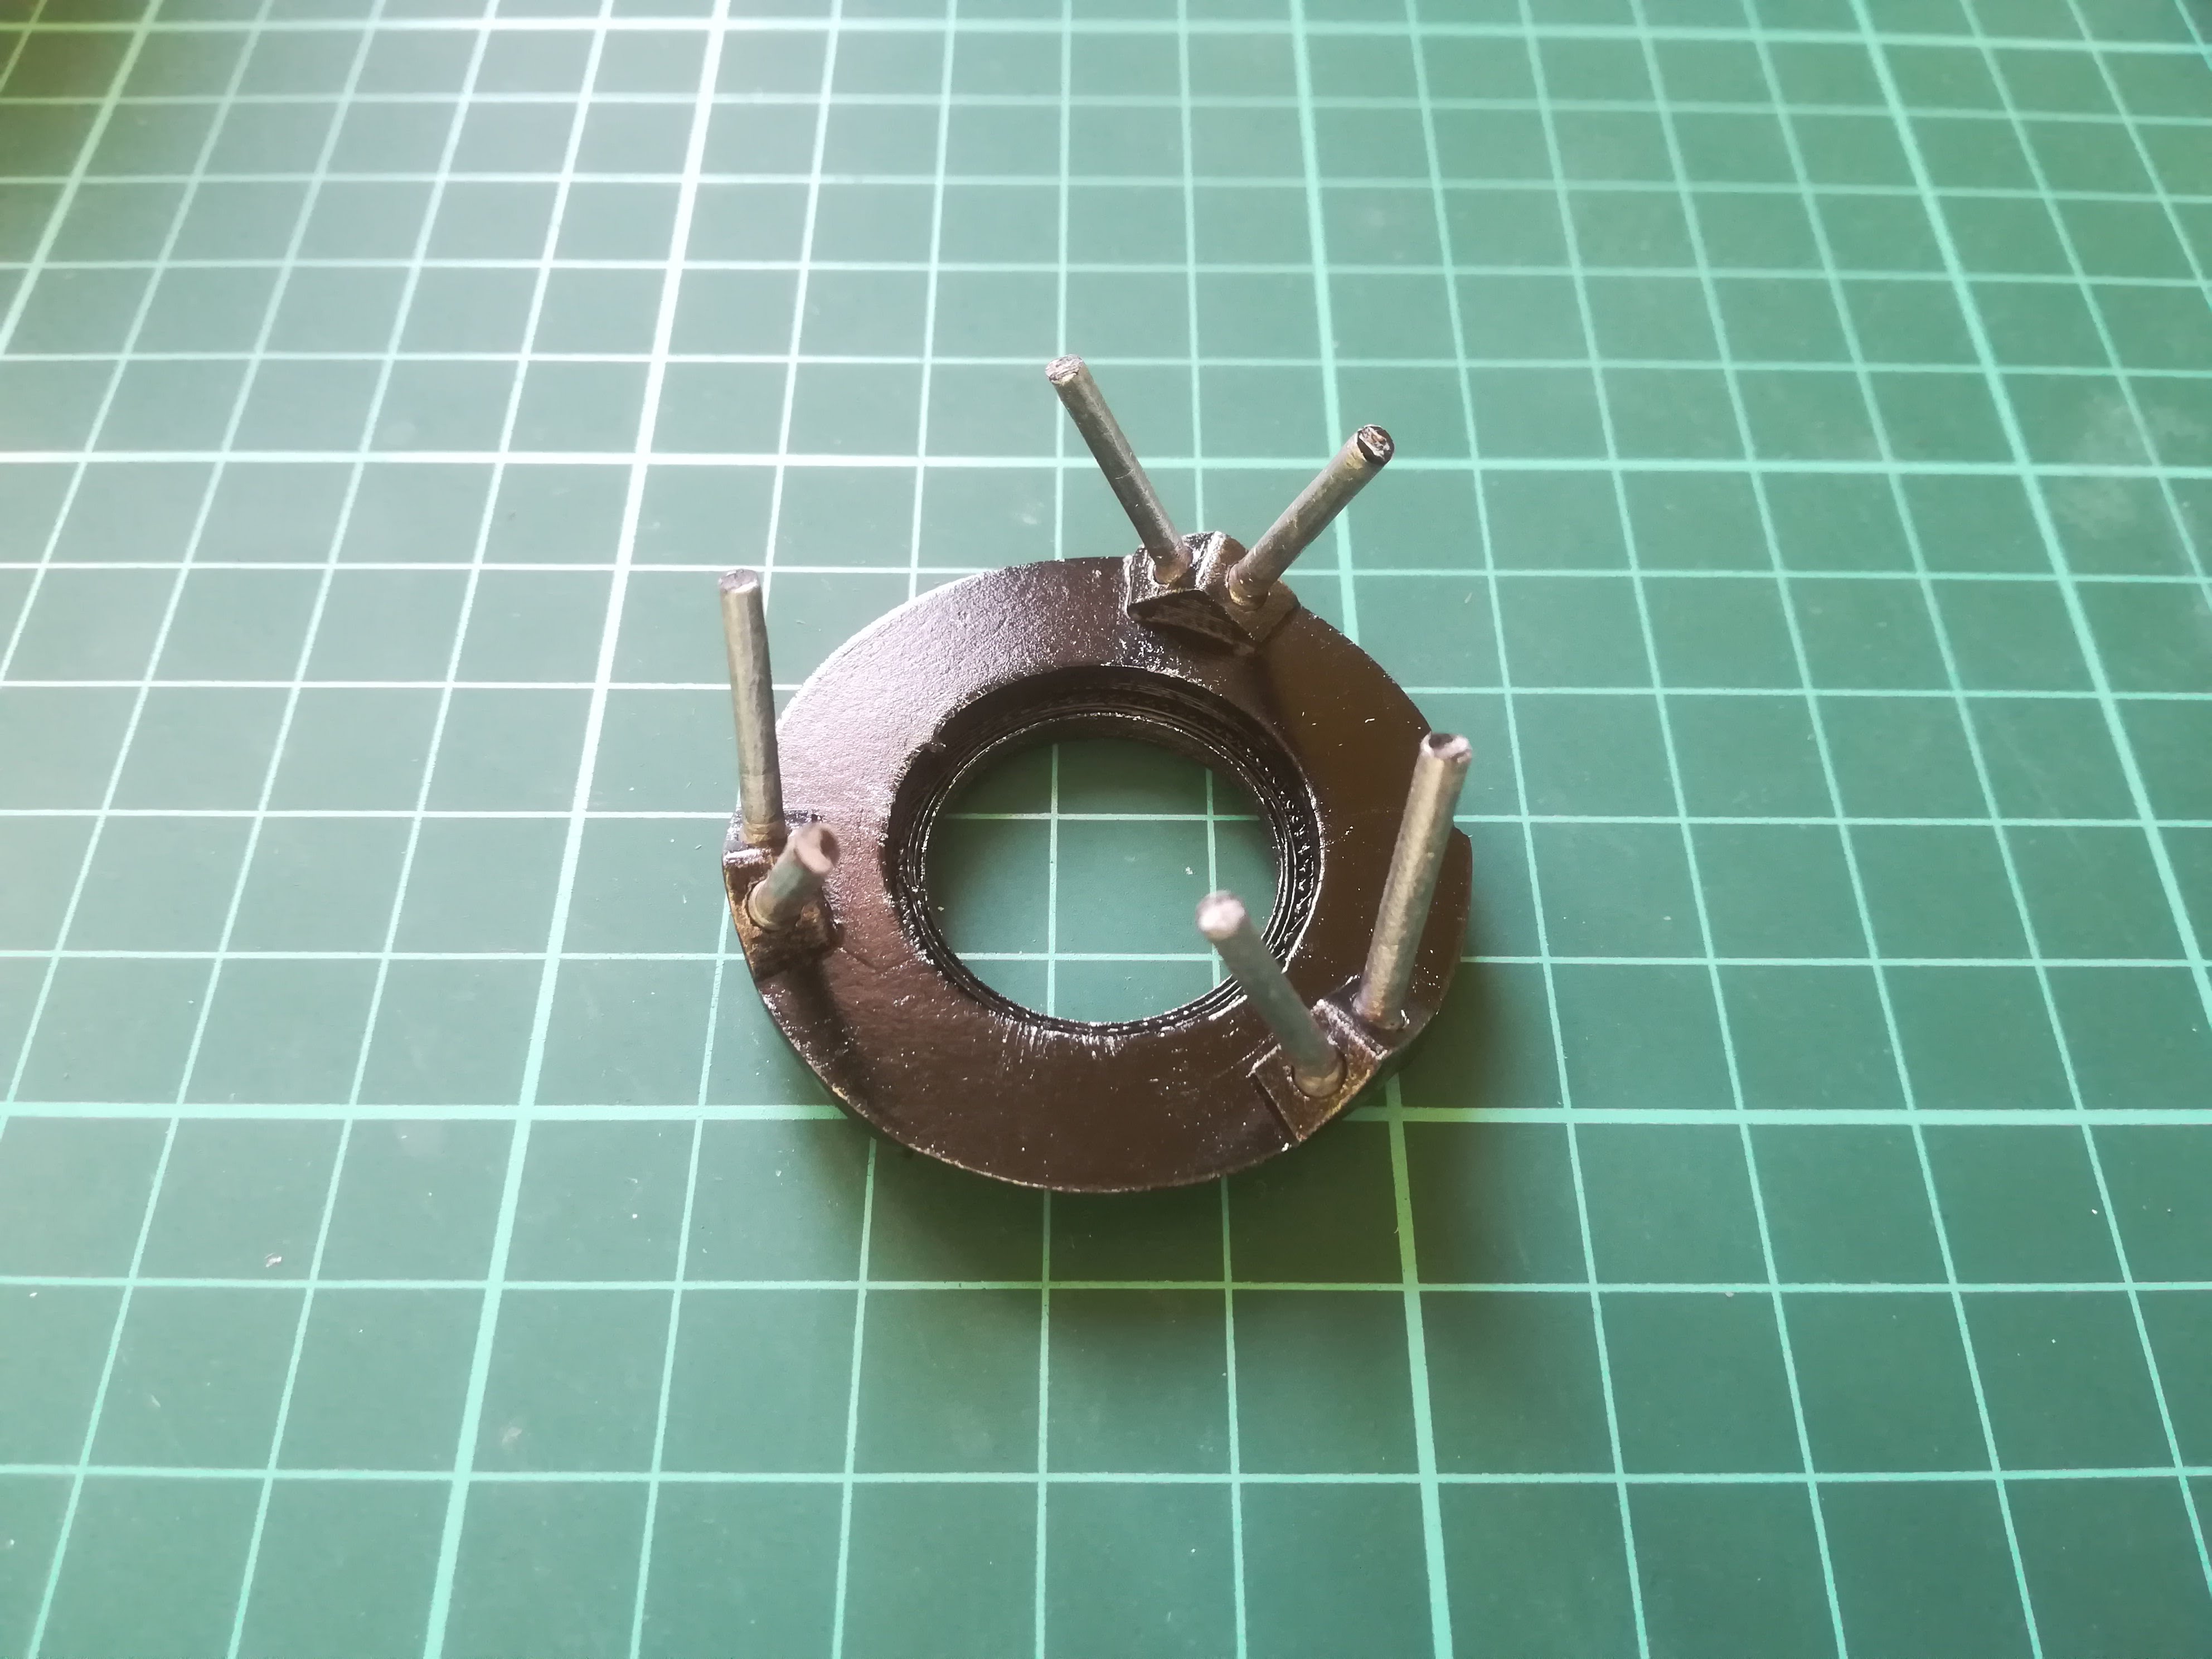
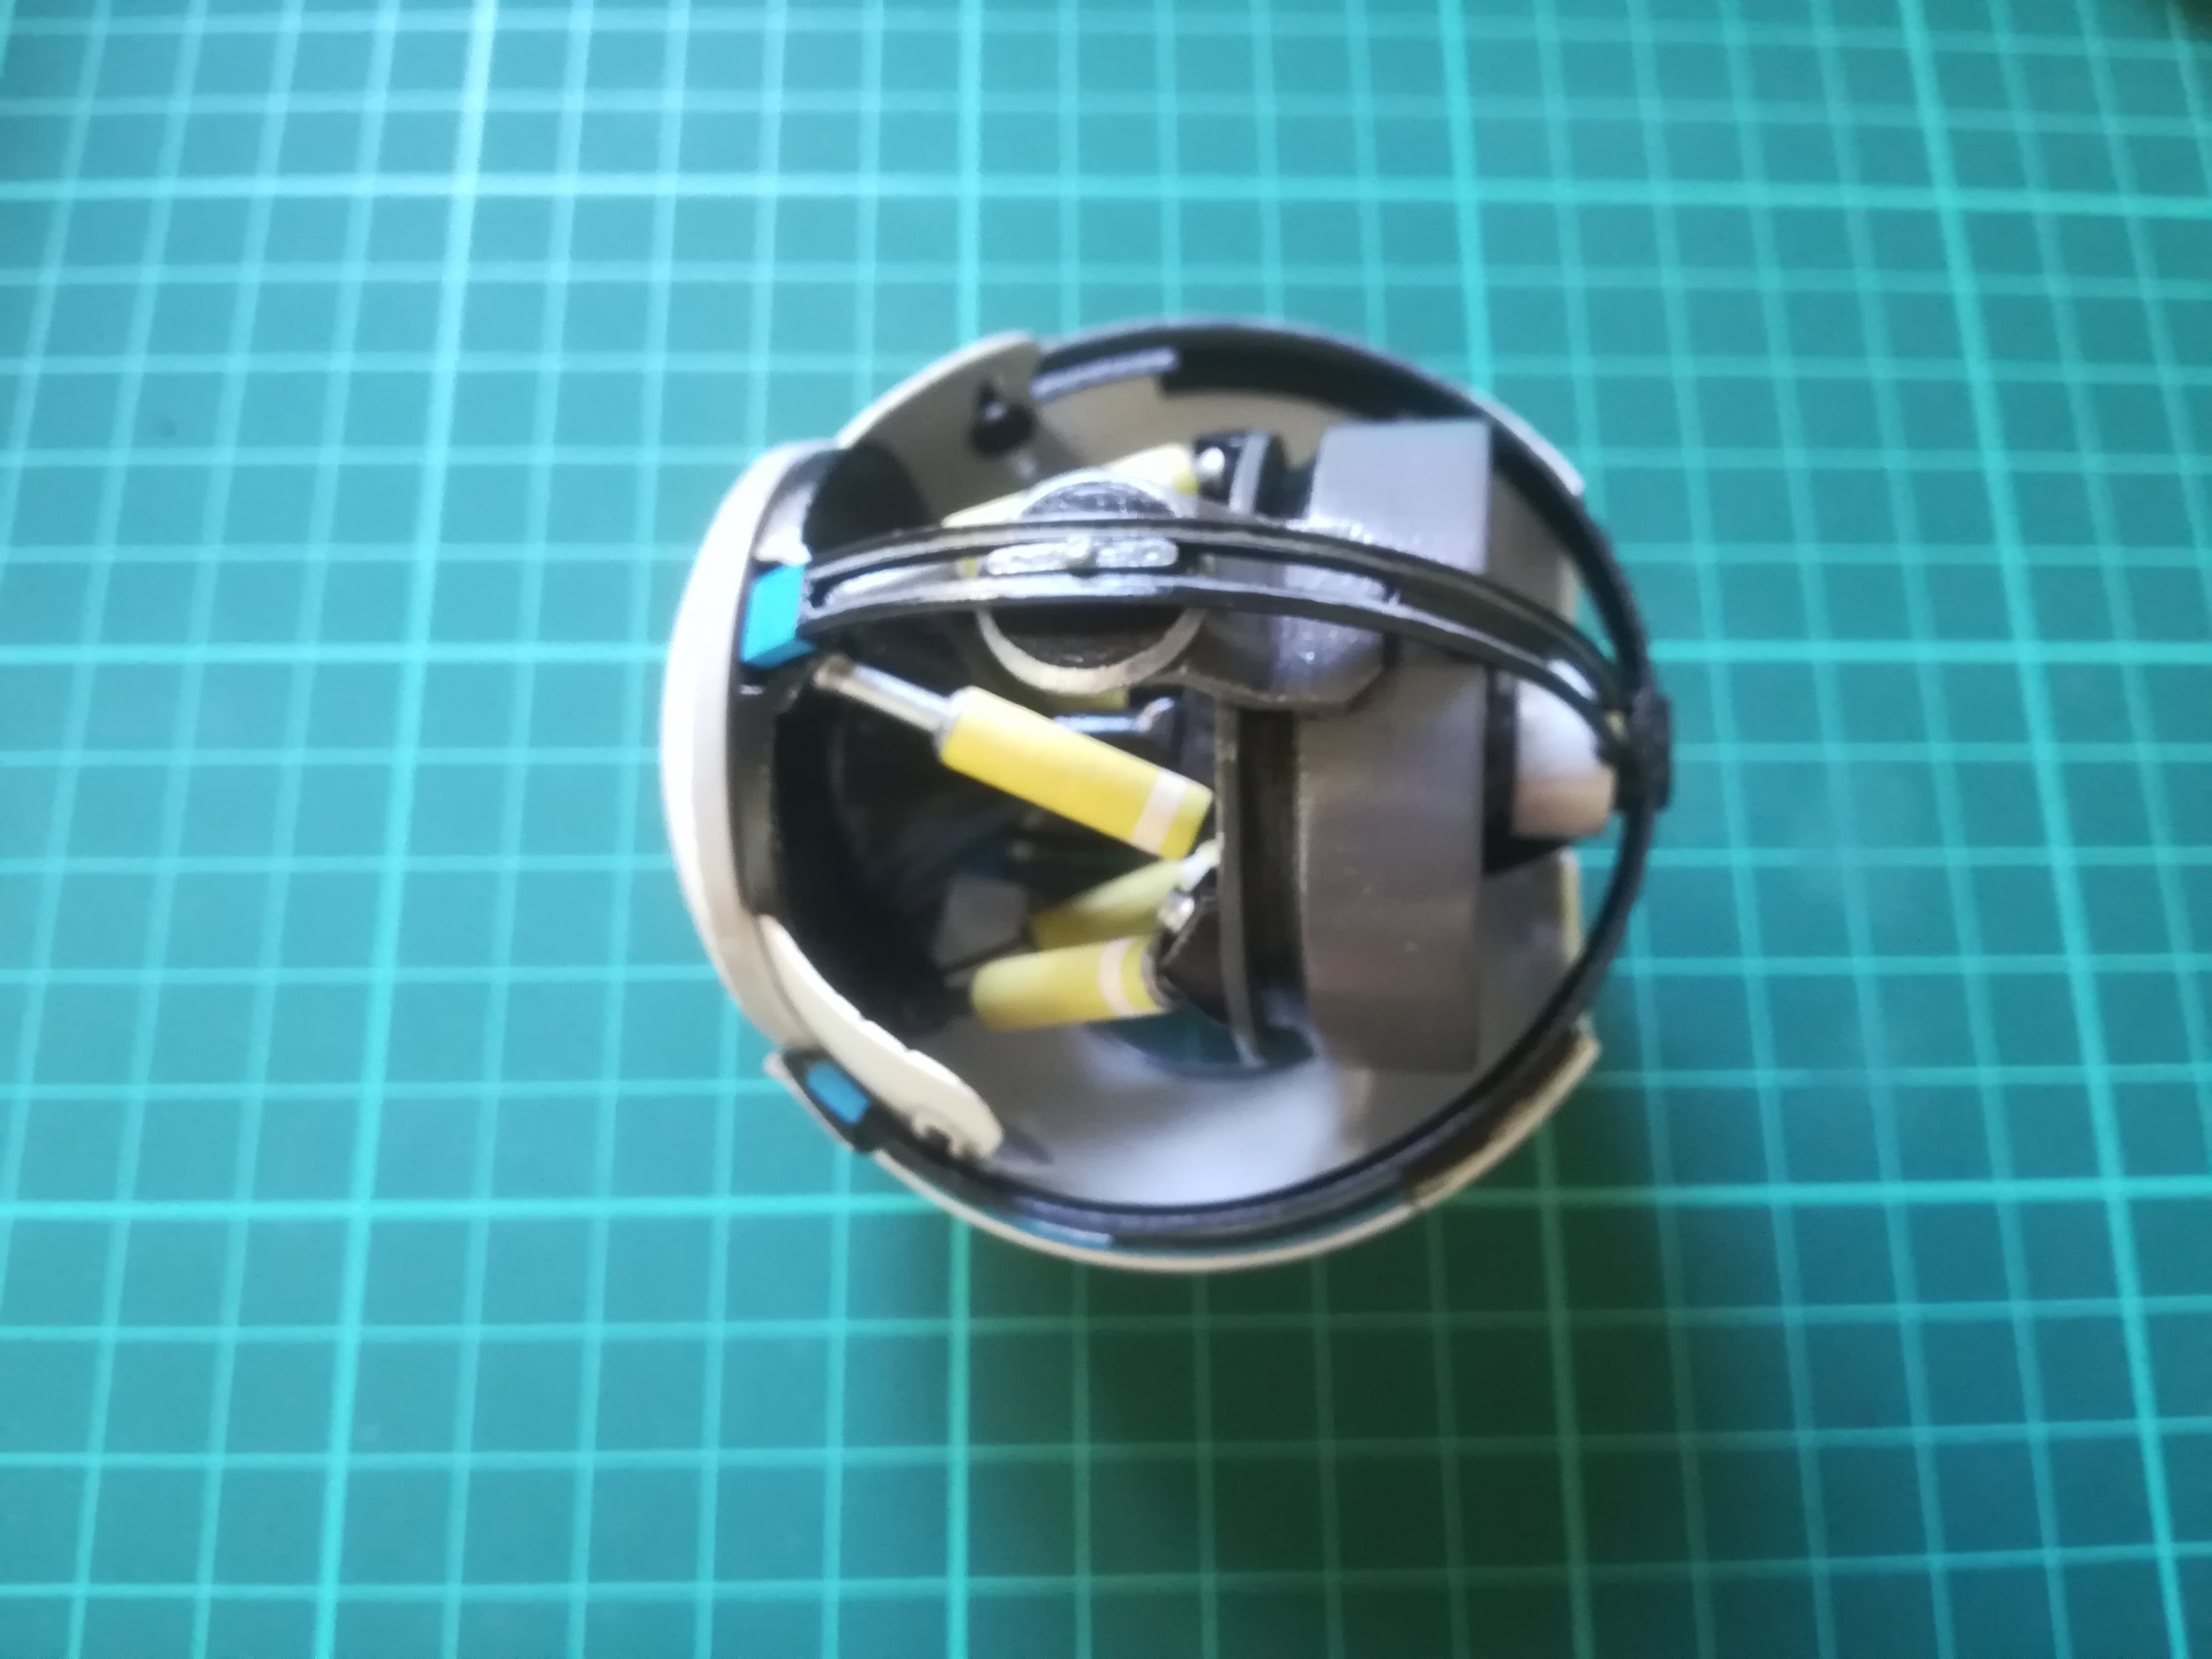
Attach the 6 "axe_verin" in the "support_verins_oeil" holes / Clipser les 6 "axe_verin" dans les trous du "support_verins_oeil"
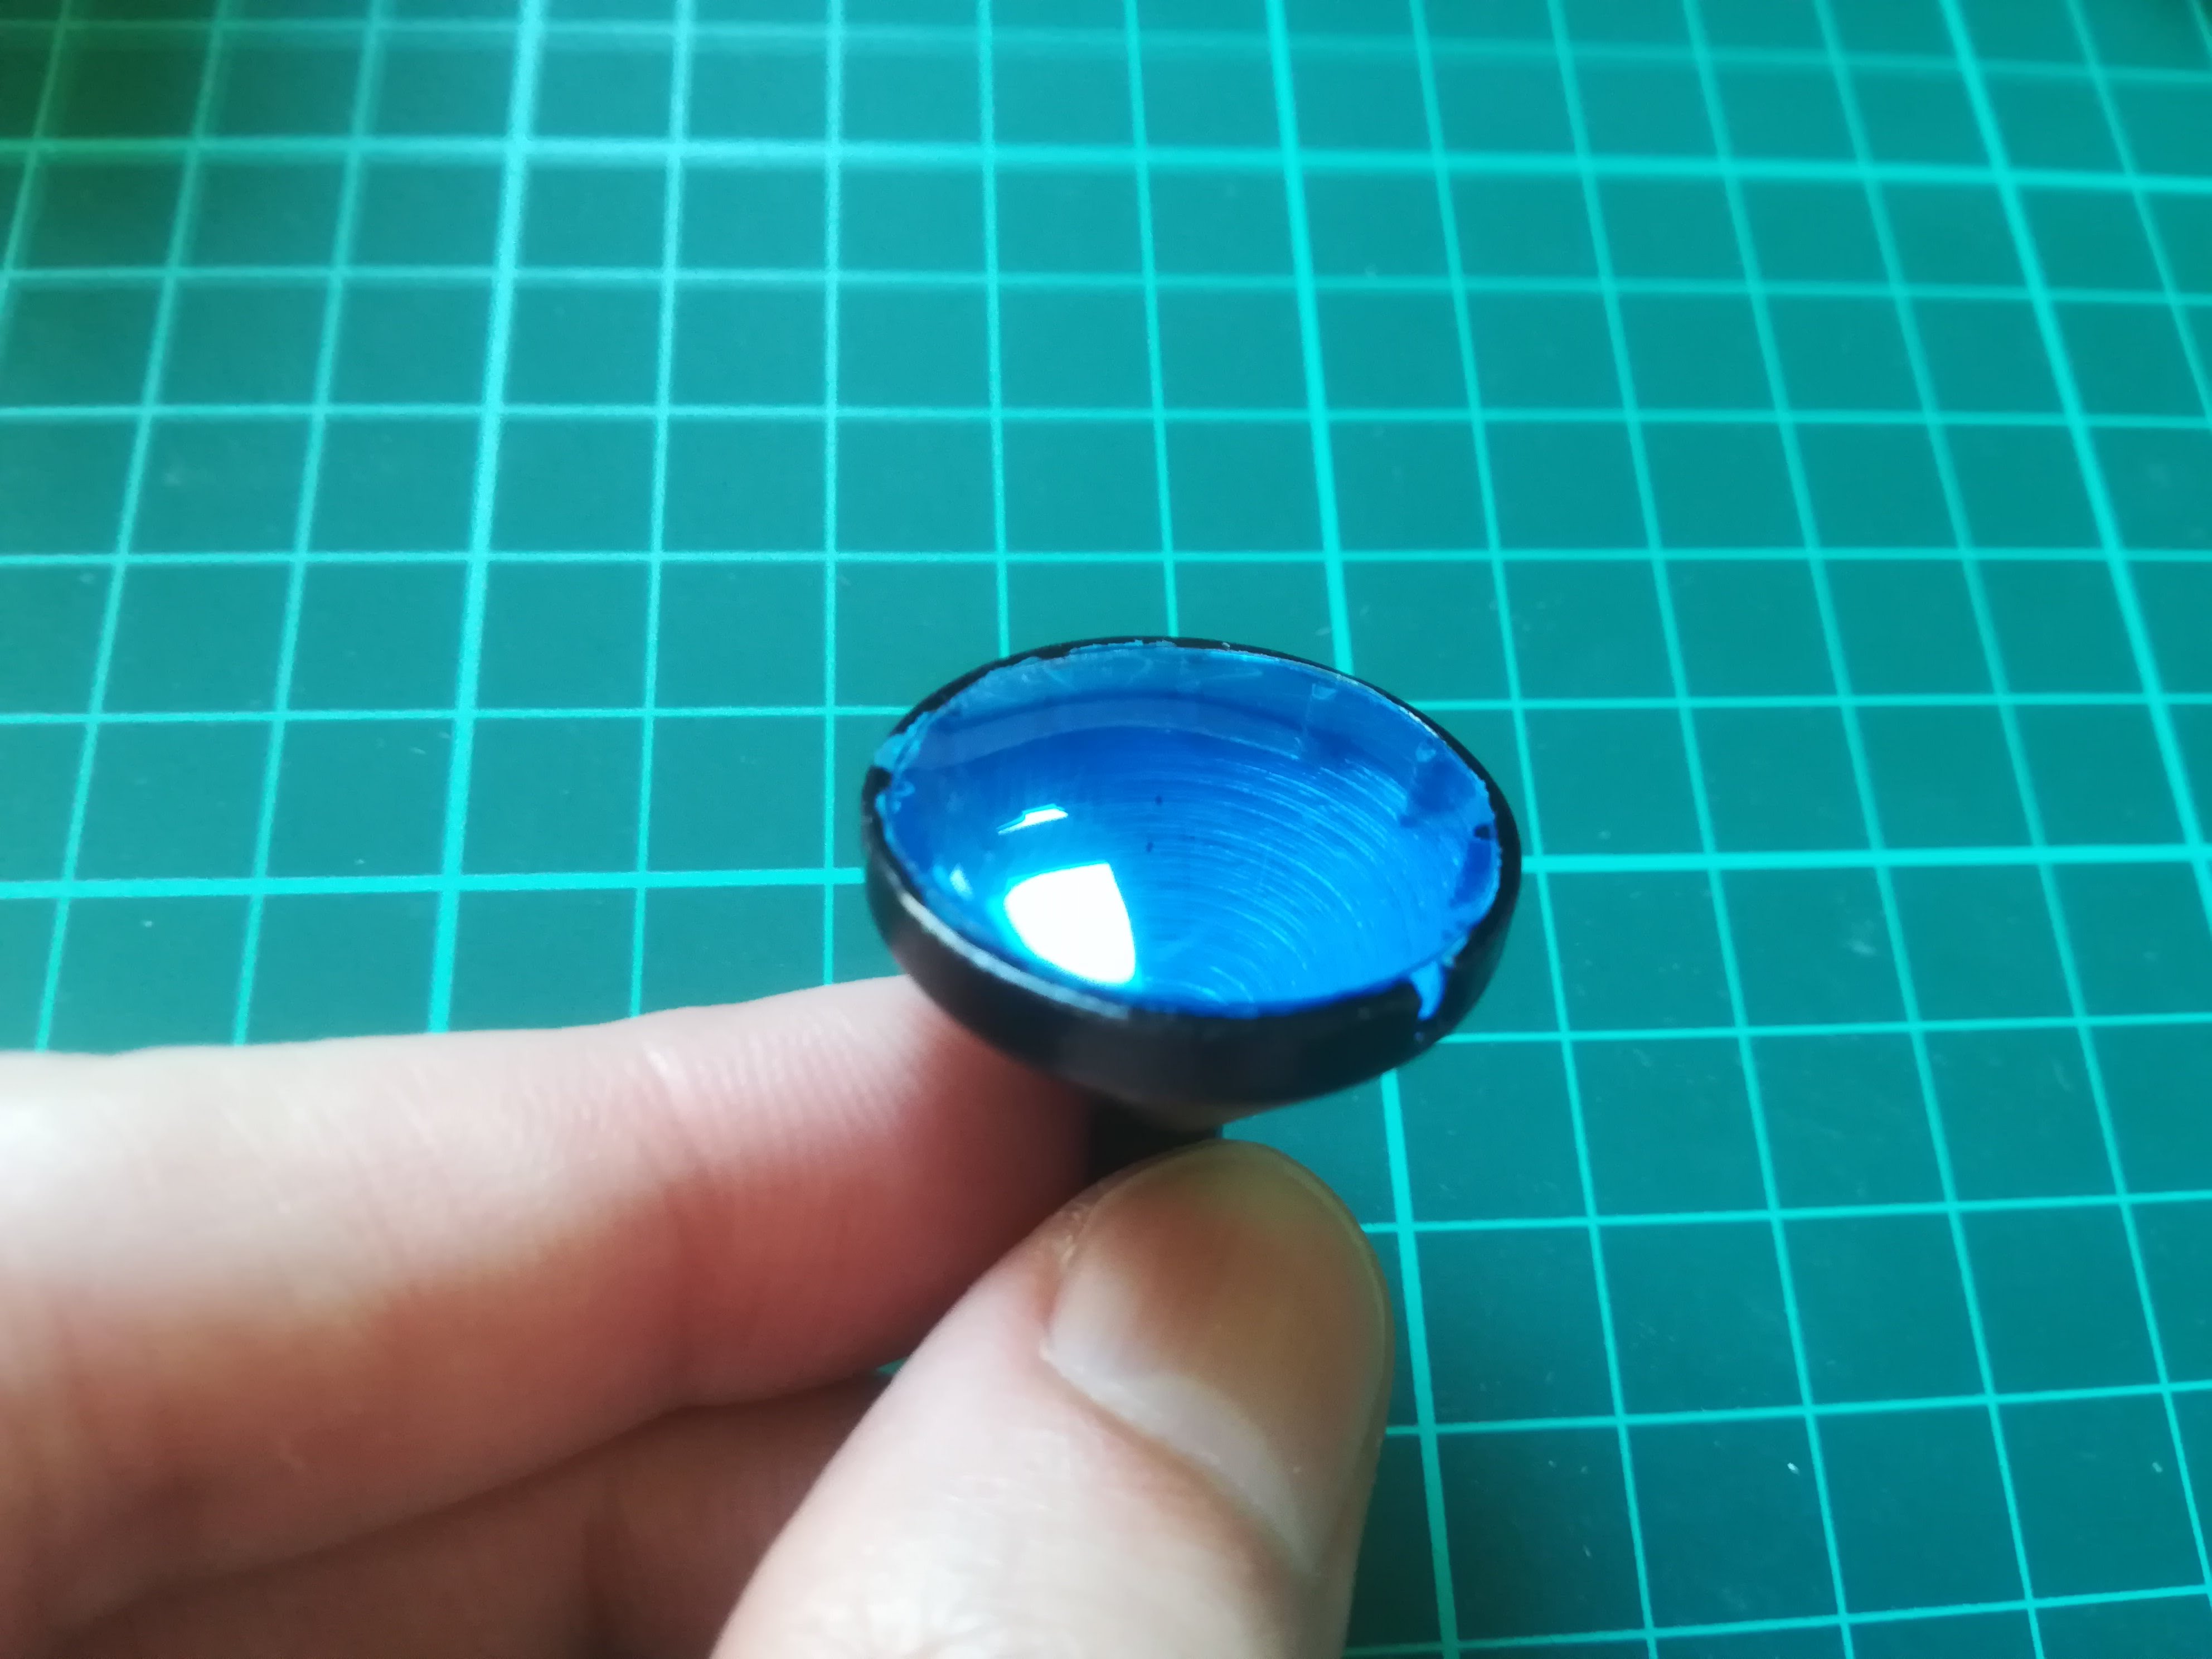
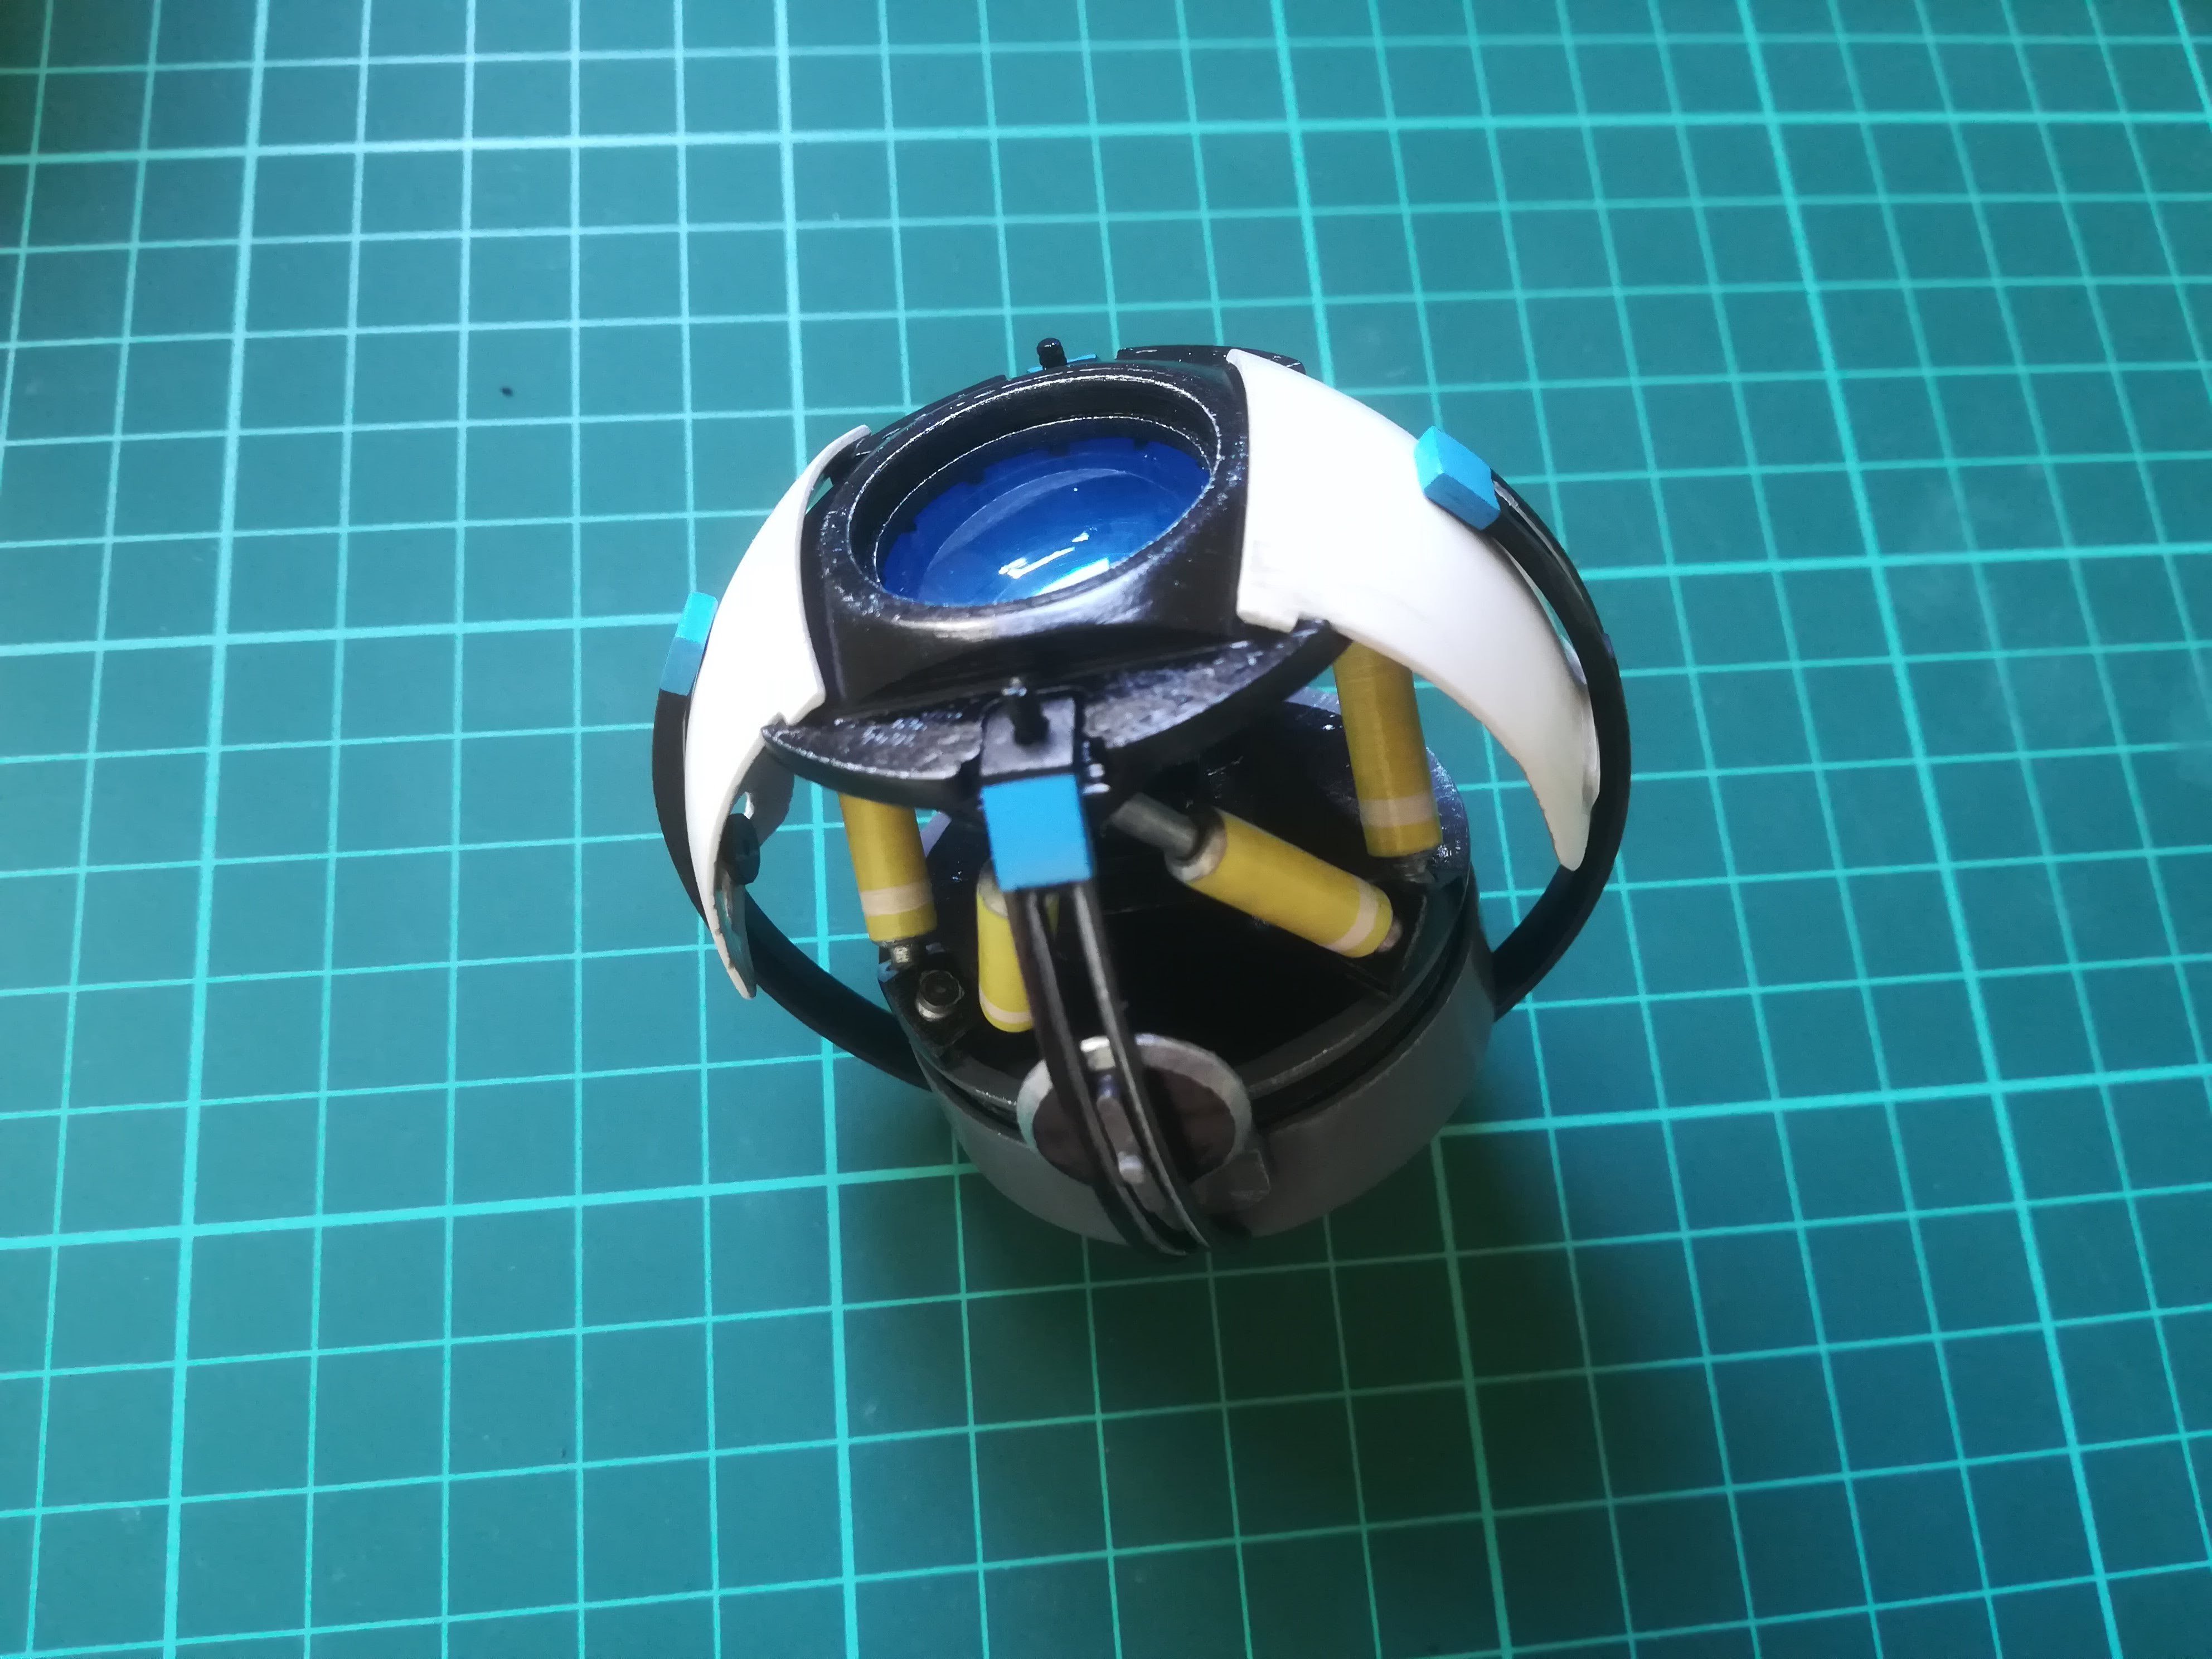
Place the thermoformed lense in the "carter_oeil" / Placer la lentille thermoformée dans le "carter_oeil
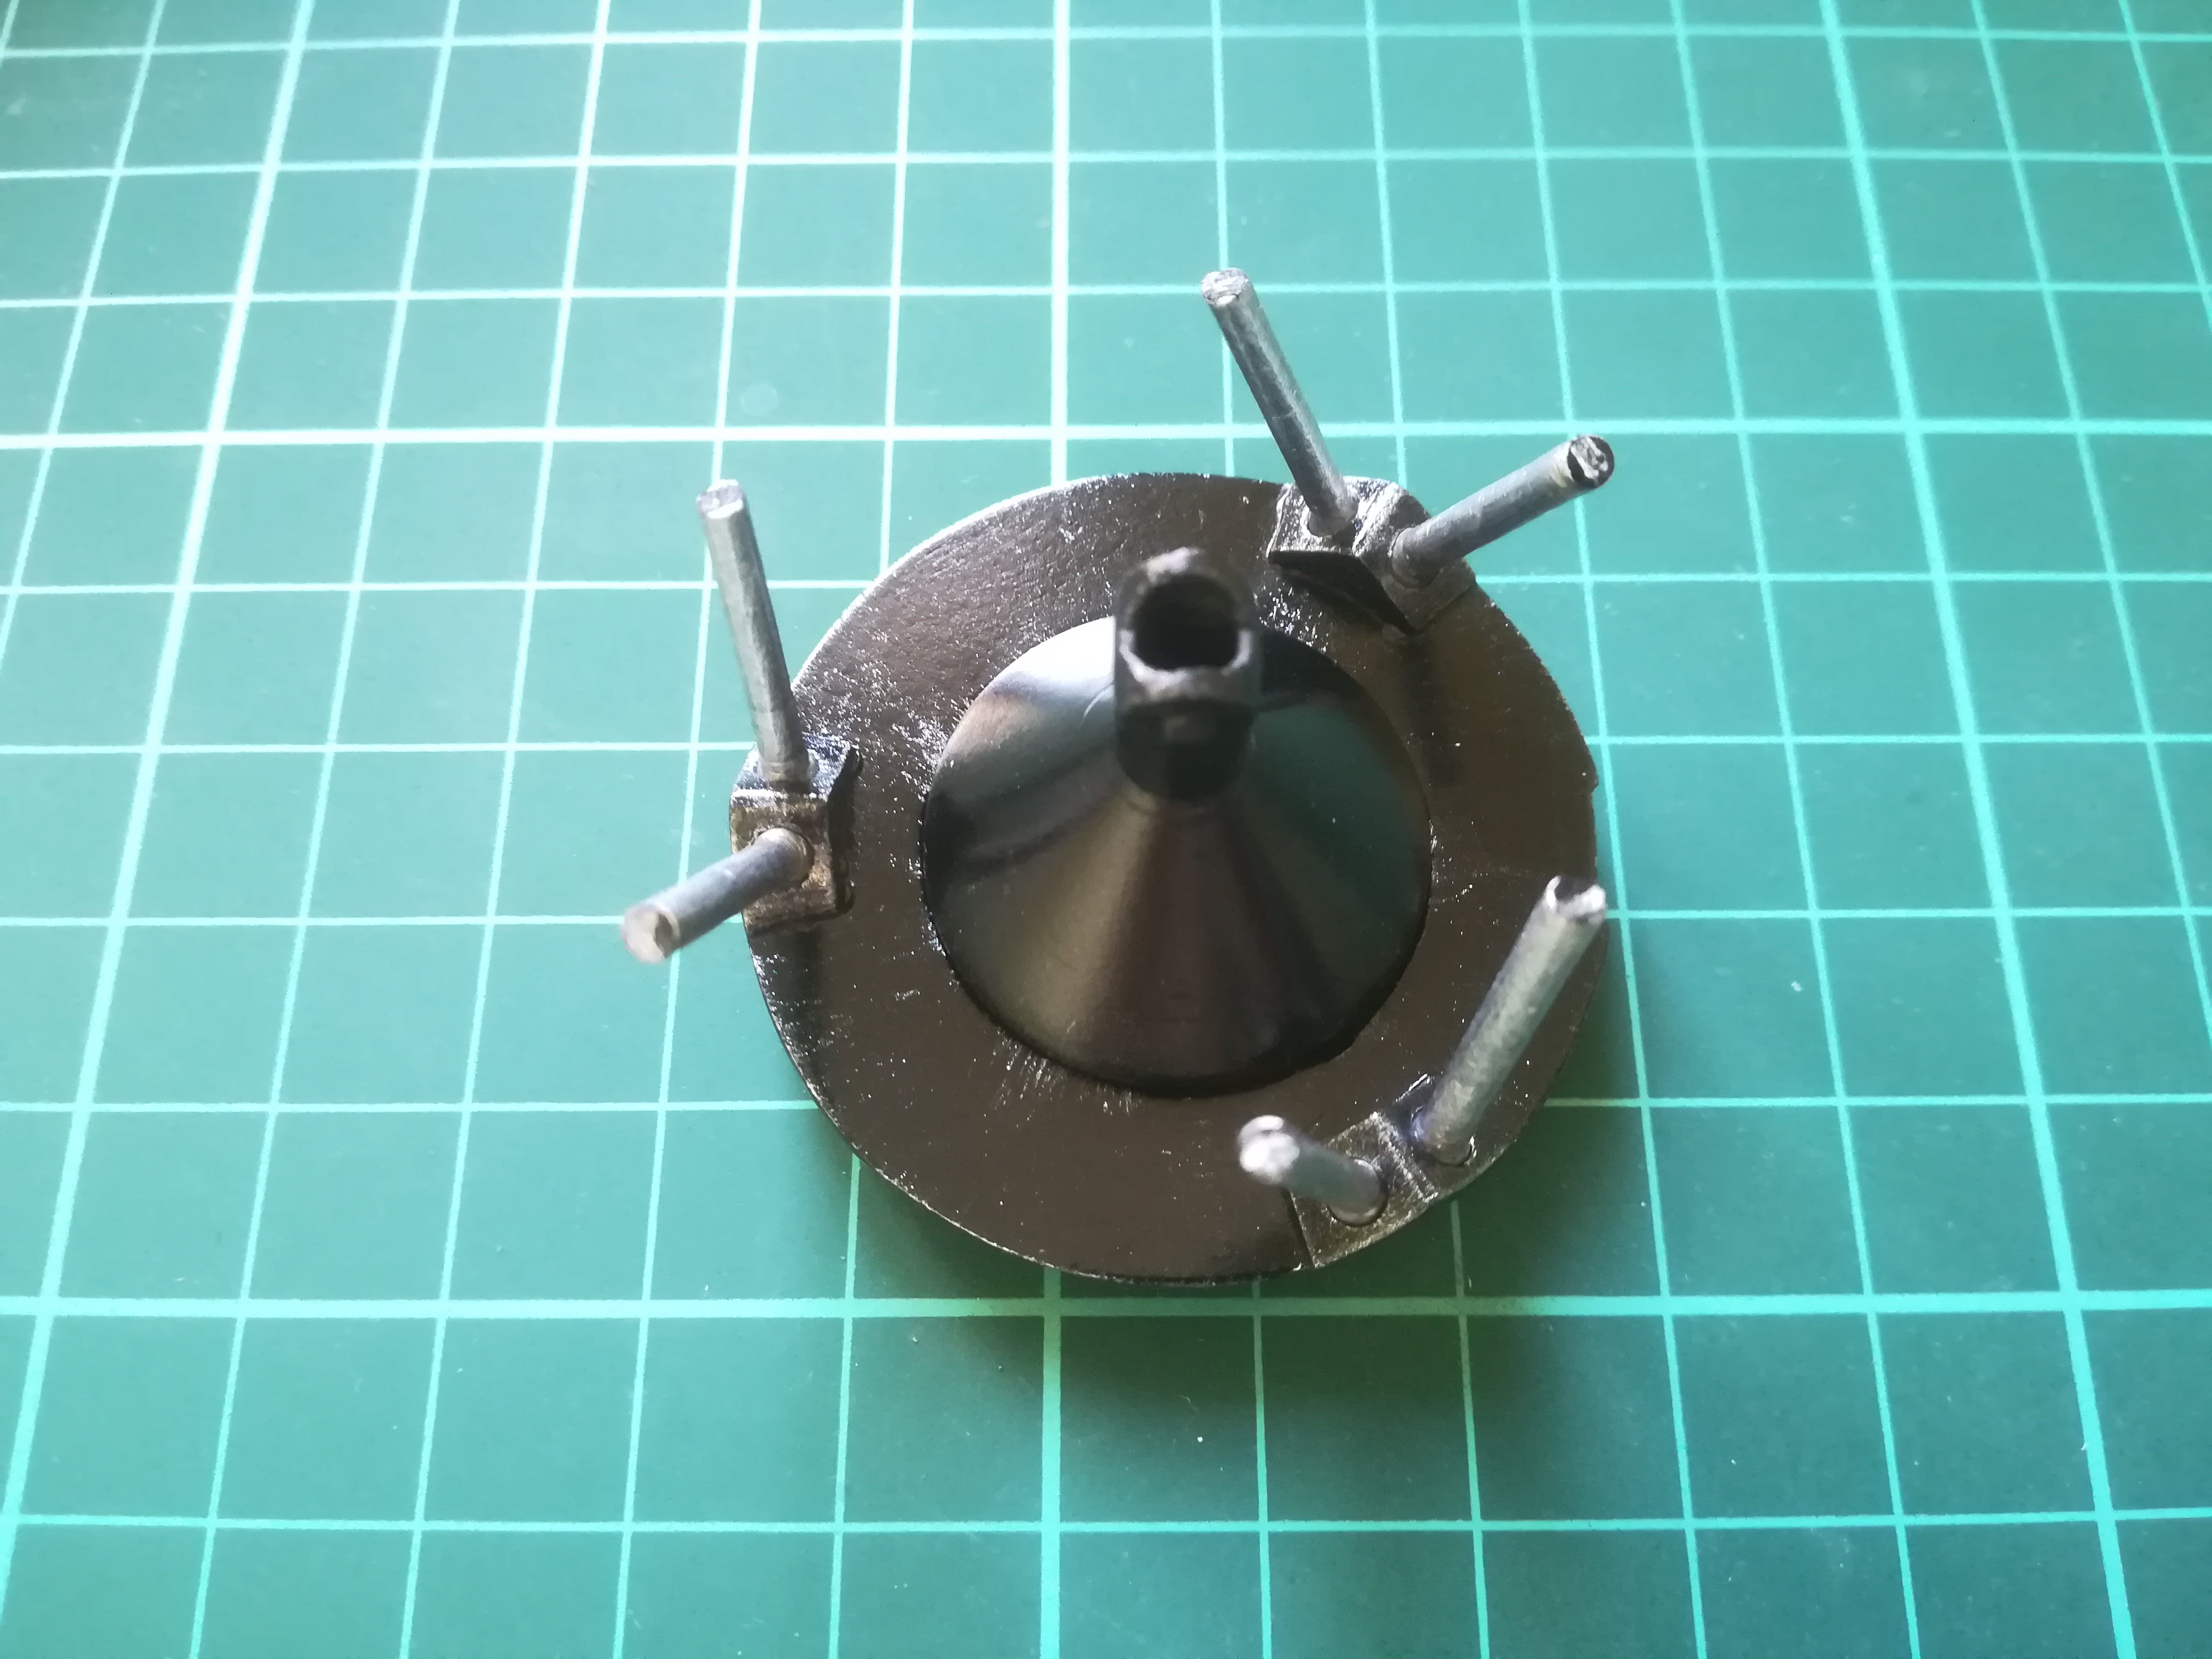
Insert the "carter_oeil" in the "support_verins_oeil" / Insérer le "carter_oeil" dans le "support_verins_oeil"
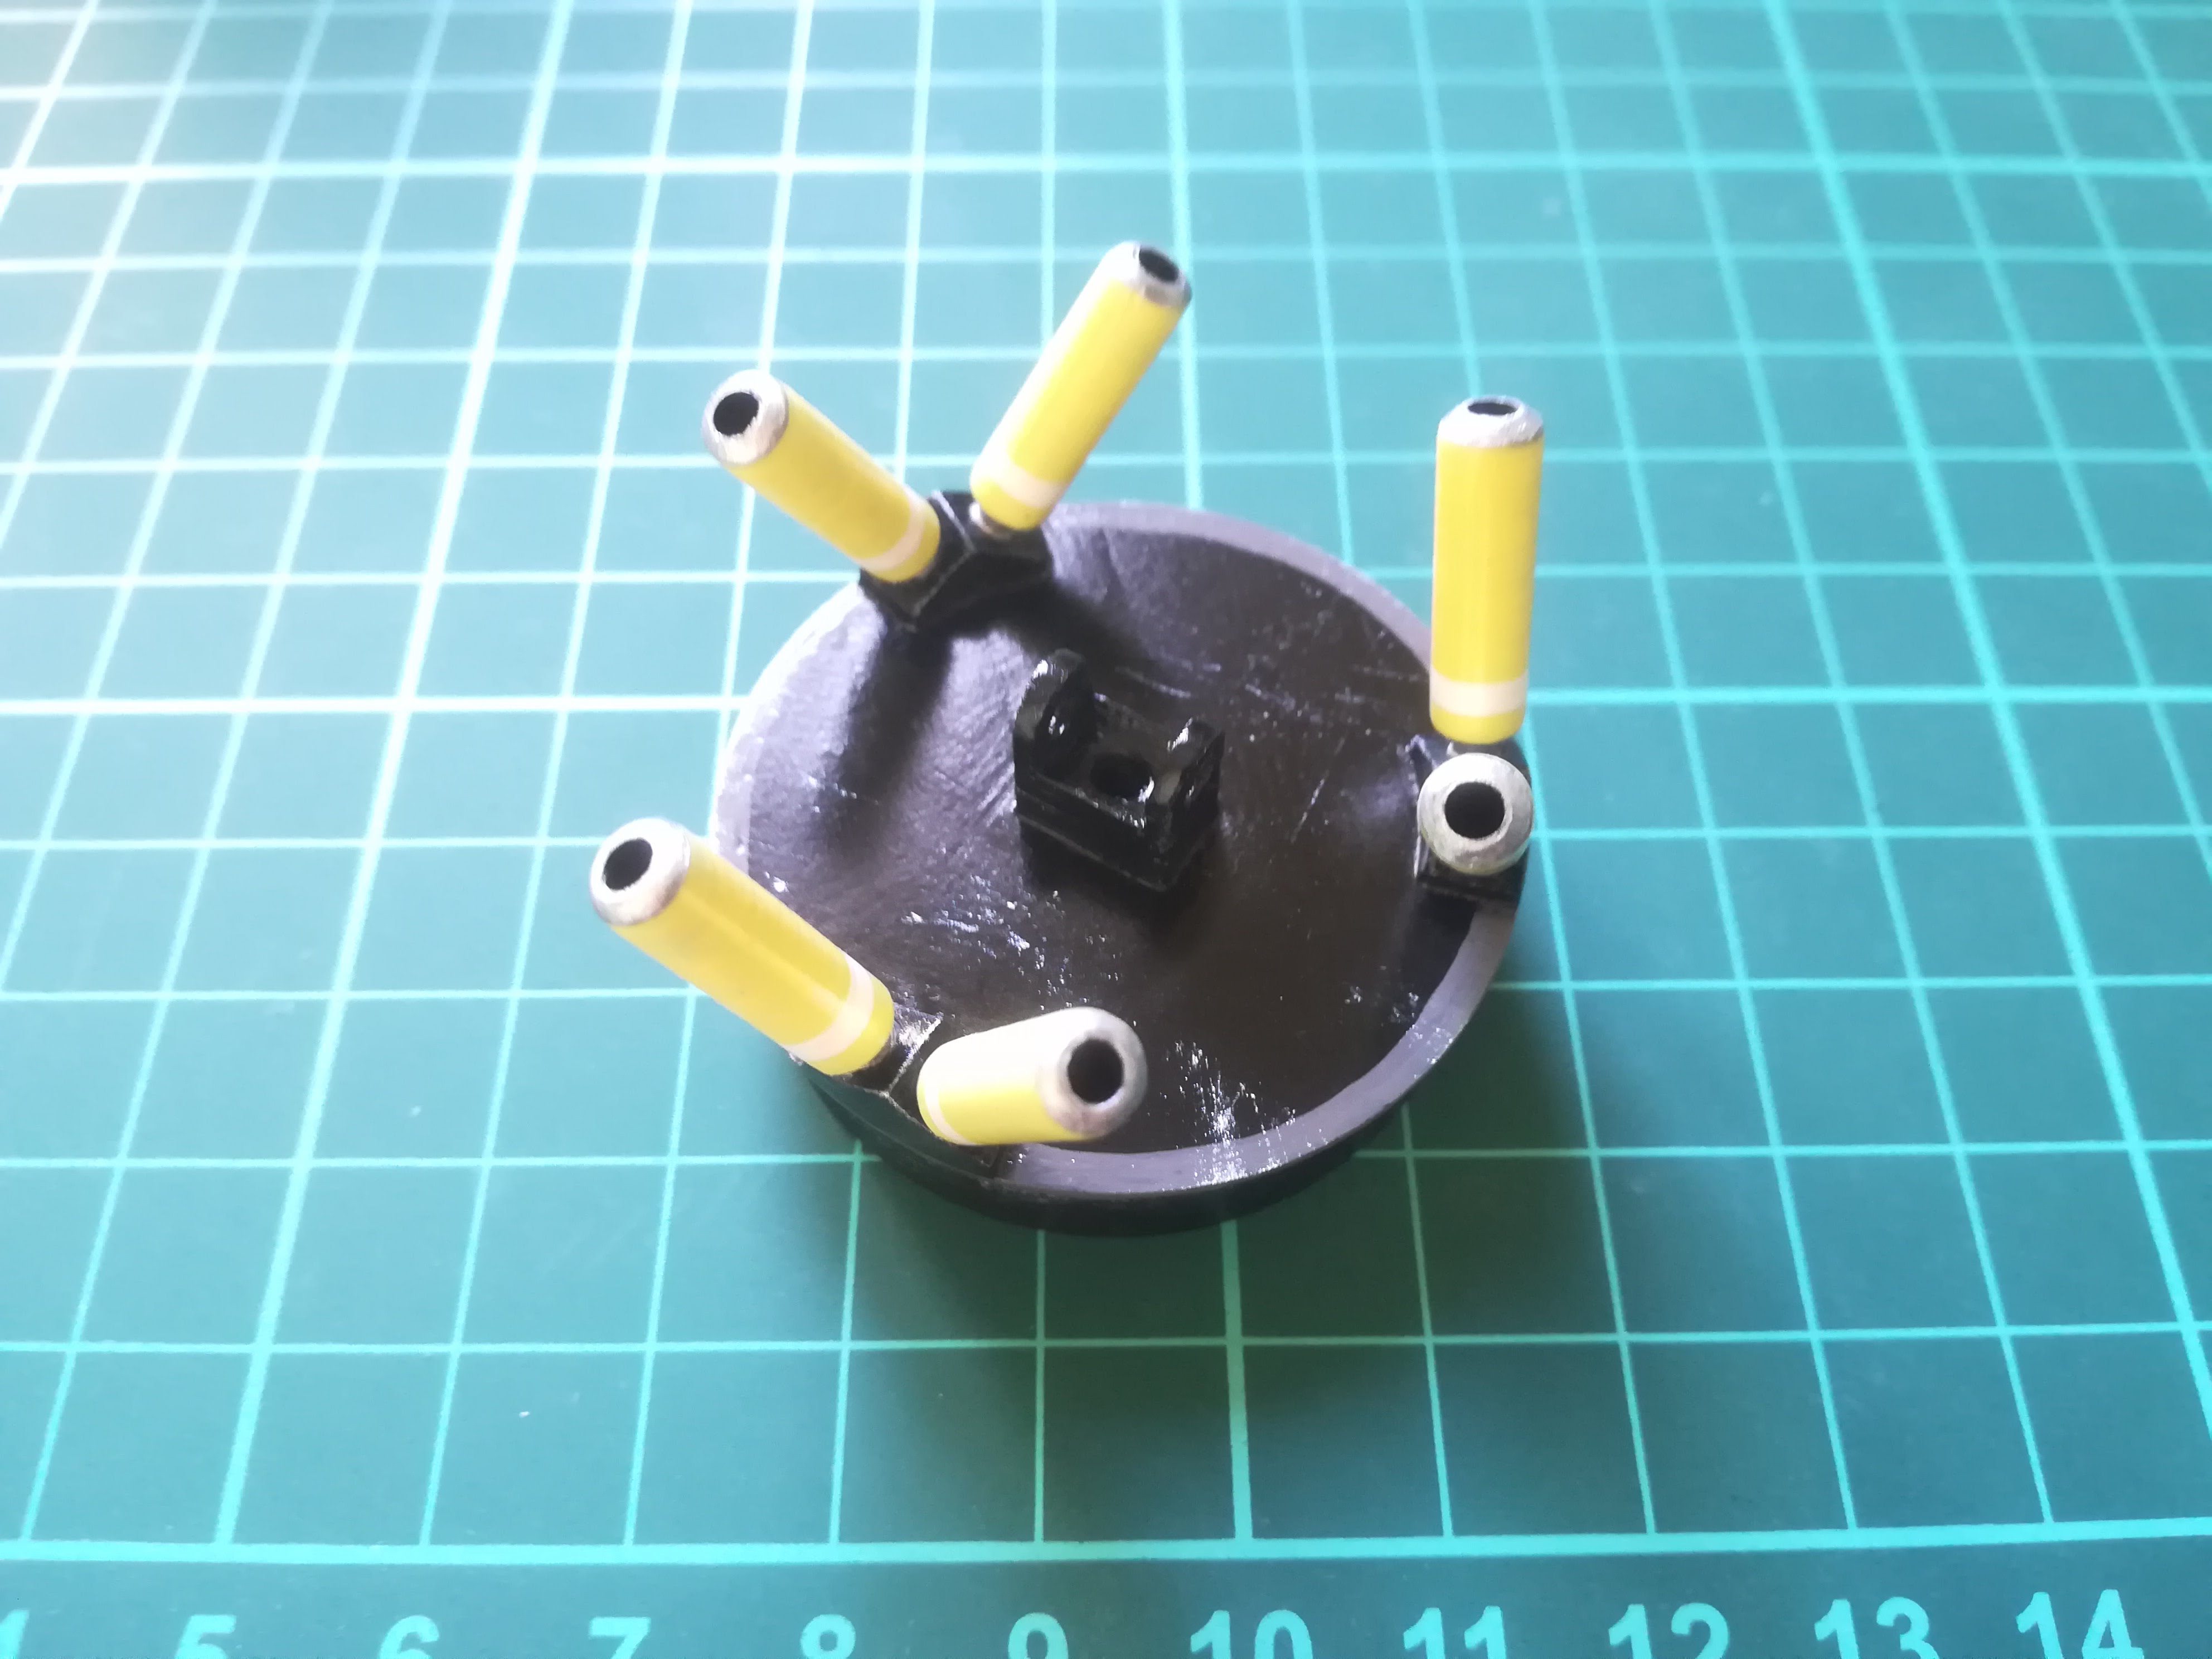
Attach the 6 "corps_verin" in the "support_verins_coeur" holes / Clipser les 6 "corps_verin" dans les trous du "support_verins_coeur"
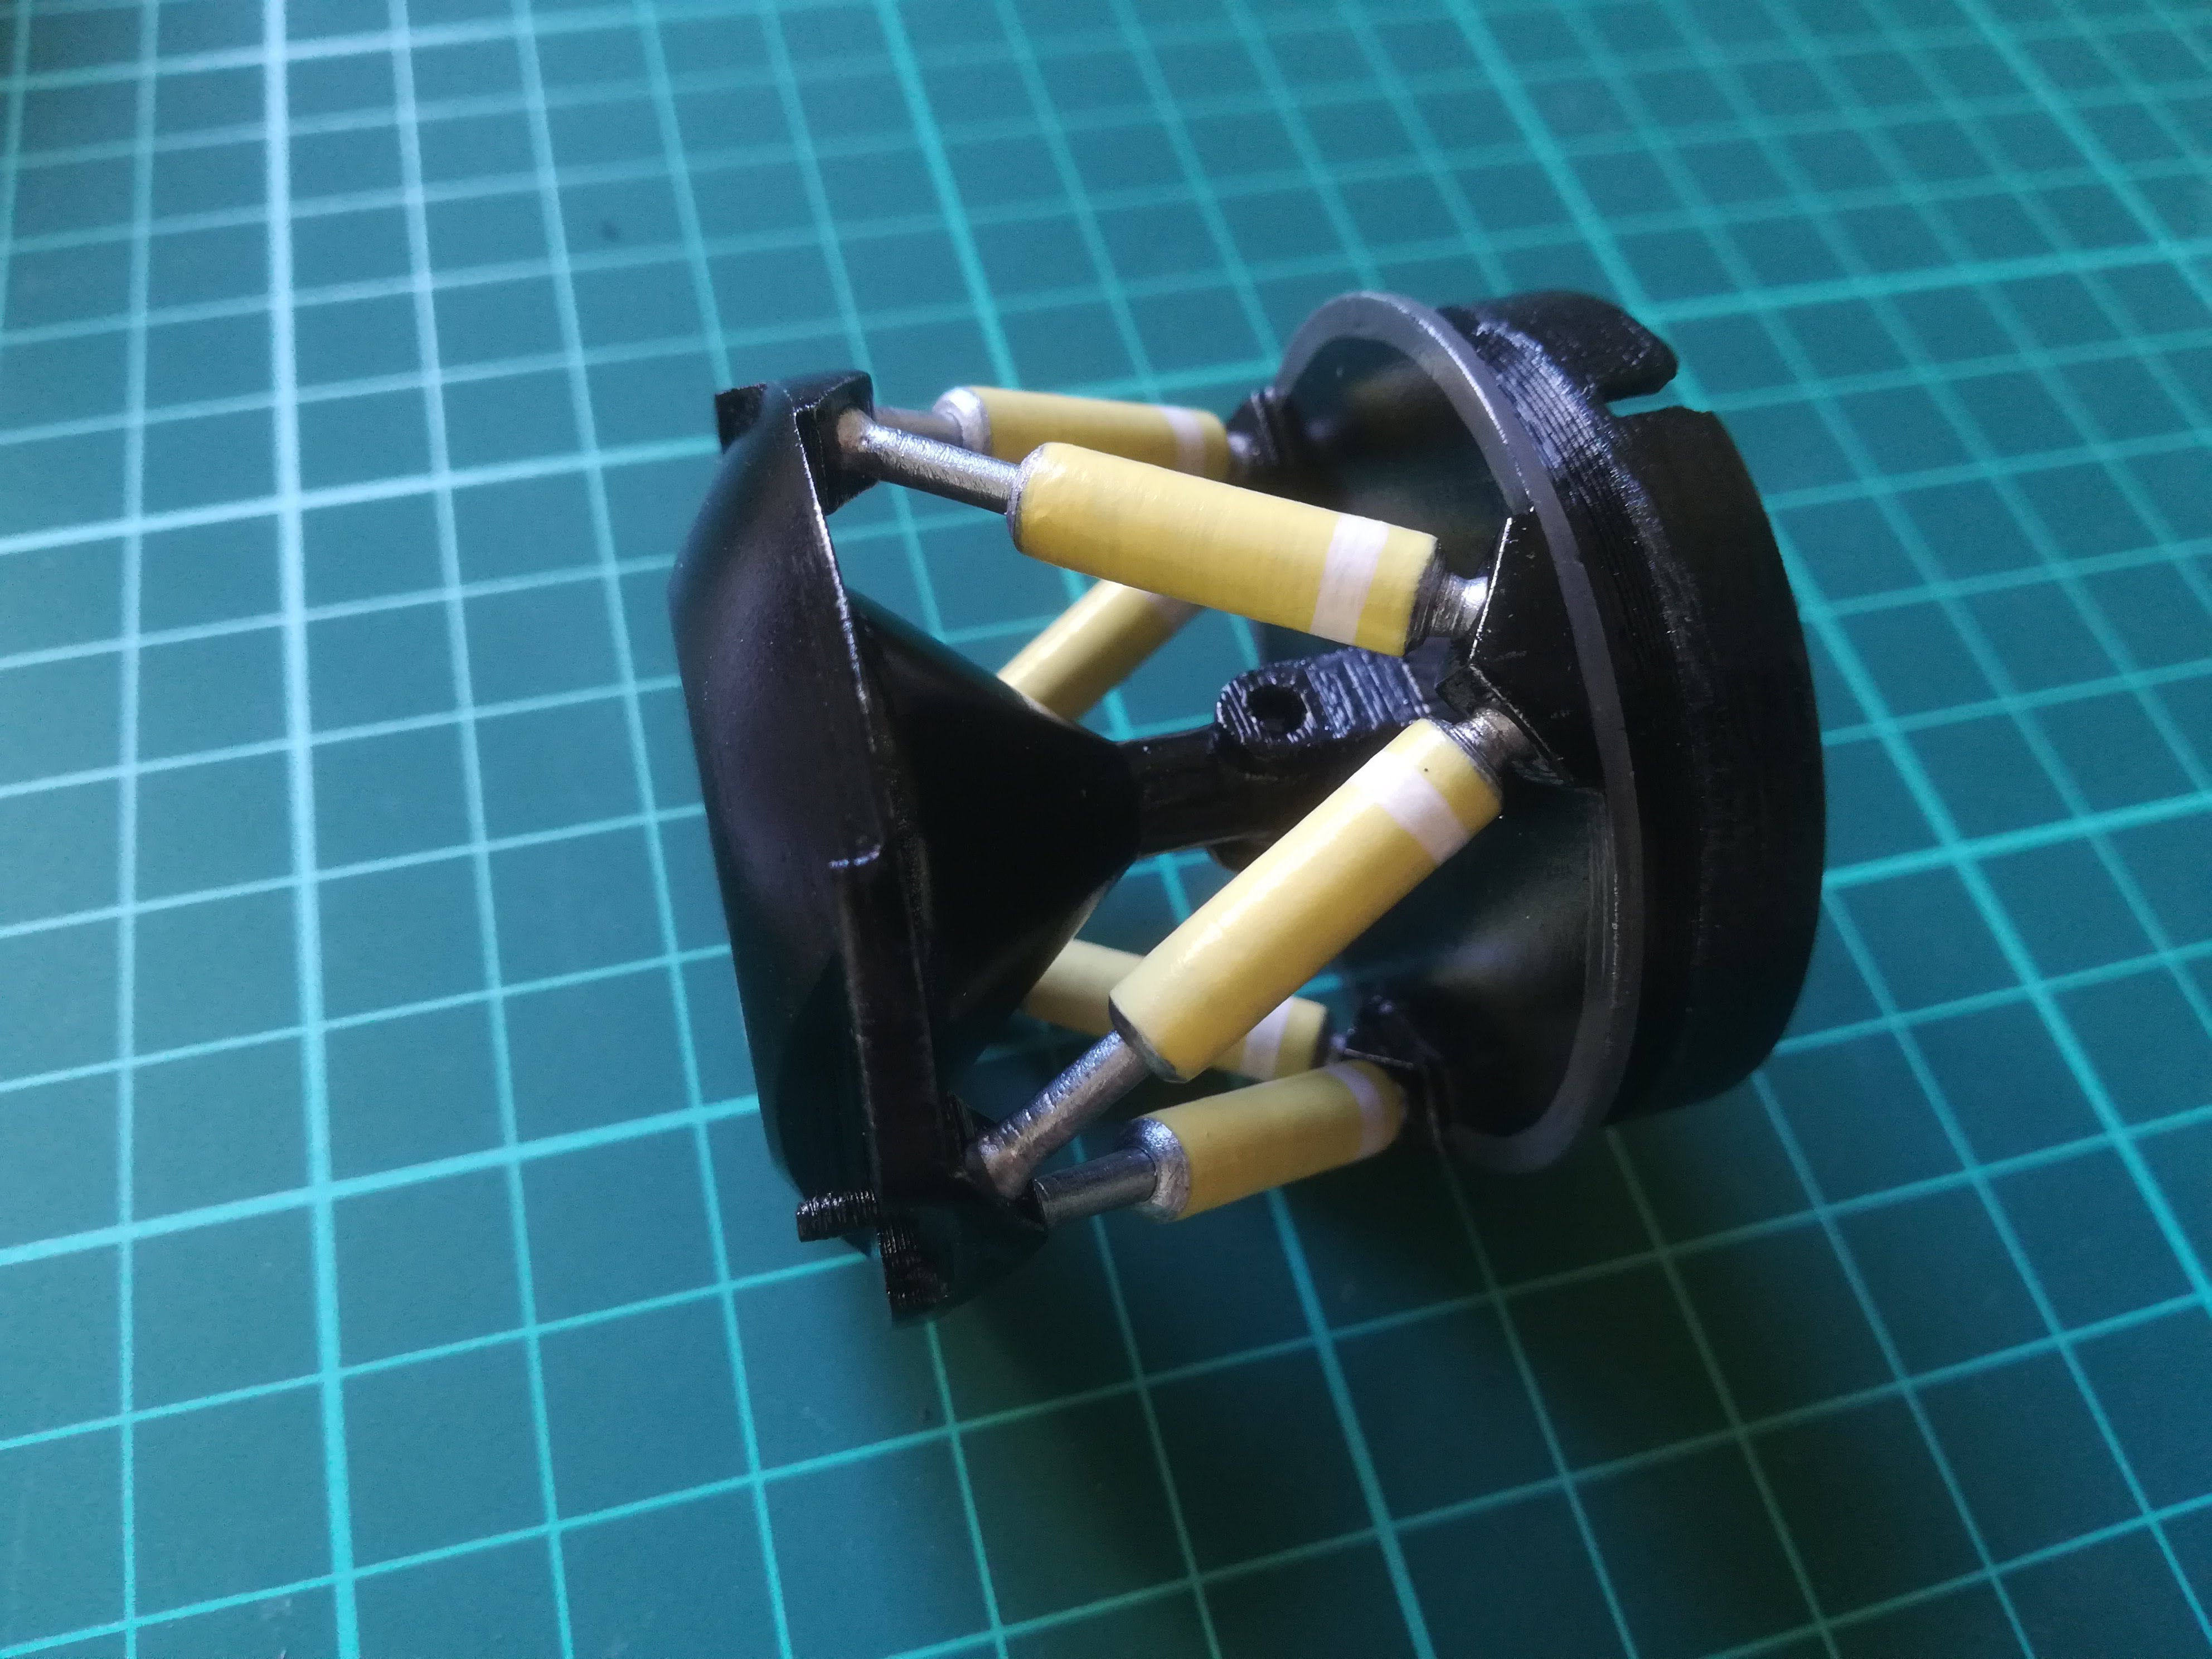
Clip the "carter_oeil" in the "support_verins_coeur" and insert aswell each "axe_verin" in each "corps_verin" / Clipser le "carter_oeil" dans le "support_verins_coeur" tout en insérant chaque "axe_verin" dans chacun des "corps_verin"
Insert the "support_verins_coeur" in the "arriere_coeur" (insert M1.6 nut before) / Insérer le "support_verins_coeur" dans le "arriere_coeur" (insérer l'écrou M1.6 au préalable)
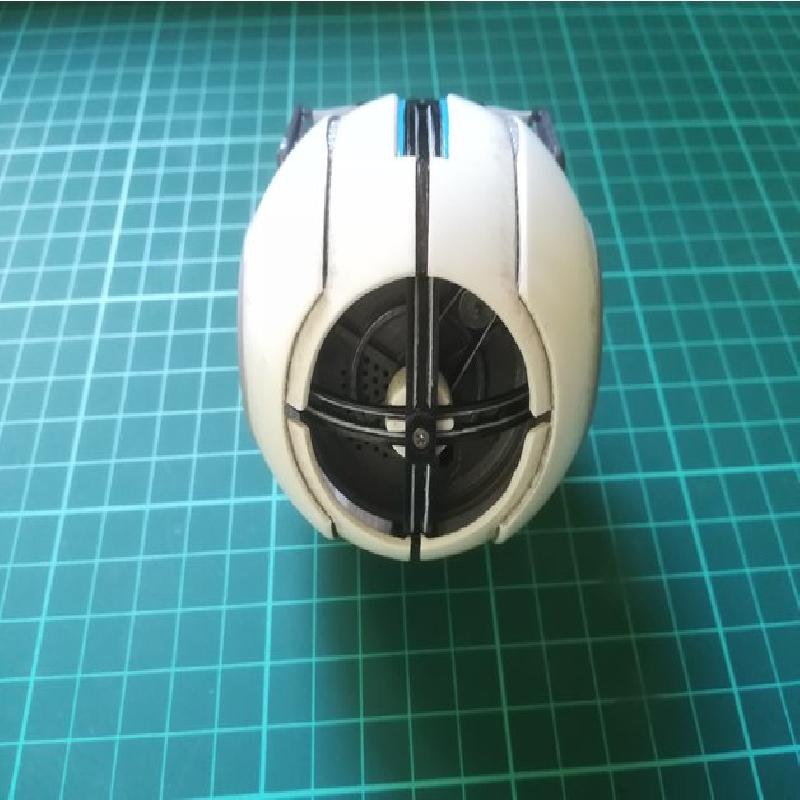
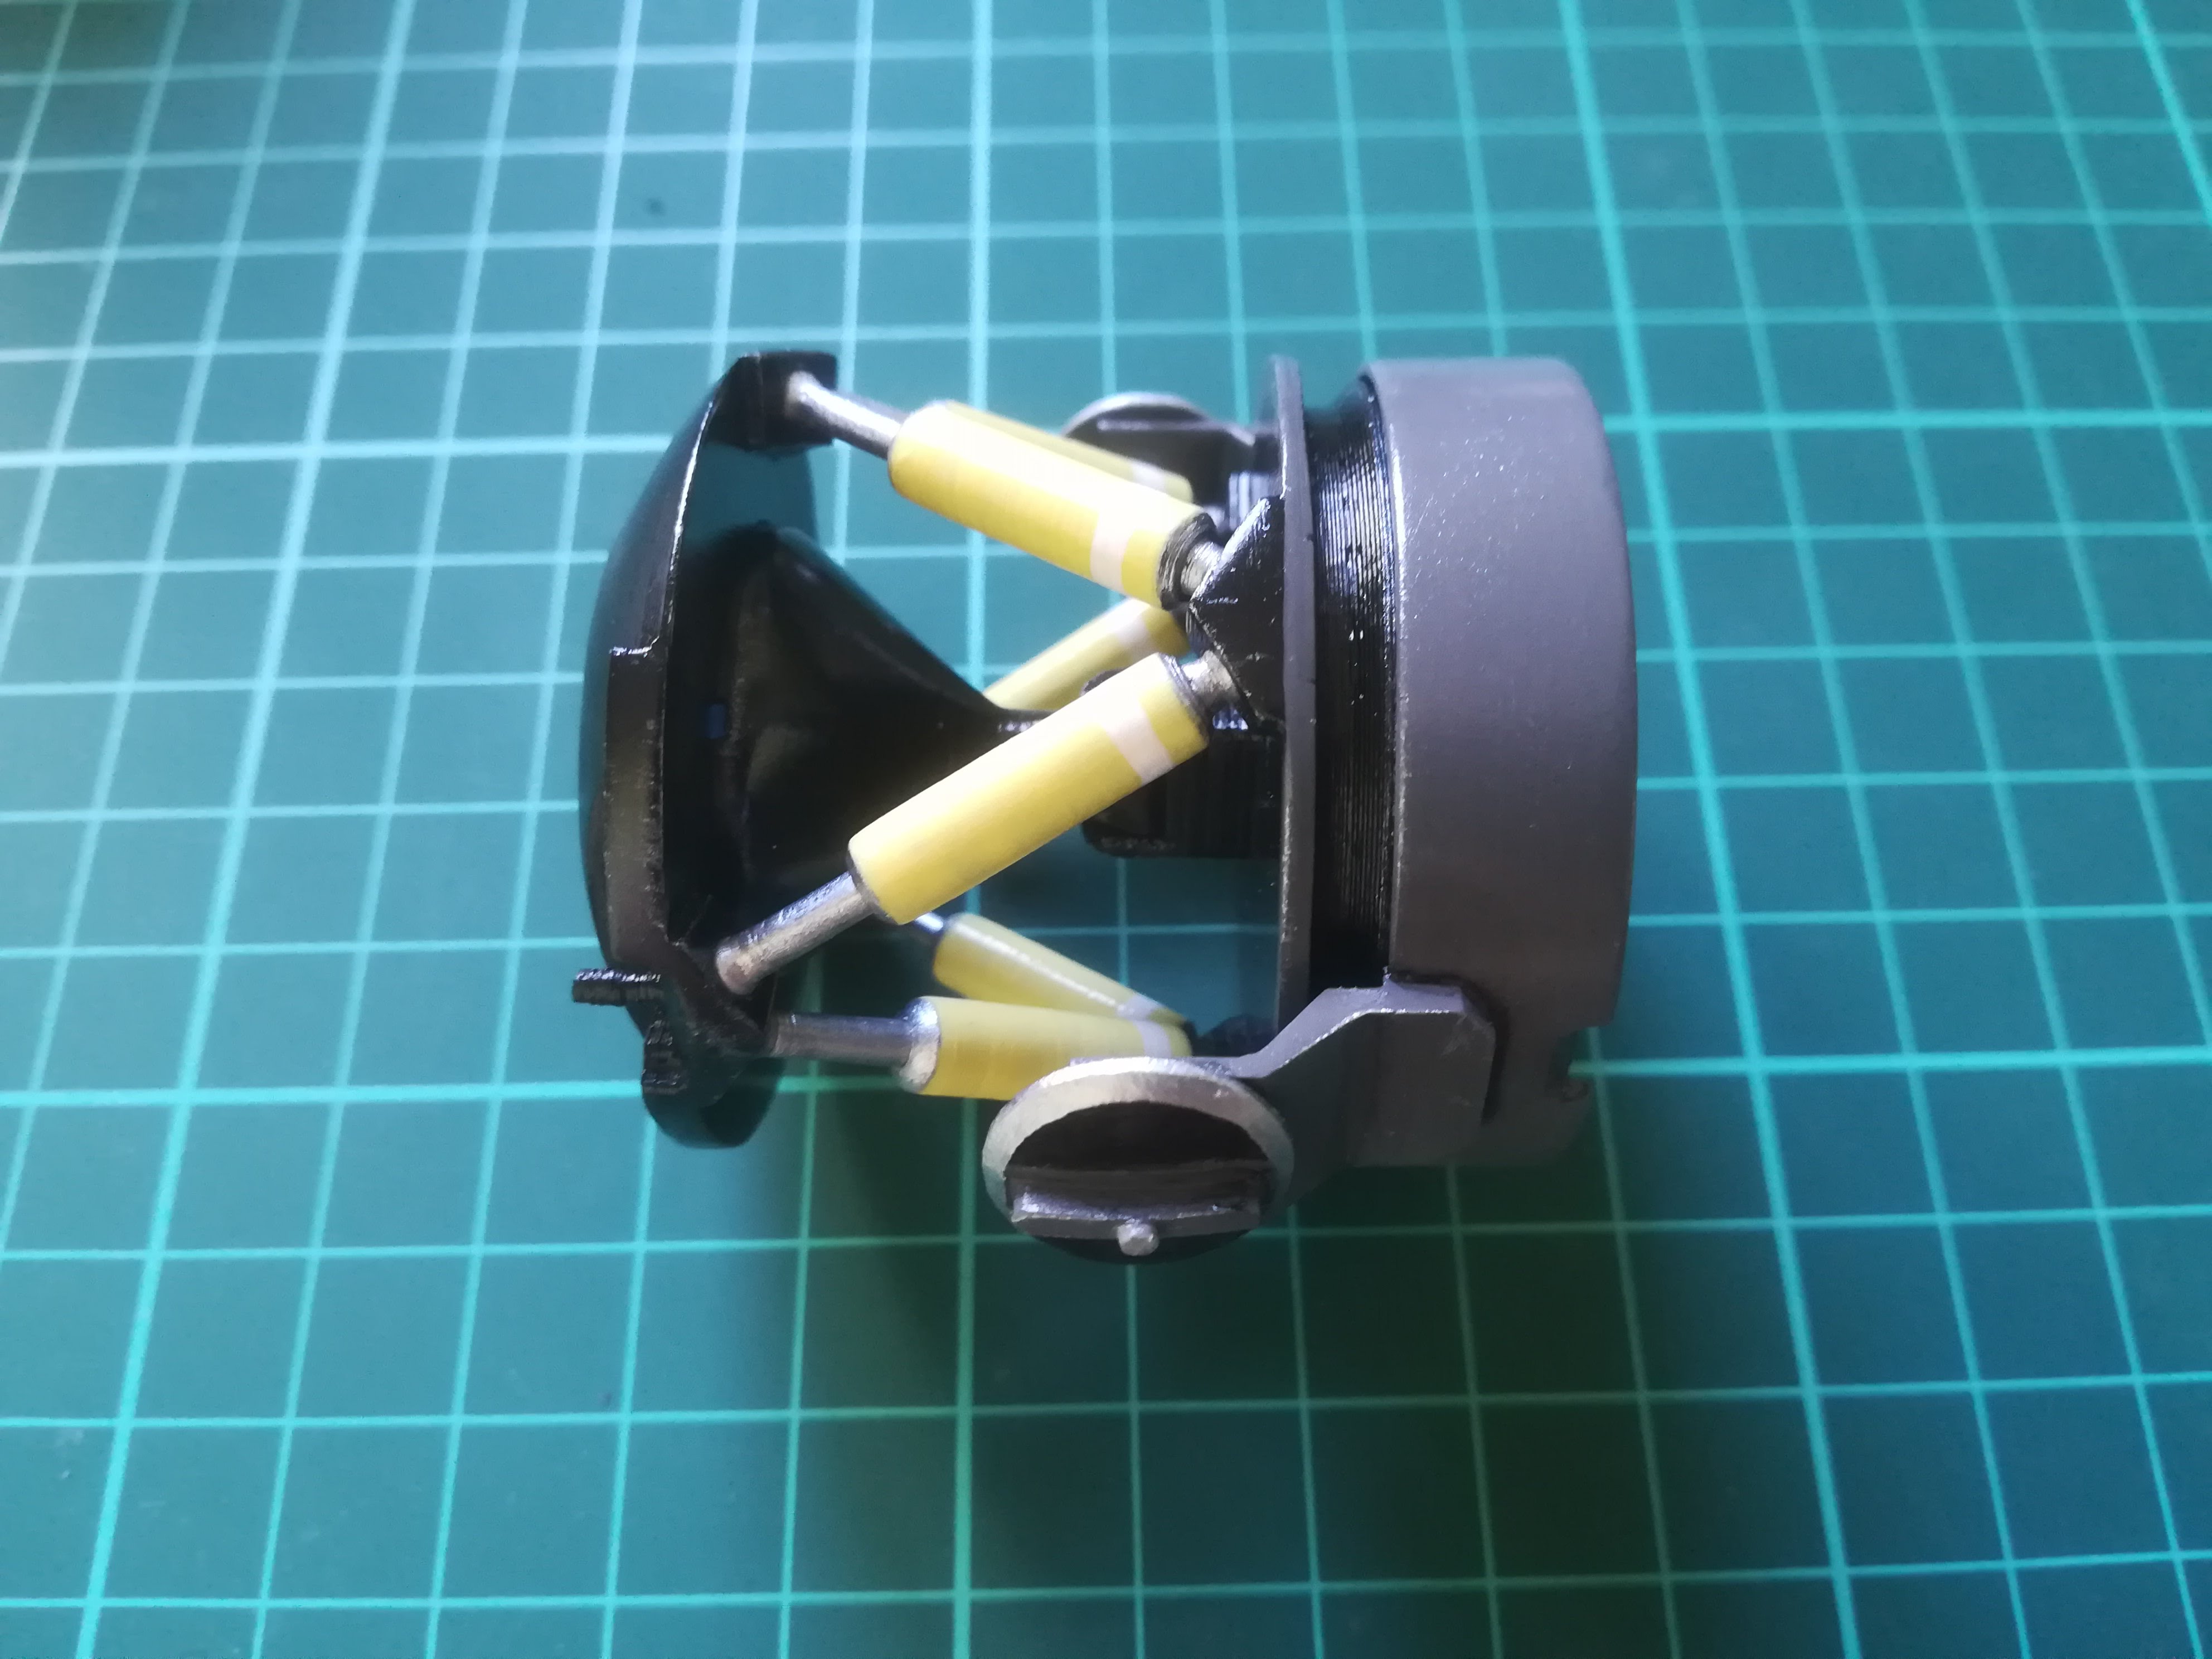
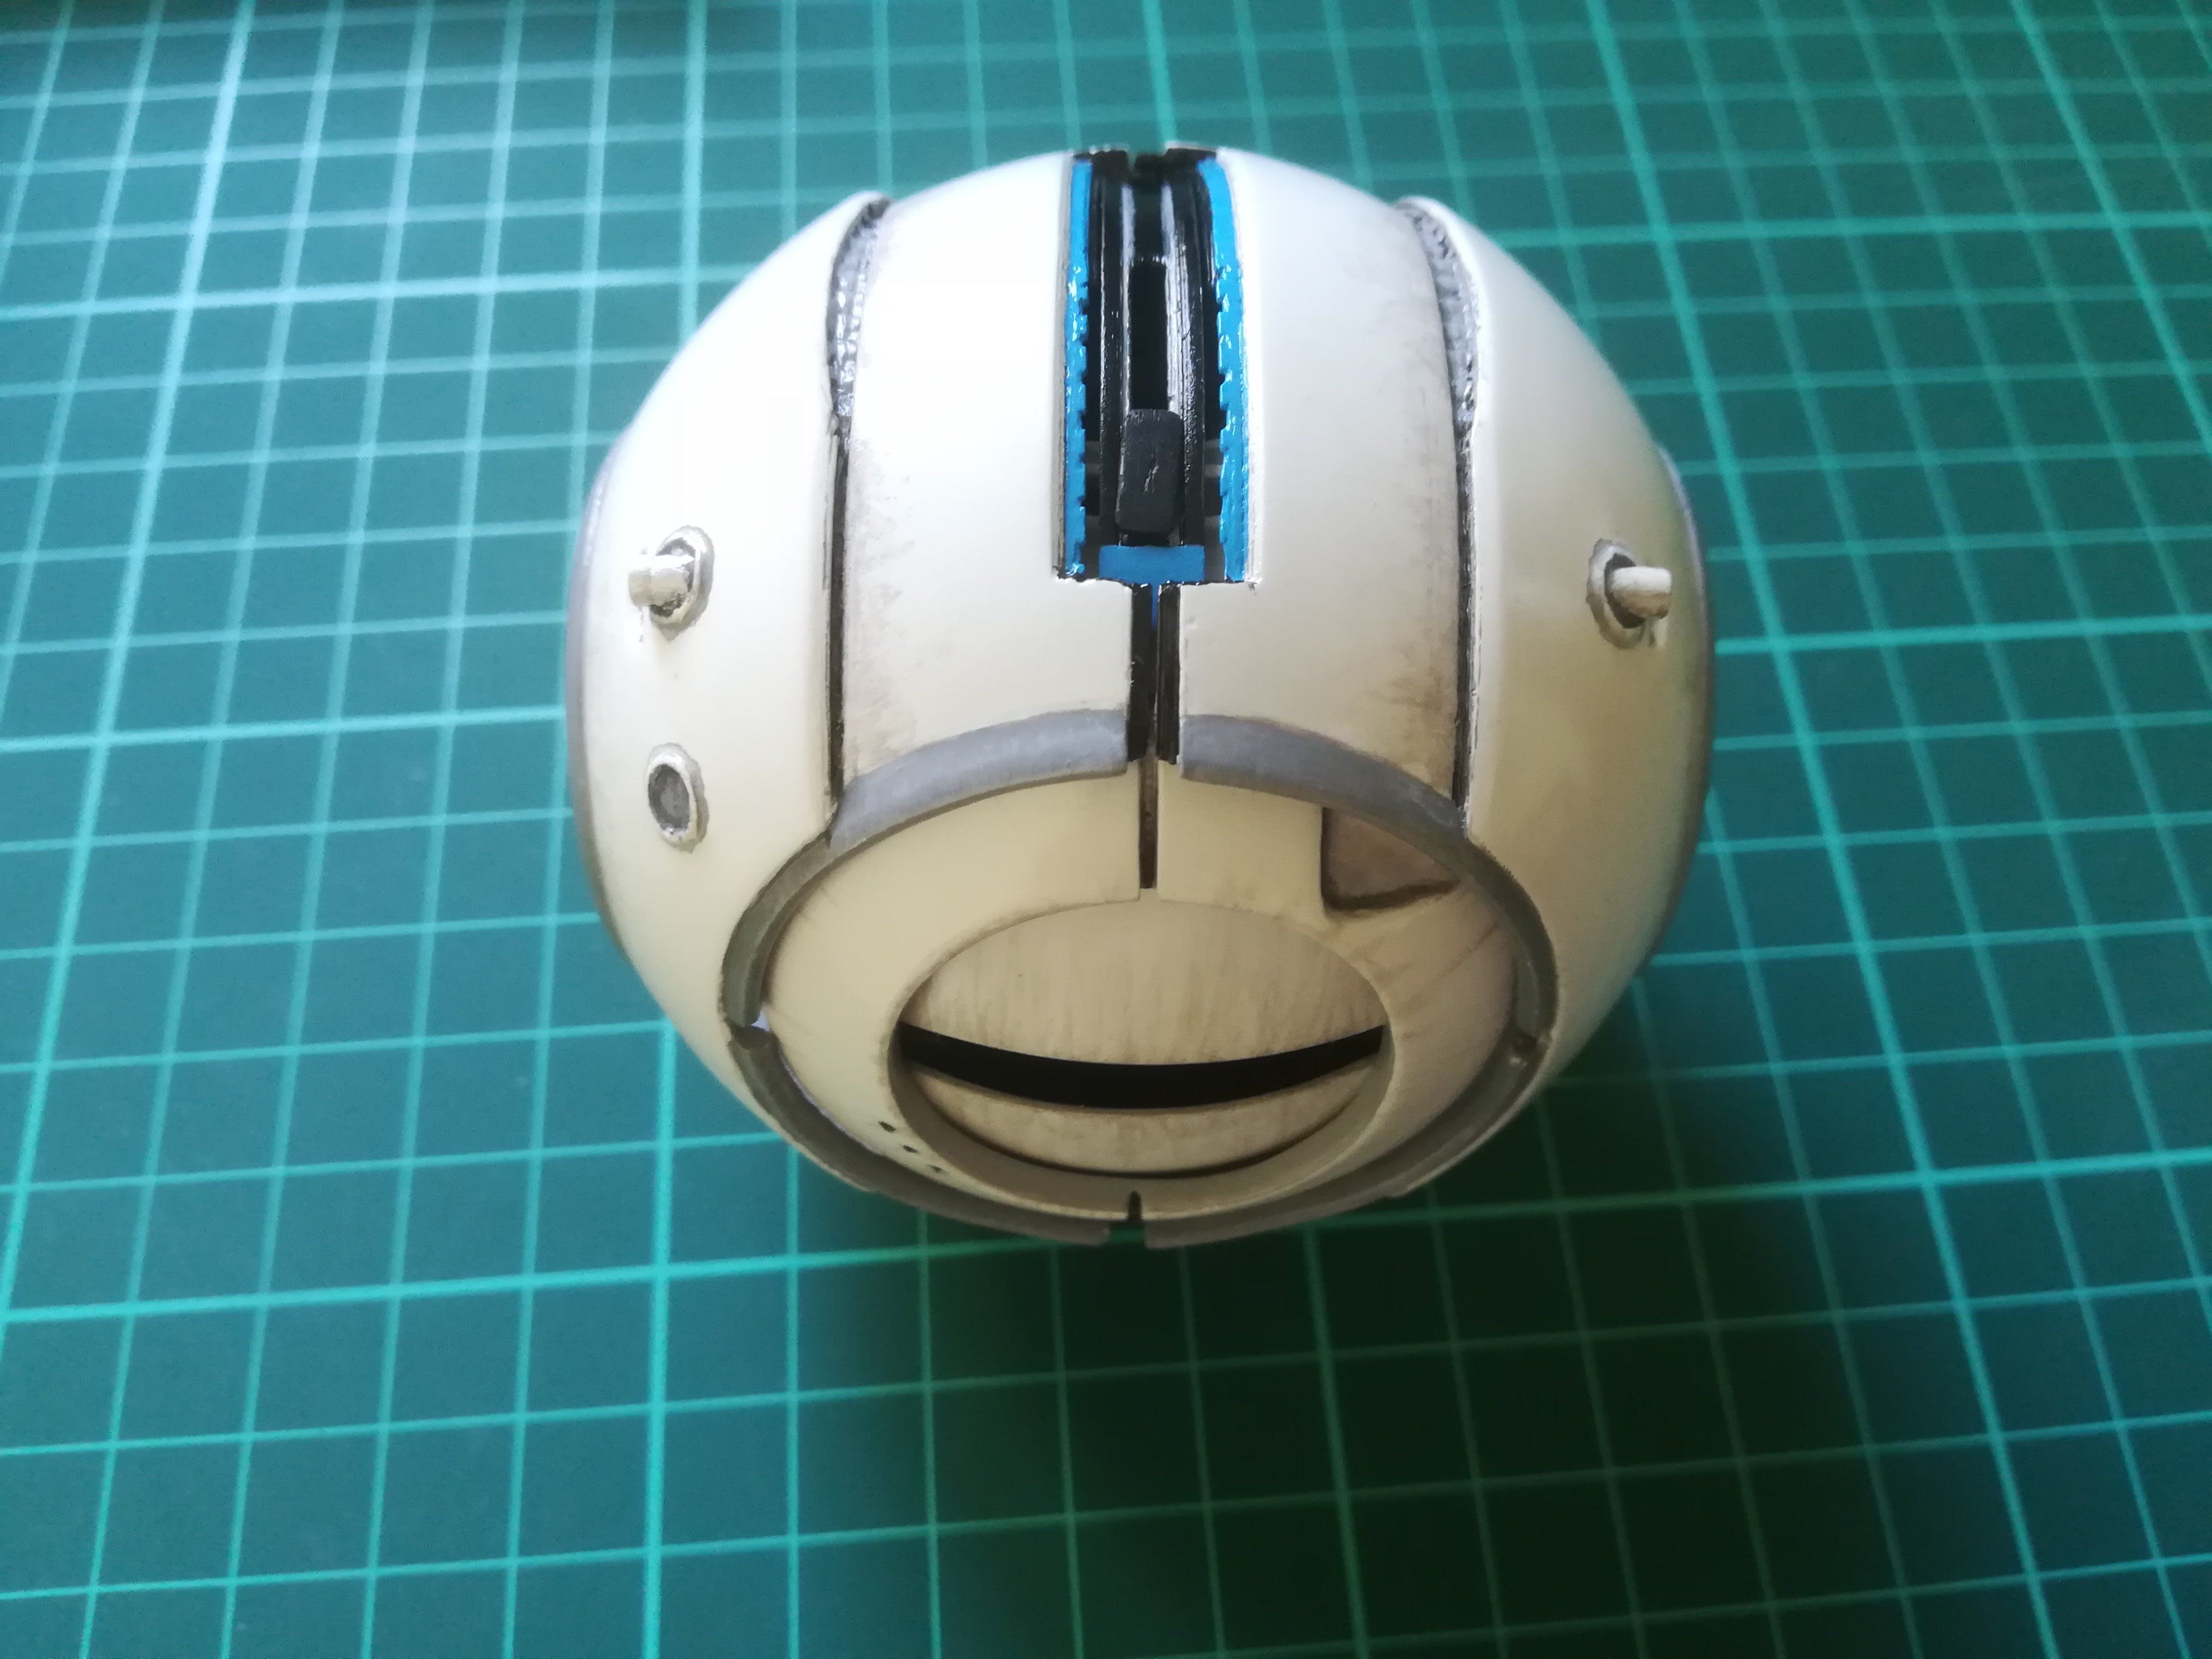
Place the "rail_x" after positionning the "courroie_arriere" / Placer le "rail_x" après avoir positionné la "courroie_arriere"
Insert the "pivot_arriere" / Insérer le "pivot_arriere"
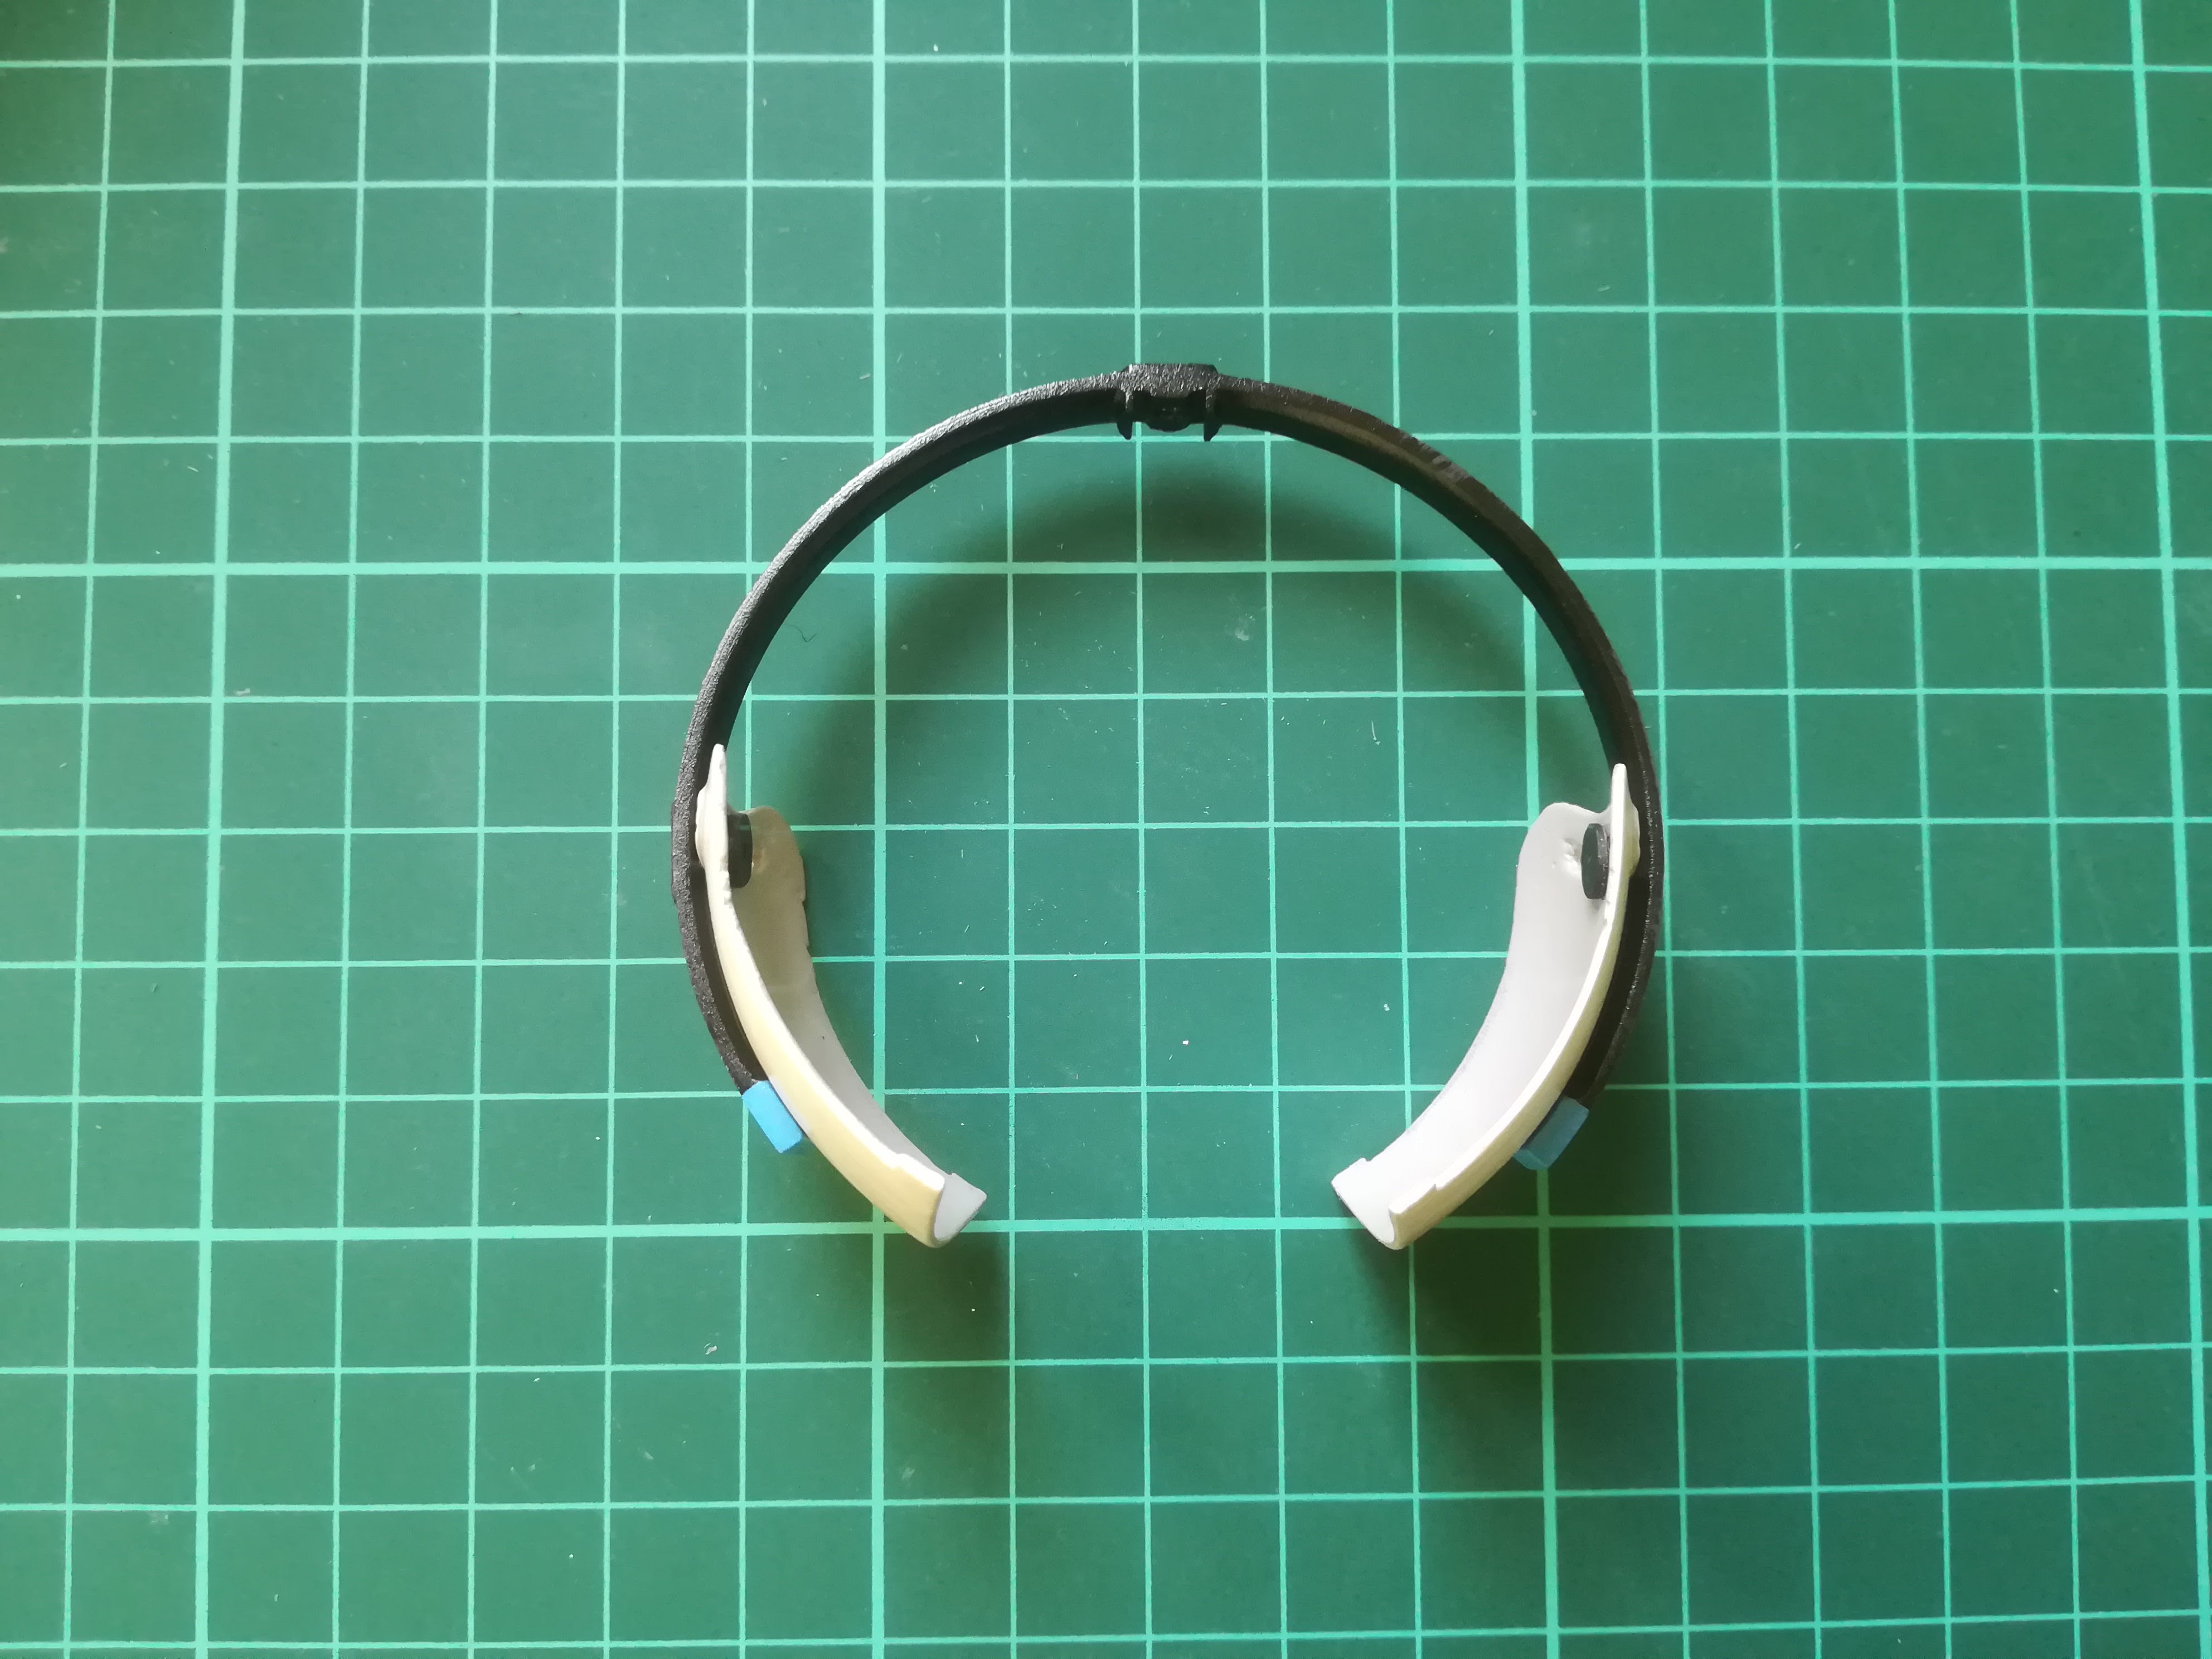
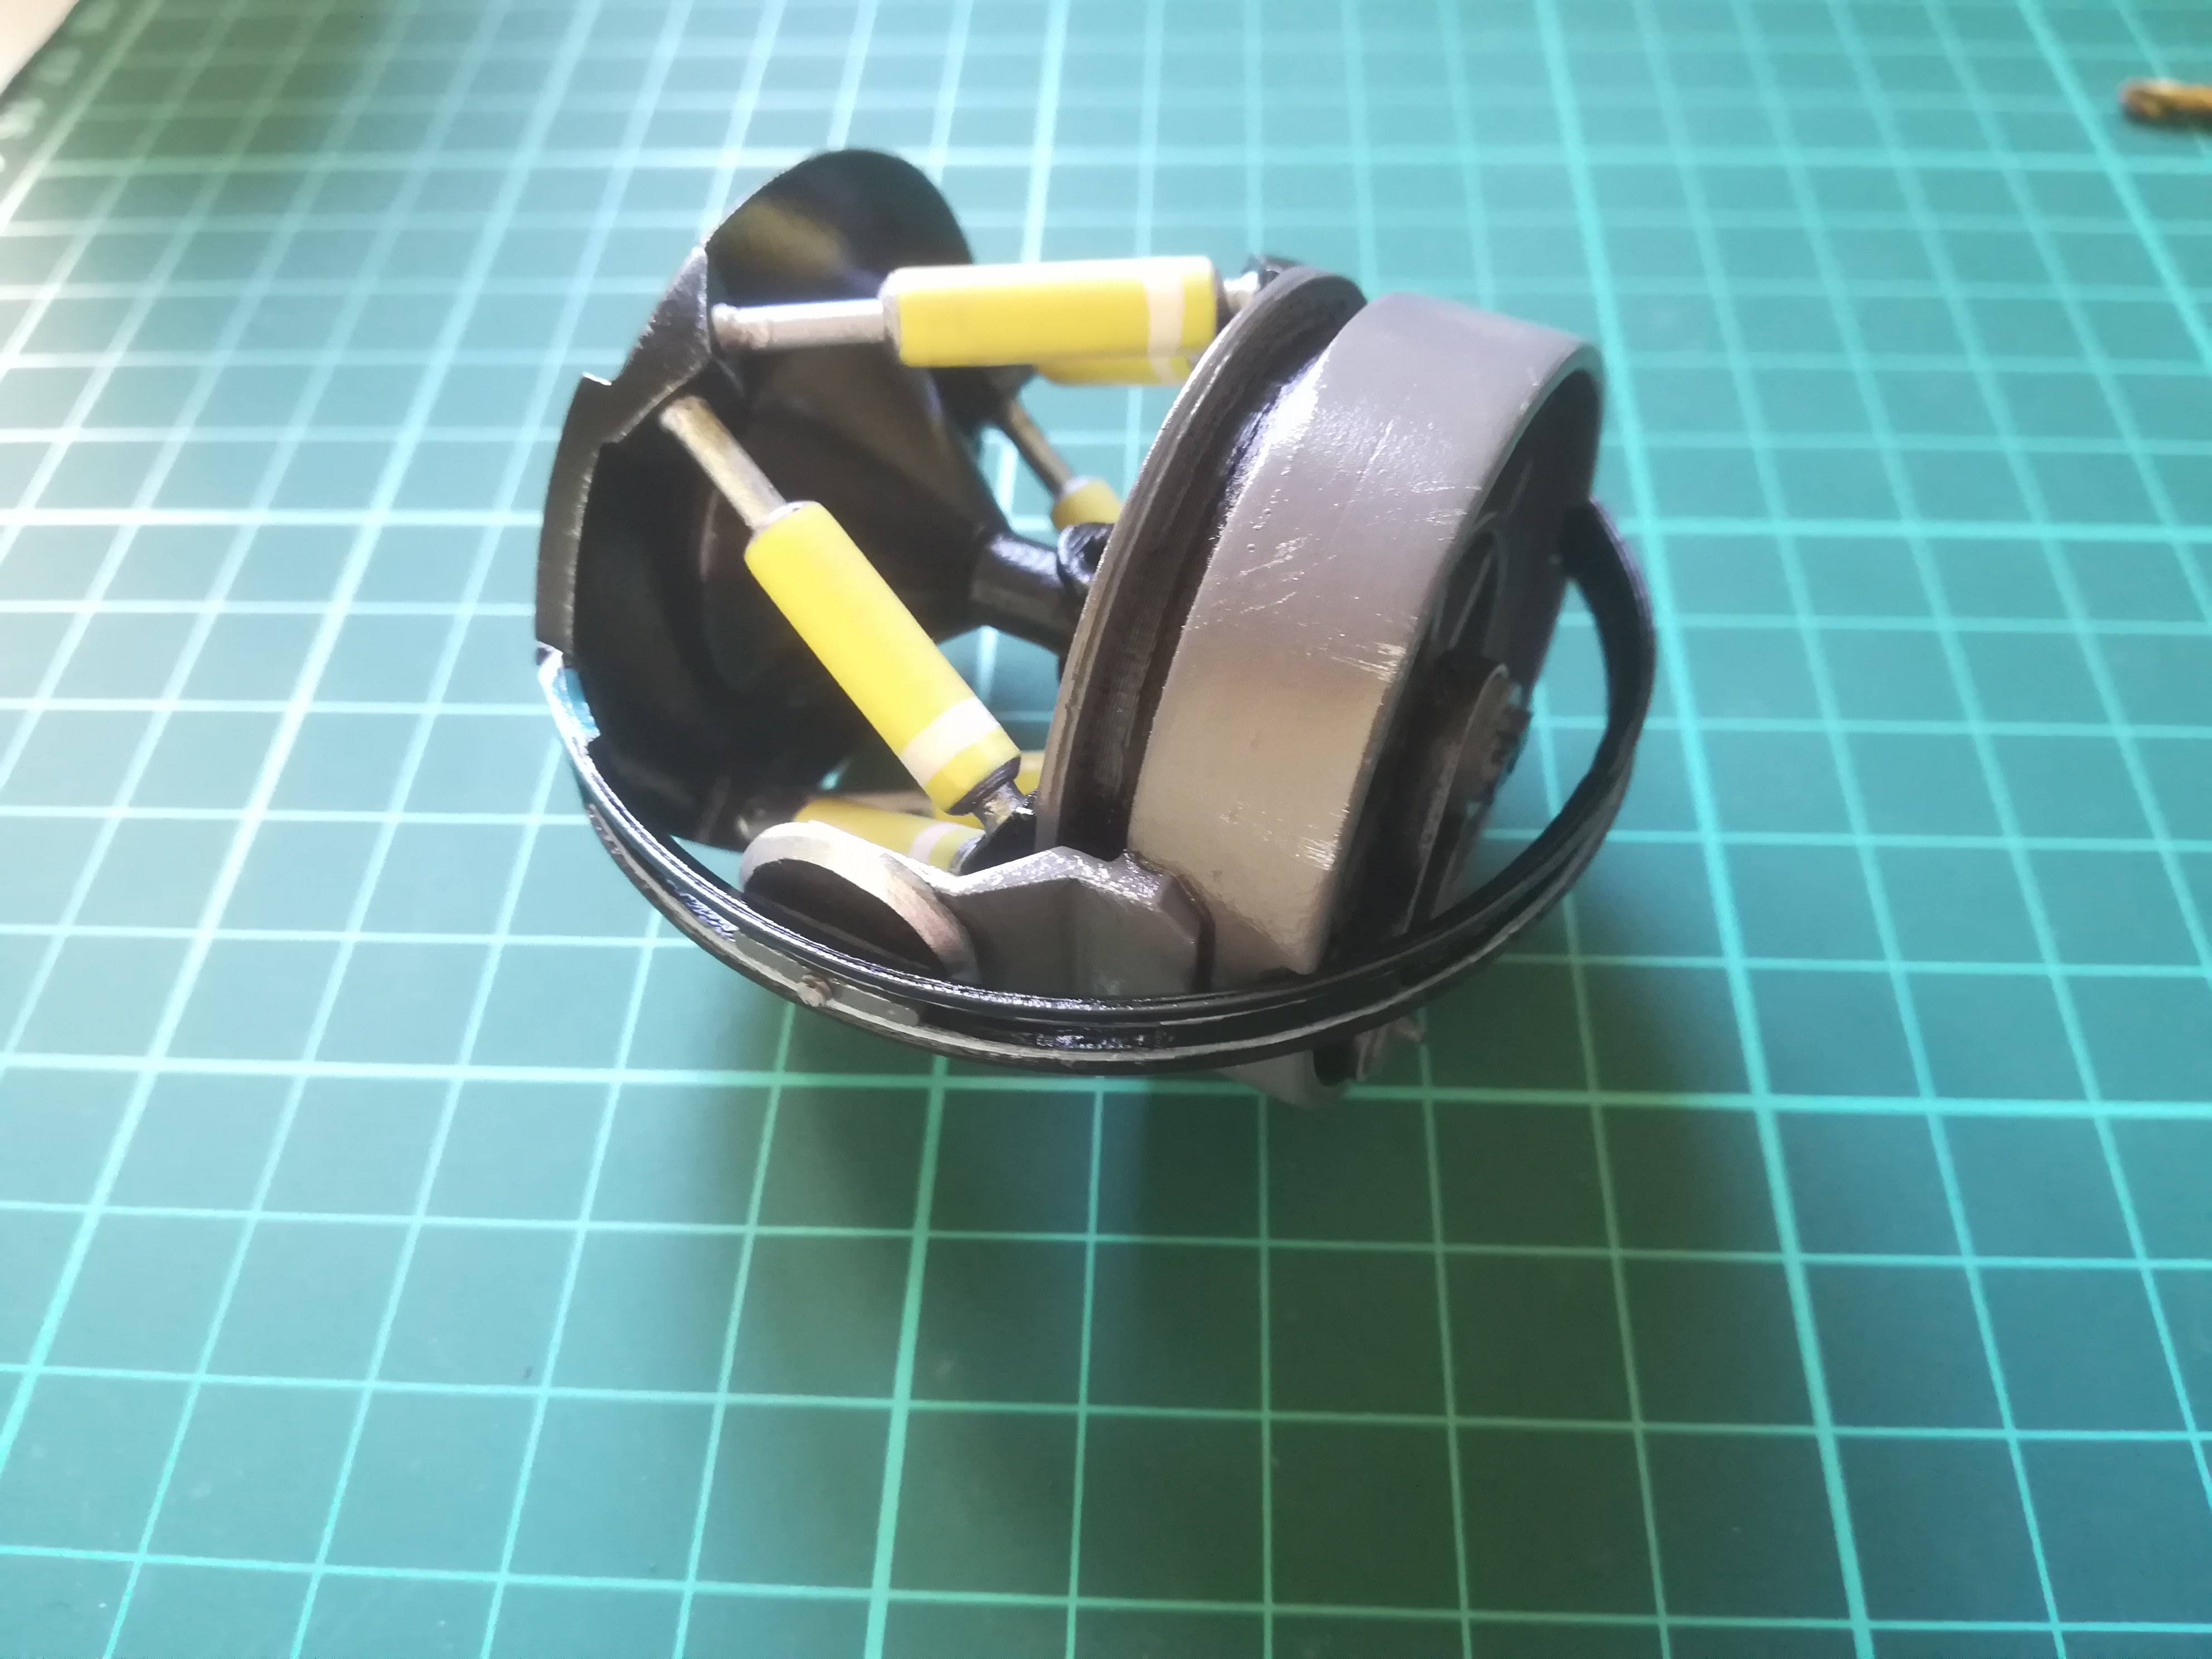
Assemble the "paupiere" on the "rail_y" by gluing the "pivot_paupiere" with the "verrou_paupiere" / Assembler les "paupiere" sur le "rail_y" en collant les "pivot_paupiere" et les "verrou_paupiere"
Place the assembled "rail_y" and secure it with M1.6x14 screw / Placer le "rail_y" assemblé et maintenir le tout avec la vis M1.6x14
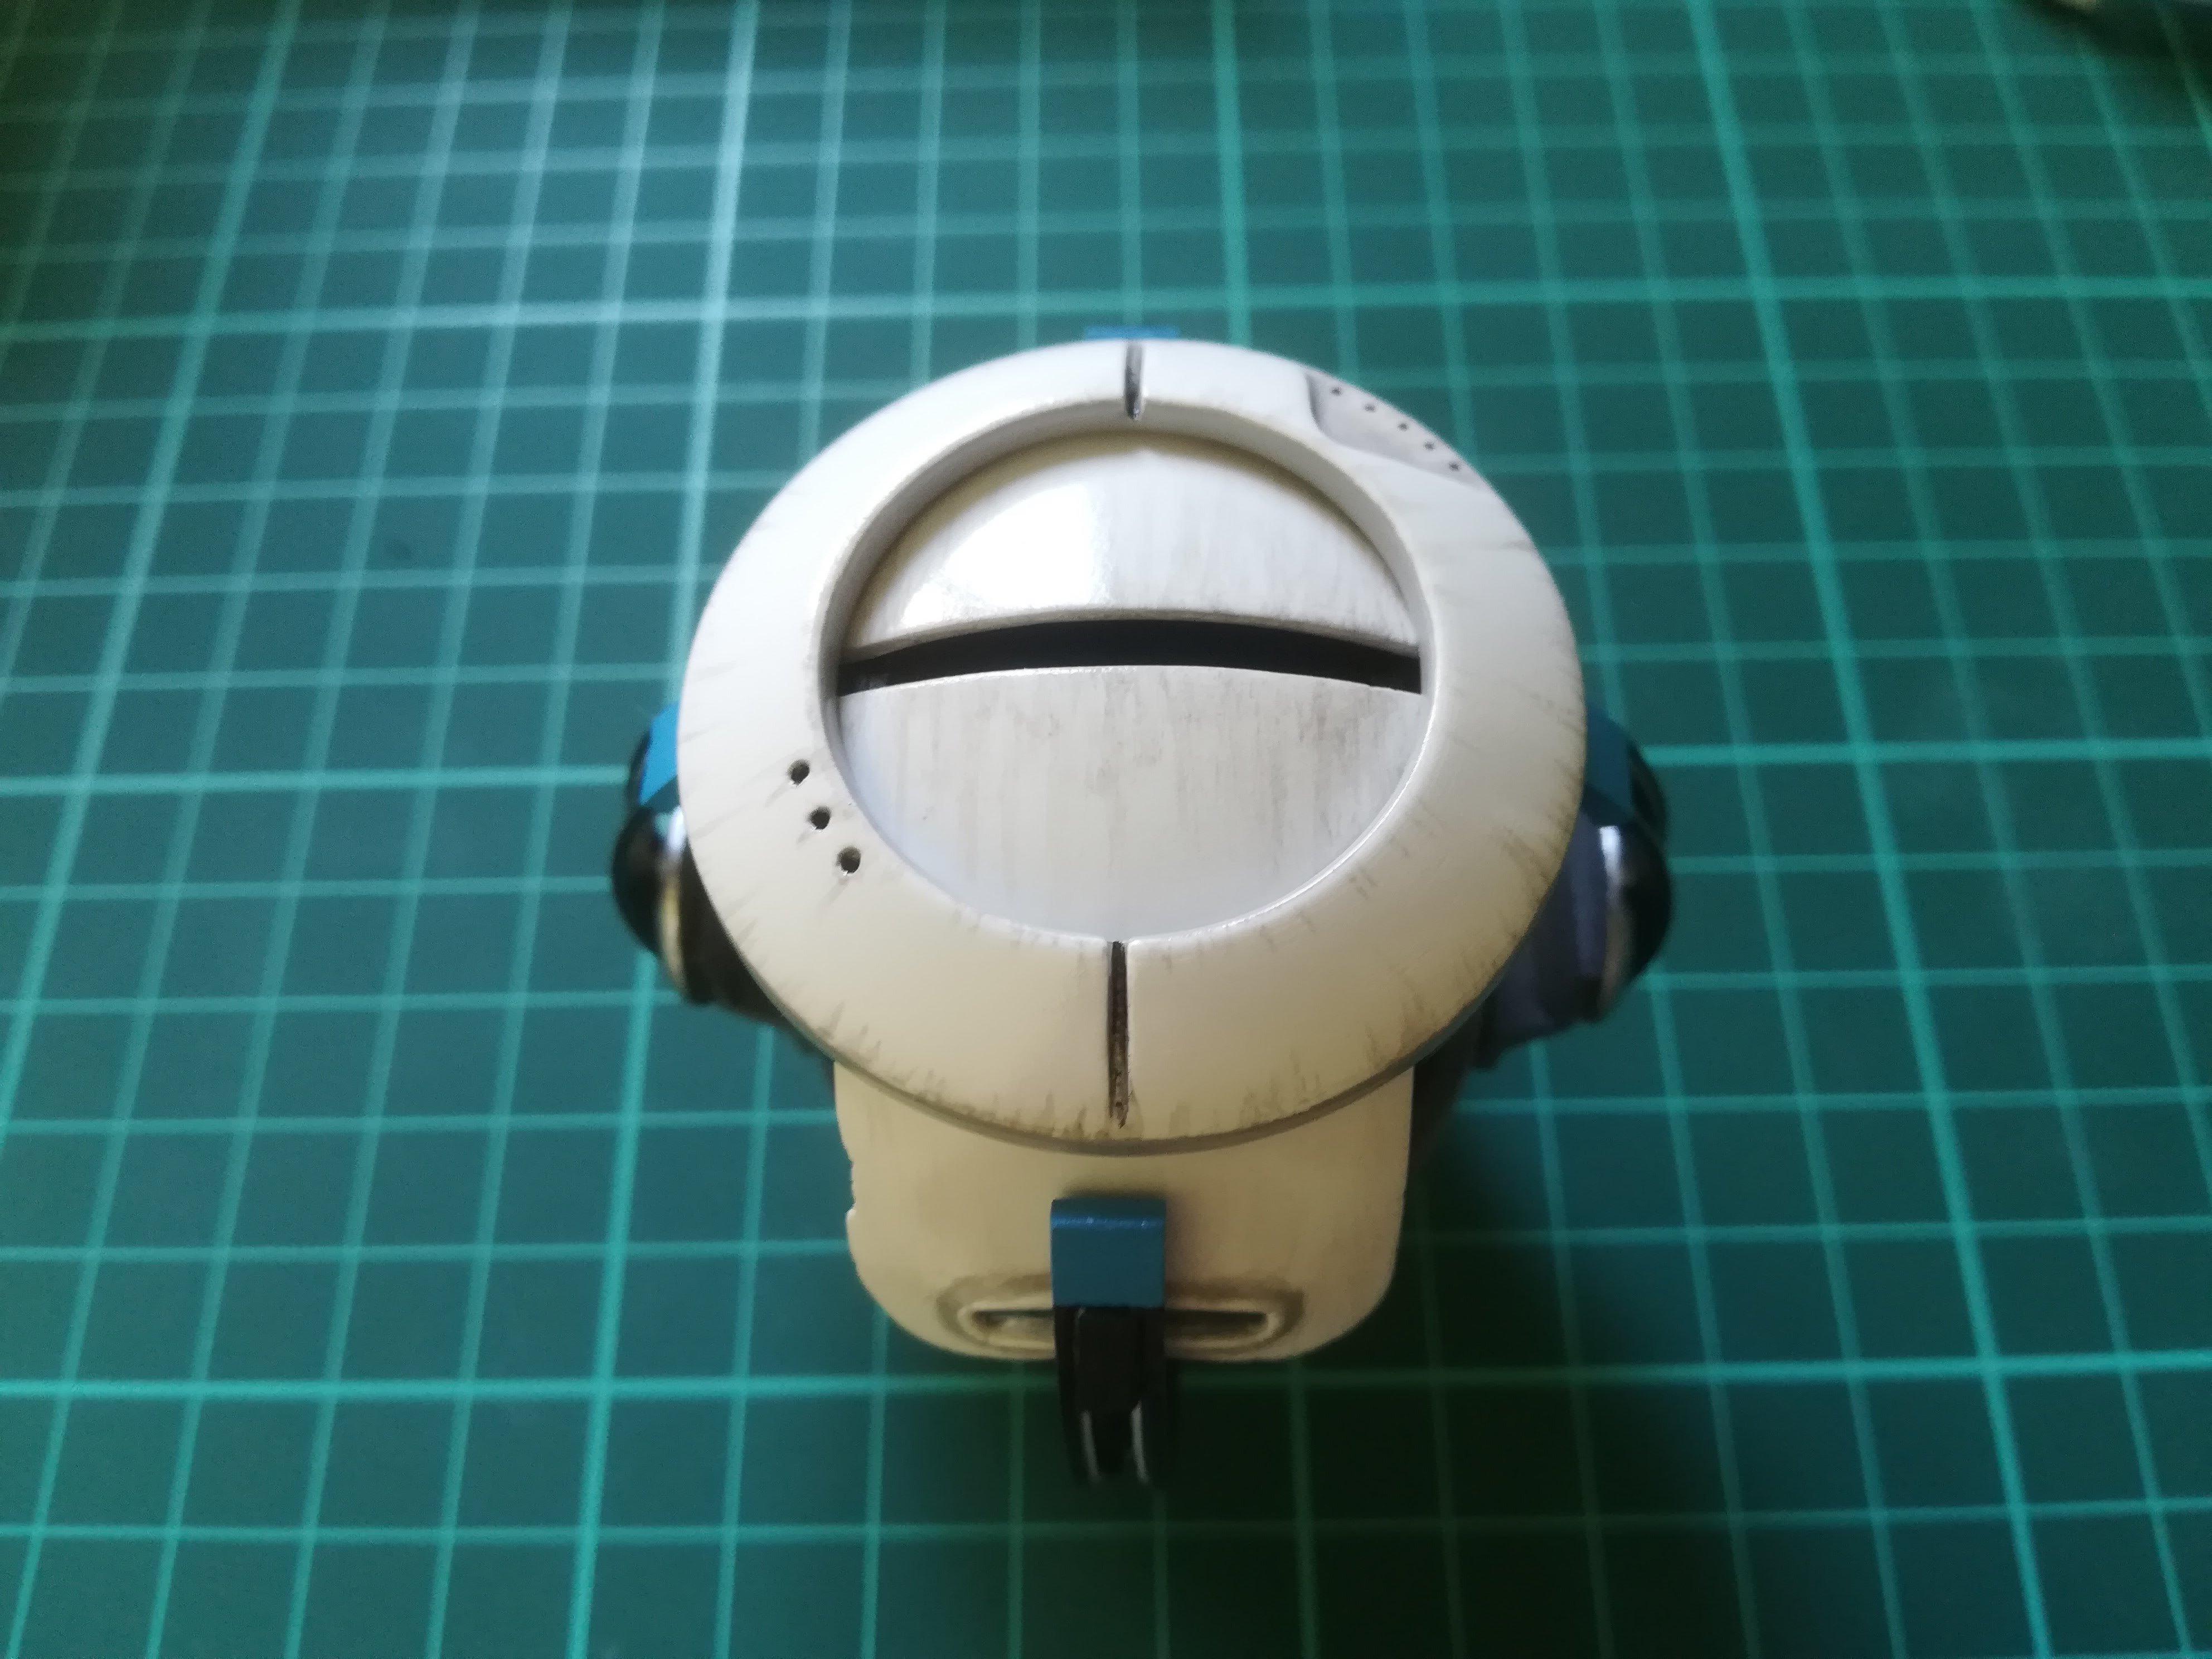
Mount the "facade_oeil" / Monter la "facade_oeil"
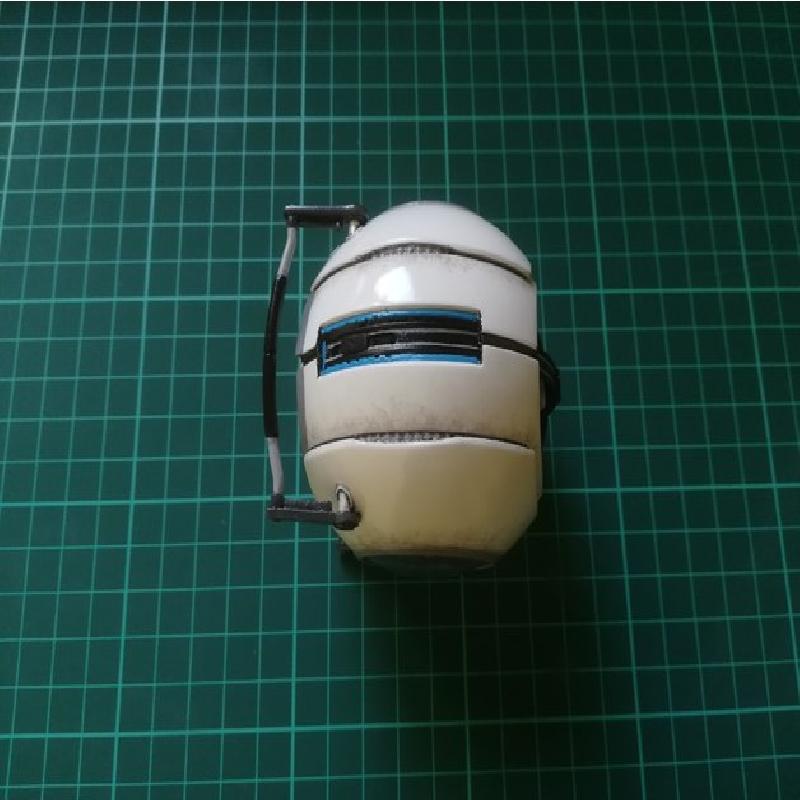
Glue the windows on the "coque_droite" and "coque_gauche" / Coller les fenêtres sur les "coque_droite" et "coque_gauche"
Place the core in the "coque_droite" / Placer le coeur dans la "coque_droite"
Clip the "coque_gauche" on the "coque_droite" / Clipser la "coque_gauche" sur la "coque_droite"
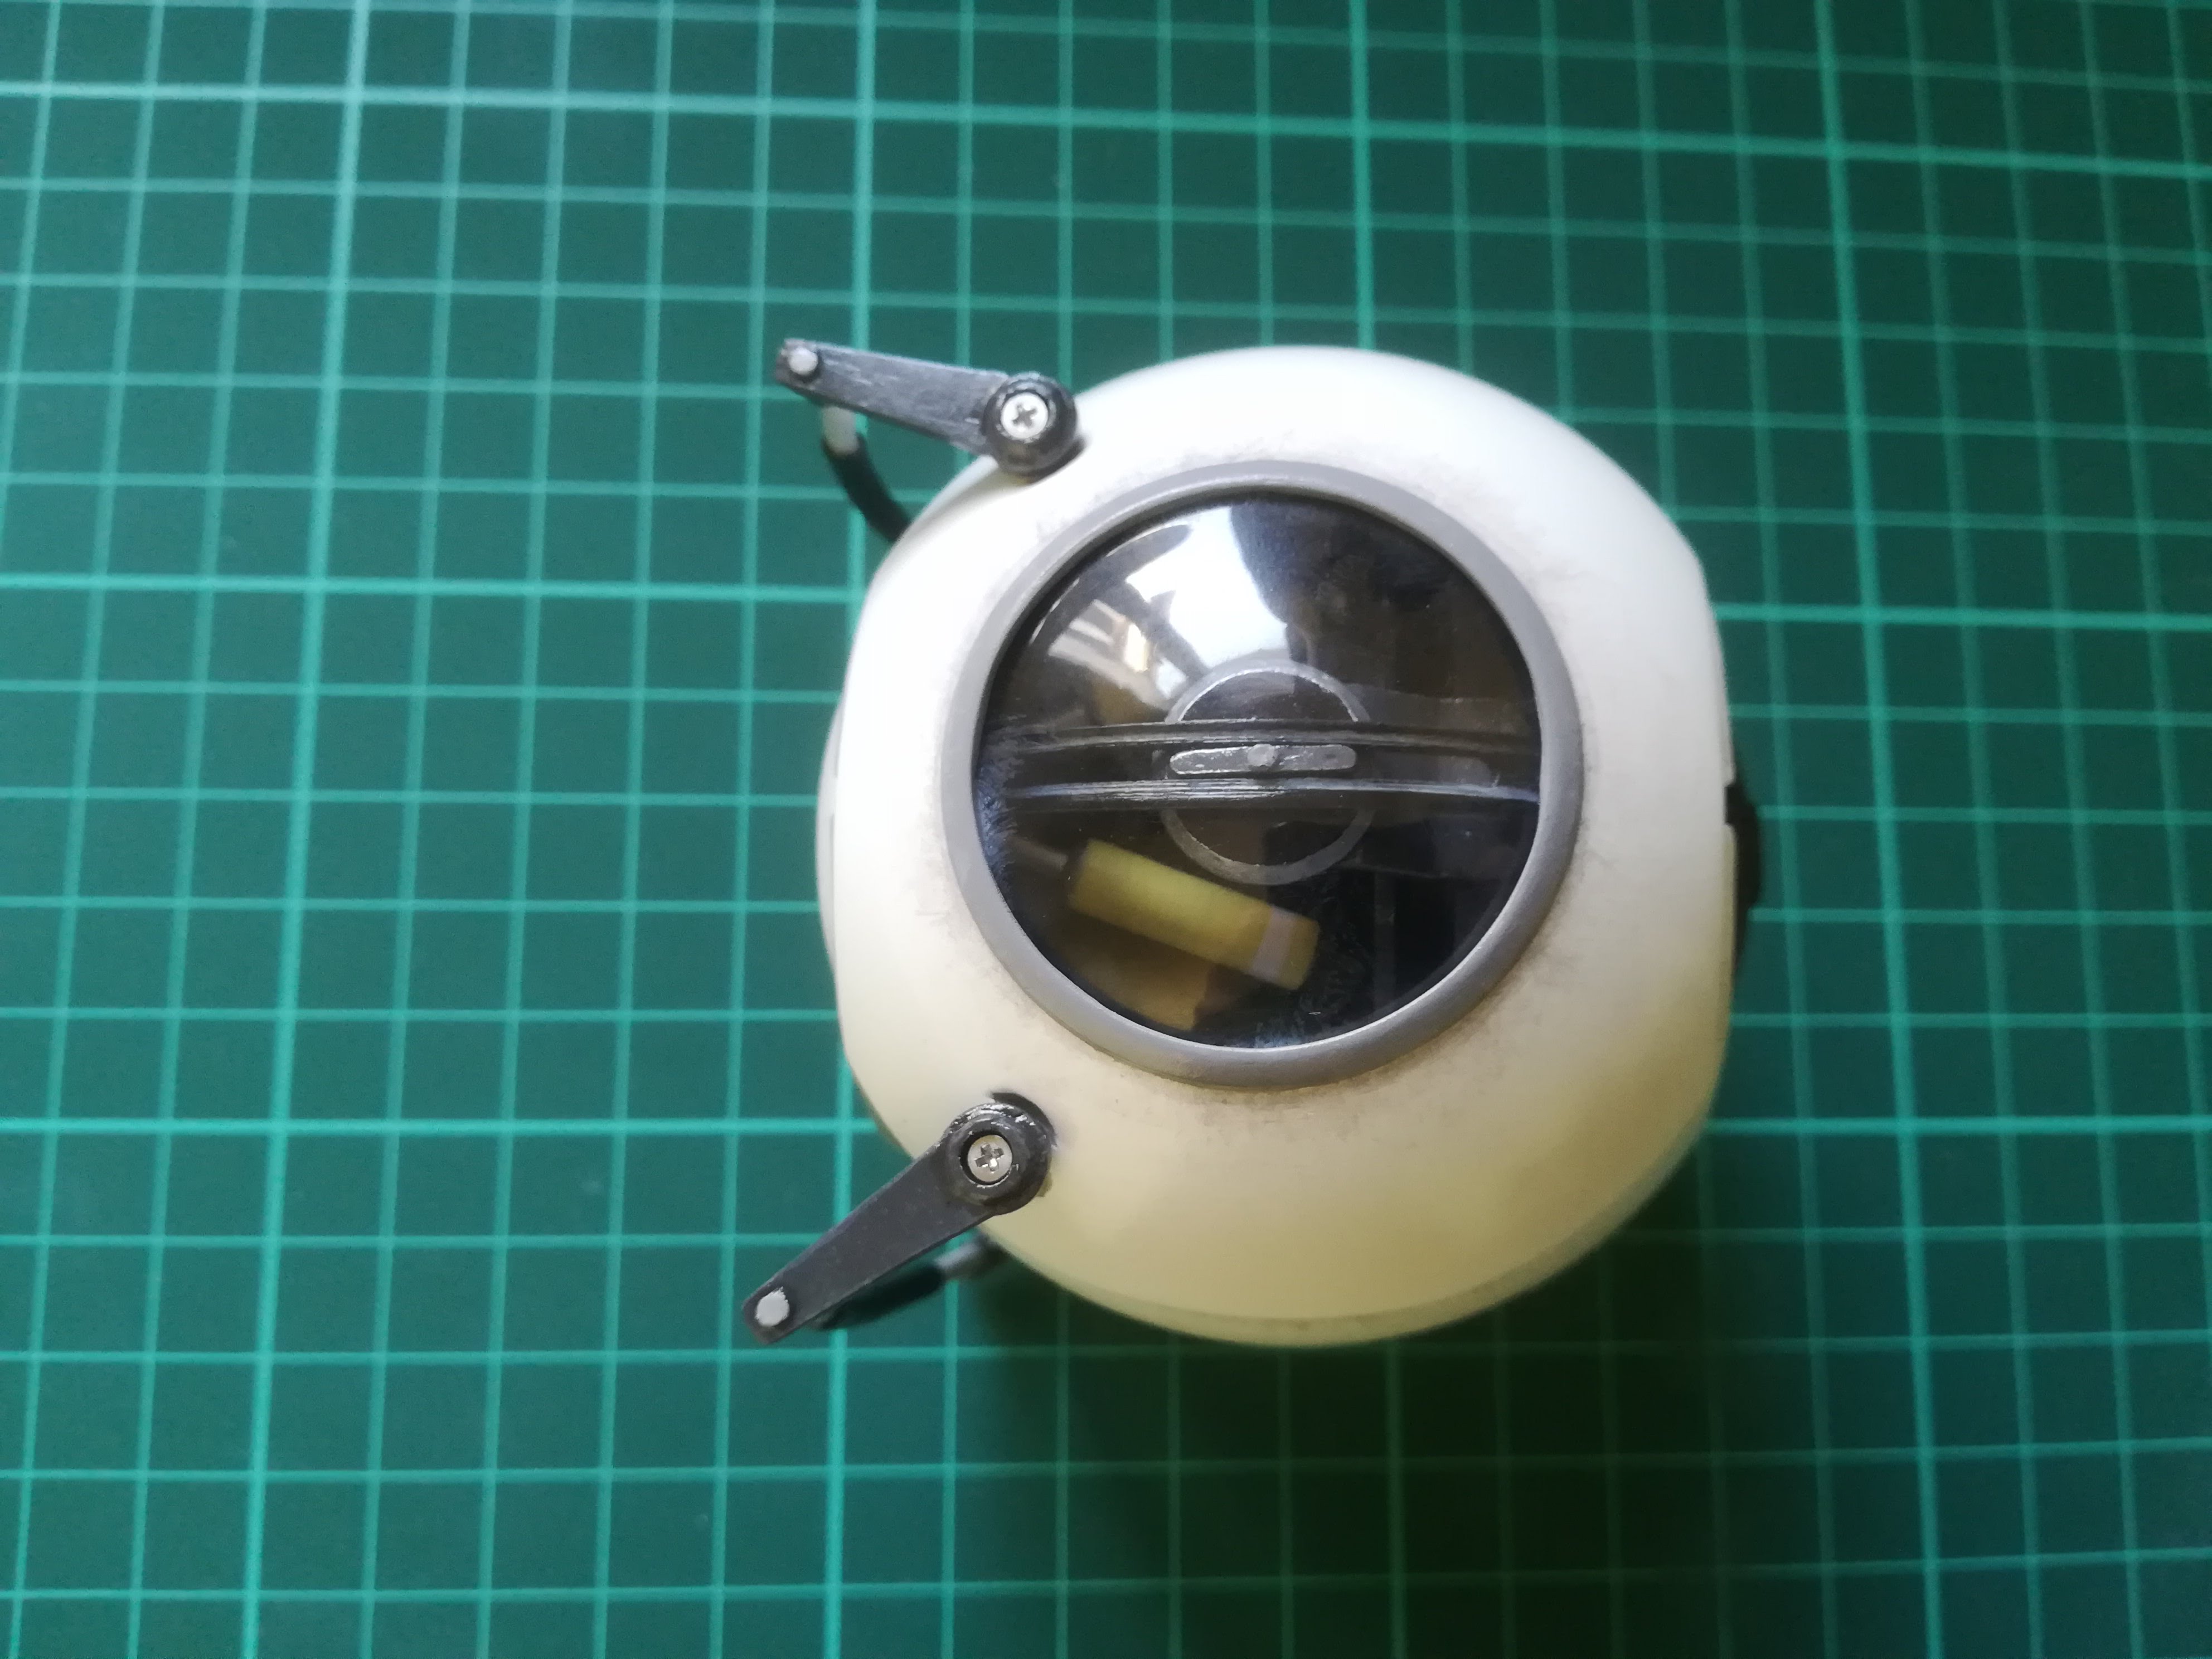
Mount the "sourcil" with the M1.6x6 screws / Monter les "sourcil" avec les vis M1.6x6
Et voilà !
Have fun ! / Amusez vous bien !
:-)