by bzkeyes
Suffice to say, I'm a huge Golden Age Justice Society fan. The Spectre, Doctor Fate, Hourman, Green Lantern, Atom, etc. were my preferred team when growing up through their appearances in JLA, All Star Squadron, and the All Star Comics continuation in the 70s.
One thing I always thought was cool was Starman's original Gravity Rod (later rechristened the Cosmic Rod, but I'm a purist and going with its original name). I was a little disappointed when I saw that no one out there had made a version of this for me to print. So, I took to the task myself, looking at as many images from the comics as I could find (especially Golden and Silver Age appearances).
Of course, there are no definitive drawings of how this looks, just a general shape that each artist took liberties with as they needed. When designing it, I tried to stick as closely to the original look as I could find, while trying to add some nuances that made it look like it might actually be a construct of the real world.
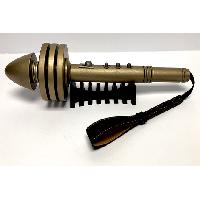
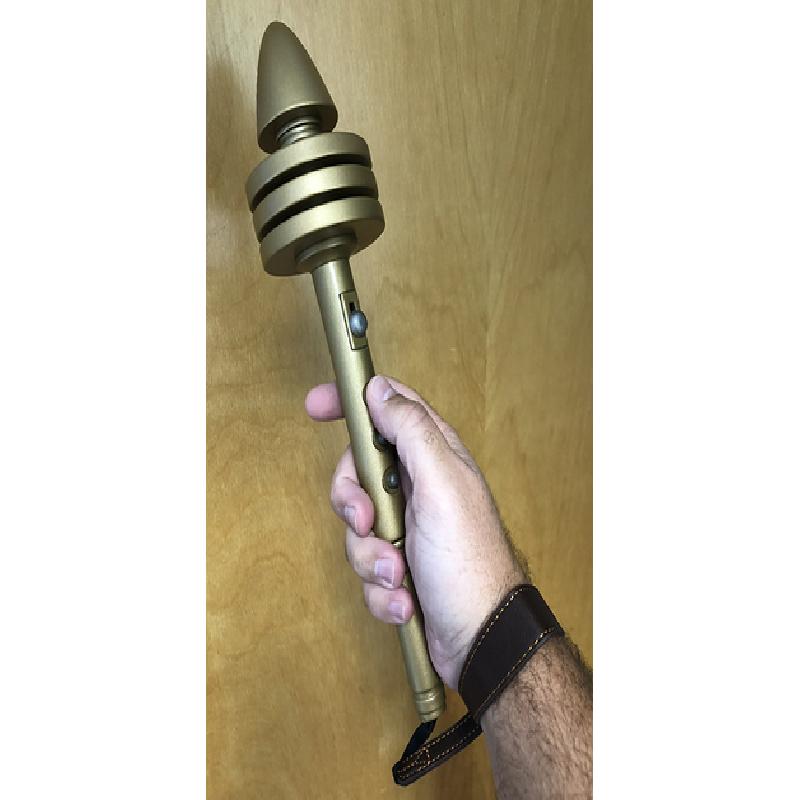
While working on it, I read a comic page in which Starman mentions pushing a particular series of buttons so thought it might be fun to make it so it had some actual action and the like, so I added push buttons and a slider to the grip. It does make the construction a little more complicated though, so I made a version of the grip with no buttons for those who want a more basic and simple Gravity Rod of their own.
I did make it pretty tight to put together because I didn't want it to be loose. Technically you could put it together without any glue, but I used a few drops on each part anyway, and certainly on the buttons. For a couple pieces, I enlarged them or scaled them down a bit in Cura for slightly easier assembly once printed (although this was mostly to make button install easier). Below are the pieces I adjusted sizing in Cura and how much:
Gravity-Rod_Coil_Cap: Enlarged to 102%
Gravity-Rod_Grip: Enlarged to 102%
Gravity-Rod_Link_Coil: Enlarged to 102%
Gravity-Rod_Slider_Block, Slider, and Head: Scaled to 98%
Gravity-Rod_SM_Button, and Mount: Scaled to 98%
Printer Brand:
Ultimaker
Printer:
Rafts:
No
Supports:
Yes
Infill:
20%
Clean up and Assembly
Because this is supposed to be a mechanical device and because of the time period in which it was supposedly invented (the 1940s), it was pretty clear to me it should be metallic. So that meant it would take some effort to get it looking smooth and nice.
So, you will need to do some sanding on the pieces. I used a 150 grit and then a 200 grit to get them fairly smooth, then took wood filler and coated the pieces lightly and sanded again to get rid of indents, flaws and print lines. I thought I might have to prime it, but I got it so smooth by the above work that I simply bought some aged brass spray paint to get that old style metallic look. It took a lot of light coats to get it on evenly, but I think it came out well. For the structure pin that connects the coils and emitter to the grip, I did sand this pretty smooth to ensure all the pieces would slide on well. I would slide a piece on, test the fit, then slide the piece back up the pin slightly, put a drop or two of glue on and push the piece back down. Pretty simple, really.
For the buttons and the slider head, I painted those in an antique silver paint I had left over from another project. I liked that it looked more assembled from different components that way, but it isn't a must to do it like that. The brass would have worked just as well.
Regarding the buttons, if you choose to make the button-ready grip versus the non button grip... For the slider, it is a very simple mechanism. I sanded the slider block so it was pretty smooth, and against the roughness of the inside of the bracket, it still has enough tension to move back and forth without being too loose. Just sand a bit and try it, then sand more until you get the right feel. Be sure to not glue the slider head down until you place the slider top panel in place (I almost forgot myself). For the push buttons, you need to sand the buttons themselves pretty smooth so they glide easily inside the mount, but then I just bought a simple spring from Lowes and glued it all down. The buttons work amazingly well and give it a real working device feel to it.
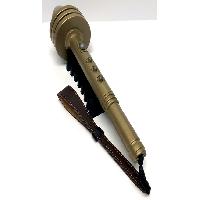
Finally, I found a cheap leather camera wrist strap on Amazon that I added to the bottom. There were lots of images of the Gravity Rod having a wrist strap, and it made sense to me that if you are flying around with this thing, you wouldn't want to accidentally let go and fall to your death. If you aren't interested in this piece, you could skip the whole lanyard add on pieces. (I would have liked to find something more vintage, but what I found will do.)
All-in-all, I'm really happy with it. My first solo design, print and assembly, and adding a prop that I couldn't find anything like elsewhere. I hope you like it, and would love to see completed props should anyone decide to print it themselves.