by reddadsteve
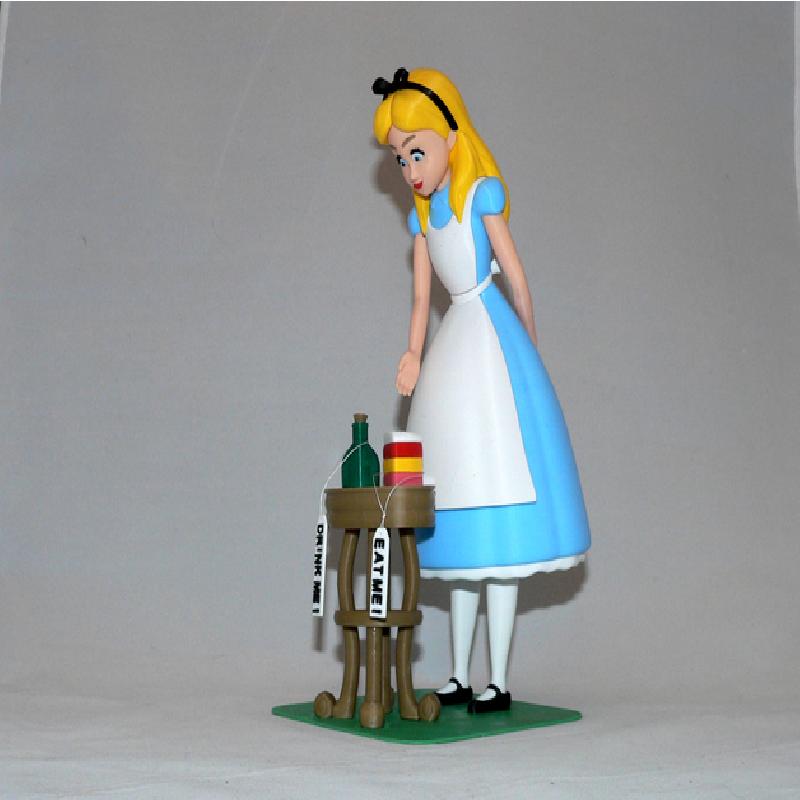
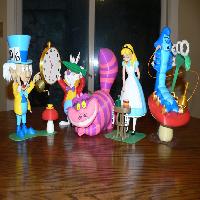
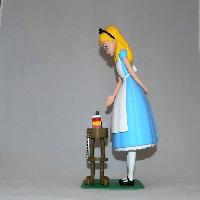
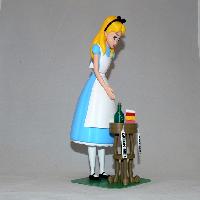
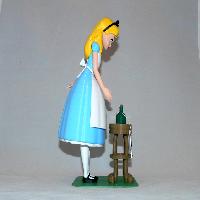
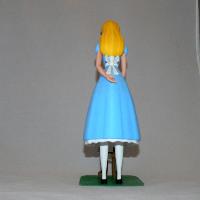
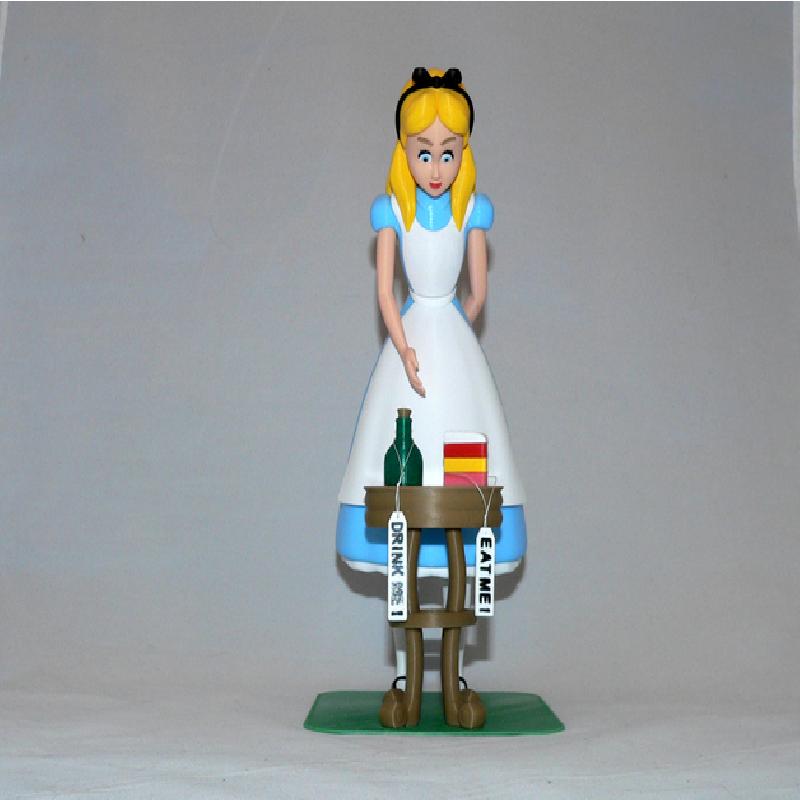
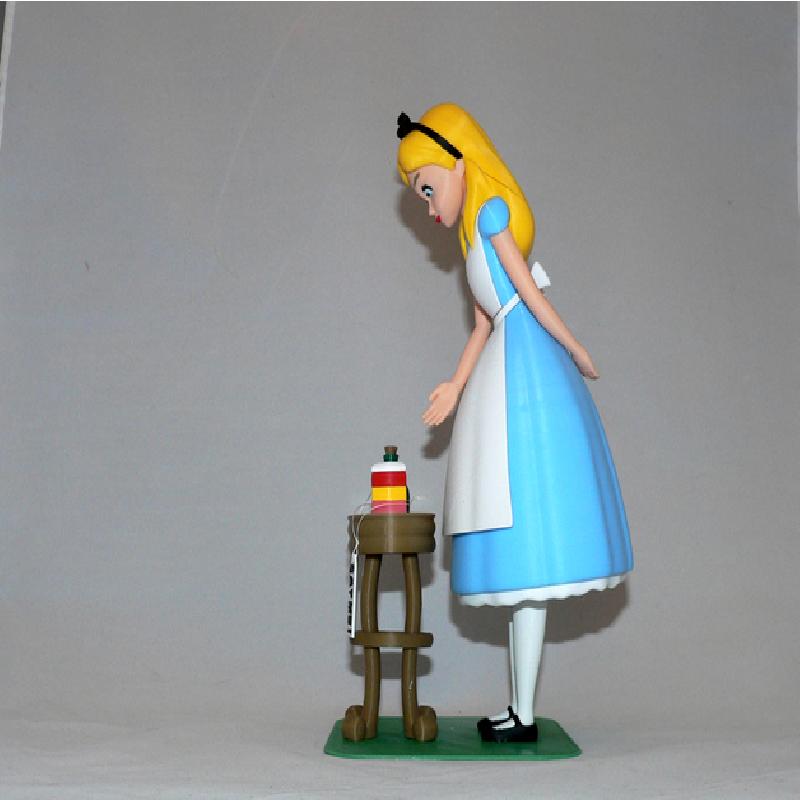
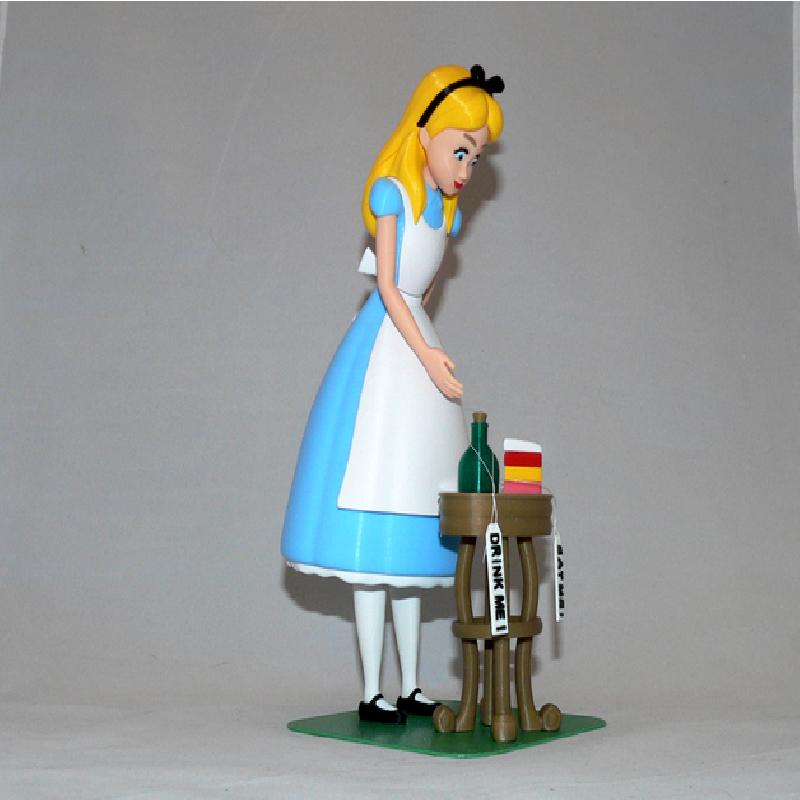
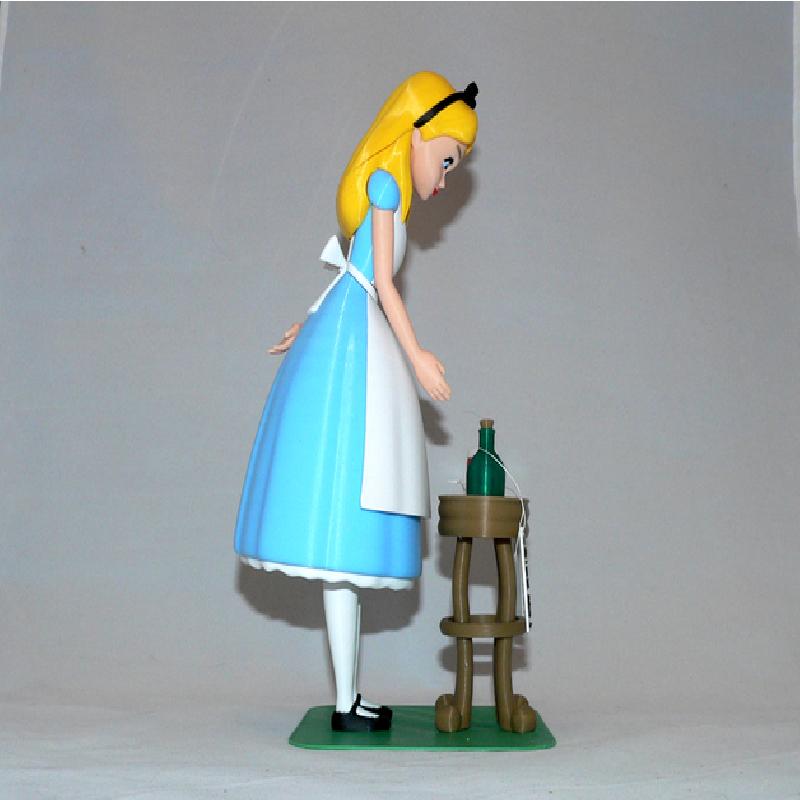
Alice, a character from Lewis Carroll's Alice's Adventures in Wonderland.
Alice falls through a rabbit hole into a fantasy world populated by peculiar, anthropomorphic creatures, and experiences many strange adventures.
No supports are required (except for one piece). If you have the proper filament colors, no painting is needed.
The assembled model is 250mm tall.
Enjoy, and decide if you want to 'drink me' or 'eat me'!
(Do not let the abundance of notes scare you away from building this model. I just like to cover all bases due to the different skill sets of makers)
Printer:
FlashForge Creator X
Supports:
No
Resolution:
.2mm
Infill:
10%
Filament: See notes below See notes below See notes below
Notes:
Refer to the notes below for helpful printing and assembly instructions.
*One piece does require supports
Colors (there are no multiple printed pieces)
Light Blue: (3D Solutech ABS - aqua blue
dress_bottom
dress_top
dress_top_middle
eye_blues (contains 2 pieces)
..
Skin: (ESUN ABS- medium skin)
arm_right
arm_left
head
..
Yellow: (Mad Maker PLA - sunshine yellow)
hair_front
hair_back
cake_b
..
Red: (Bumat ABS- red)
mouth
cake_c
..
Brown: (xxx ABS- brown)
table_legs (contains 4 pieces)
table_top
table_support
eyebrows (contains 2 pieces)
flask_top
..
Green: (Amazon Basic PLA - green)
base
..
Black:
eyelashes (contains 2 pieces)
eye_blacks (contains 2 pieces)
eat_text
drink_text
hair_bow
shoes
..
White: (ESun ABS - white)
petticoat
apron_bottom
legs
feet
drink_back
eat_back
apron_belt
apron_bow
apron_top
cake_d
eye_whites (contains 2 pieces)
..
Translucent Green: (XYZ PLA - translucent green)
flask_bottom
..
Pink: (ABS - random filament)
cake_a
..
Any color (hidden pieces)
hair_pins (contains 2 pieces)
cake_pin
belt_pin
bottle_pin
..
Printing and assembly tips
Printing tips
1-No supports are required except for the one piece, dress_top. I used supports defined by the slicer as 1mm with overhang 60deg (or 30deg depending on how your slicer looks at it)
2-Use your judgement for brims/rafts. Personally, I did not use any brims or rafts on any of my pieces.
3-The parts should fit nicely when printed cleanly or with a slight first layer squish. For this model, in particular, be sure to clean off any first layer squish. Most first layers are hidden inside the model when assembled, so even if the cleanup is 'ugly' it should be hidden. .A reminder, first layer cleanup also applies to the inside edges of parts as well. Holes for pins that are on the print surface should be clean of first layer squish, as well as the pins.
4-Beware of many small parts. I've found that once the small parts are loosened from the print bed, I use a piece of masking take to pick them up and store them (keeping them on the tape) until needed. I have not misplaced any pieces since I started doing that.
5-The hair_front piece is modeled as one part but actually prints as to separate parts with a tiny gap between them. Don't worry, and just assemble the two parts with the rest of the model
..
Assembly tips:
1-I used both E6000 sticky craft glue and thick superglue to put this model together. Each glue has it's advantages.
2-As a modeler, I believe that Alice's eyes are very important but being small there is little room for error. Clean off as much of the brim as possible on the eyelashes and eye_whites. Push/glue the eyelashes in first. The eye_whites should be placed next, but if you have any problem, either continue to clean the brim or make them a tad smaller.
*3-The dress_top_middle should be glued to the apron_top. Then the apron_top should be attached to the dress top (no glue required) and then force-ably pushed into the hair_front until it snaps into place, again, no glue required but this is a one way only snap so be sure to clean the hidden brims up before joining pieces.
4-The base has guide dents for the table legs and Alice's shoes. The parts have some wiggle room, so be sure they are aligned properly with the base before setting the glue.
5-Refer to the assembly diagram as well as the uploaded pictures for putting the model together. The model is meant to be glued.
Do not hesitate to ask questions, feedback is essential to making better models.
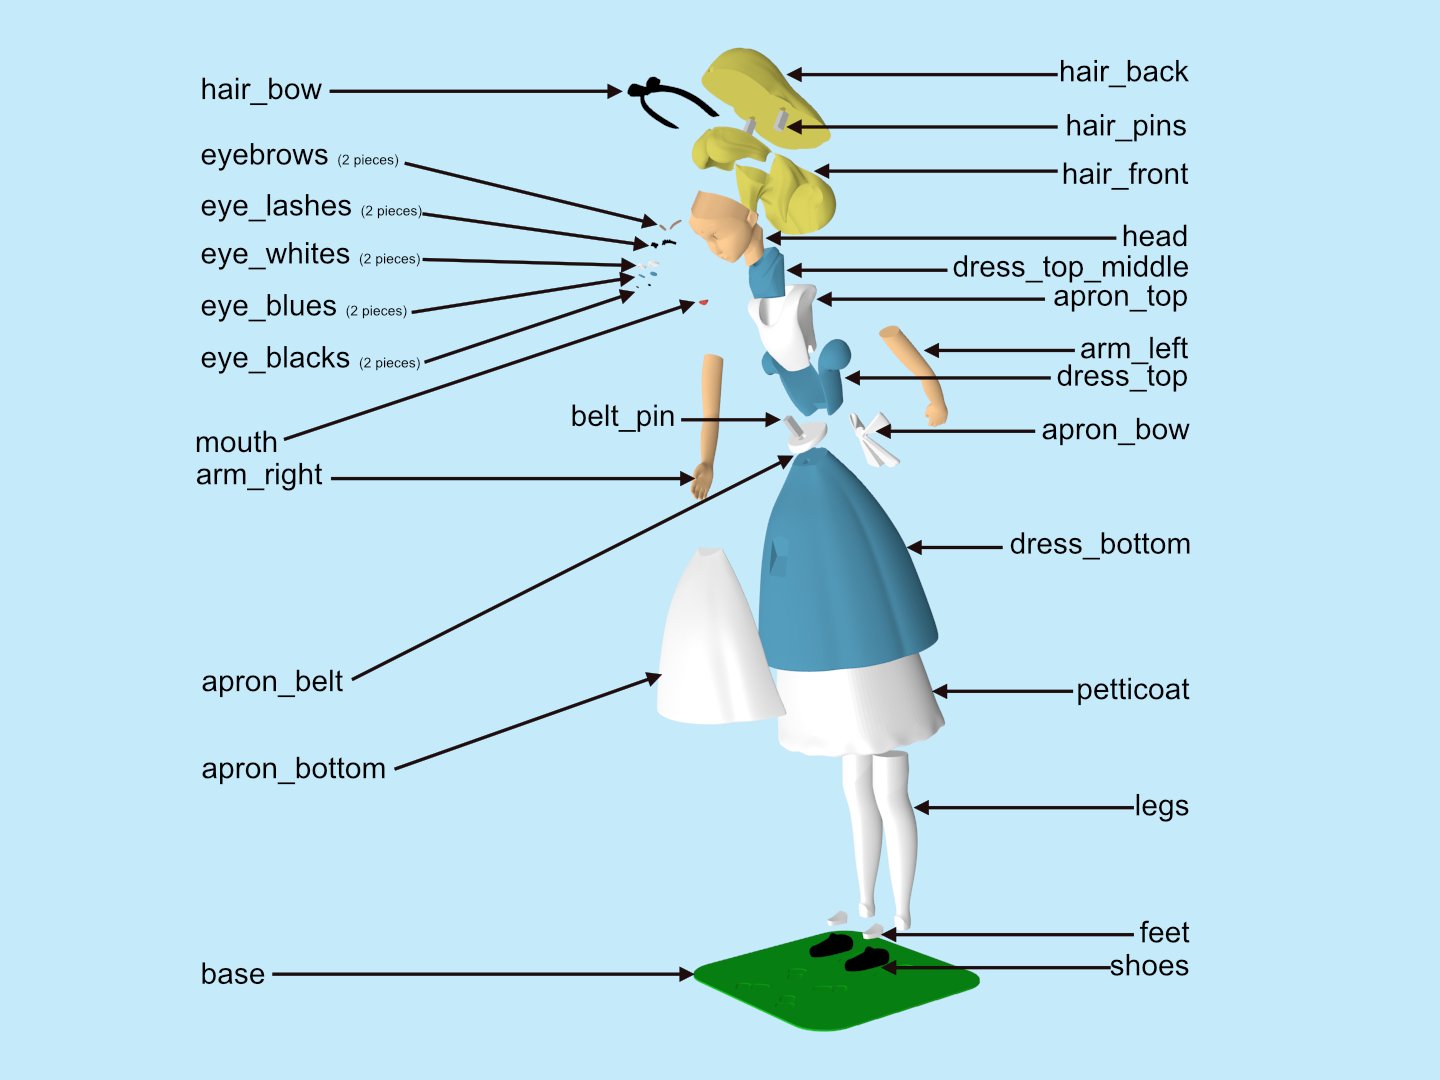
Alice assembly diagram
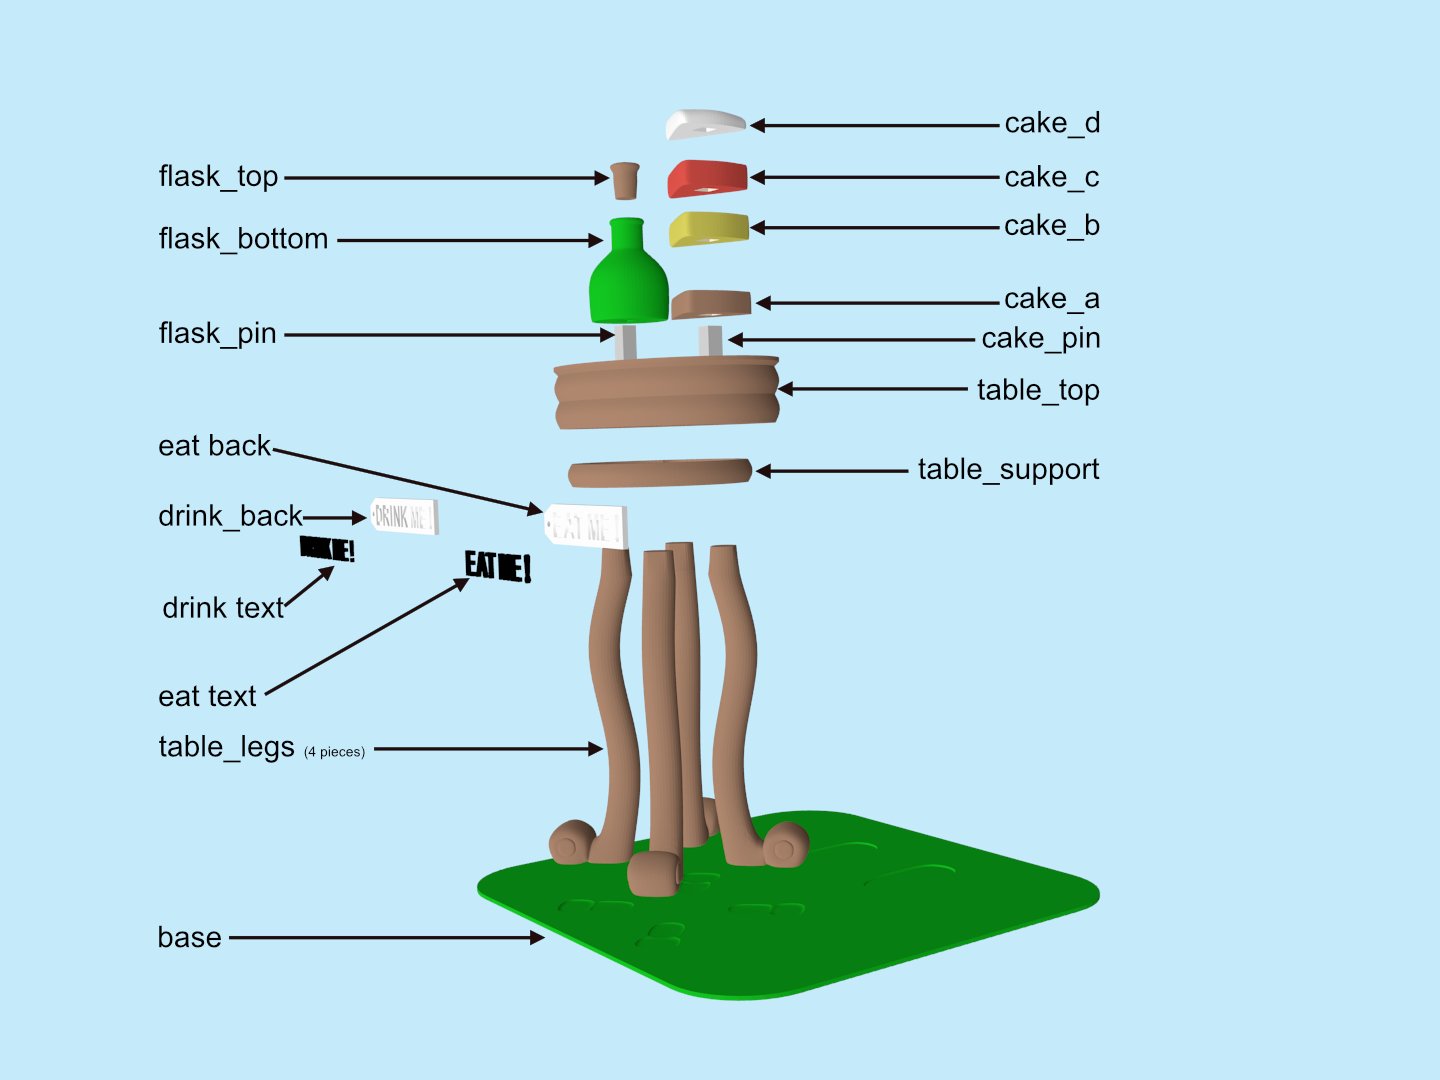
Accessories assembly diagram