by ecoiras
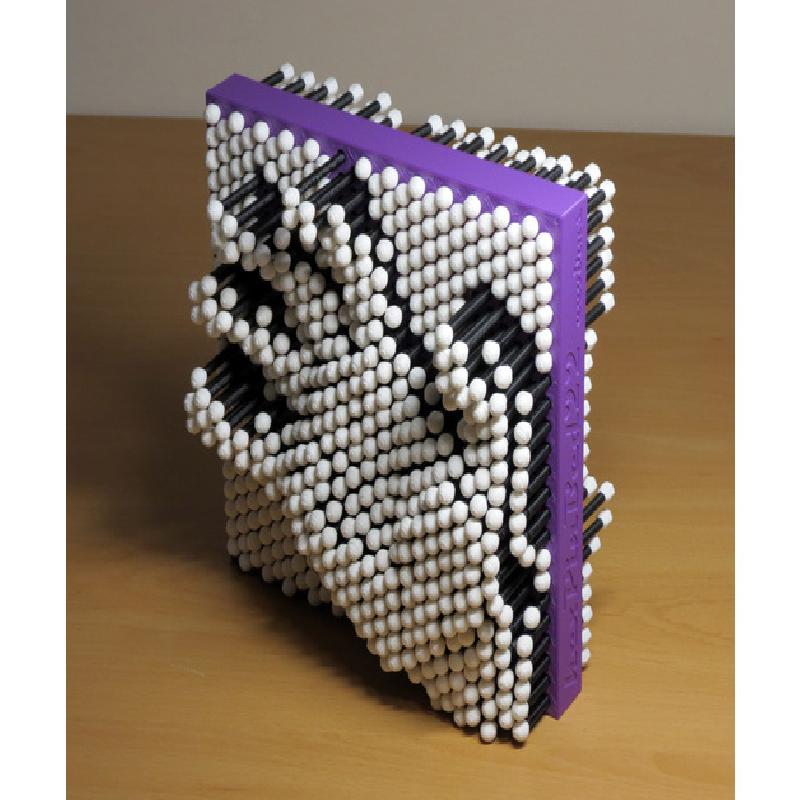
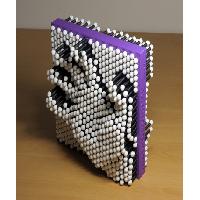
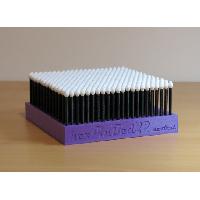
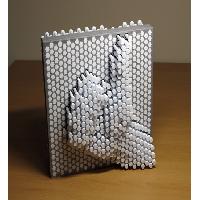
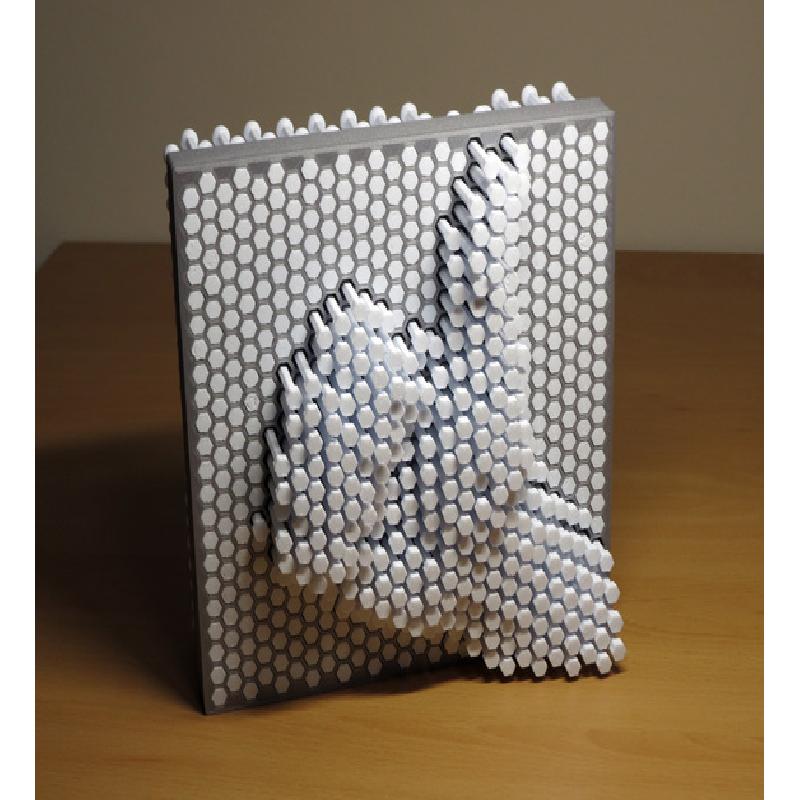
Here it is: a printable pin bed!
I wanted to do something like this for some time but it turned out to be quite tricky to get the design right for 3D printing. One key point is that the pins have to be printed standing up, which reduces their structural strength quite a lot. Printing the prints horizontally makes them much stronger (I tested it), but that means having to fill the bed one pin at a time, which will very quickly drive you mad (I tested it too).
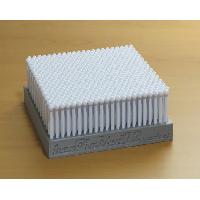
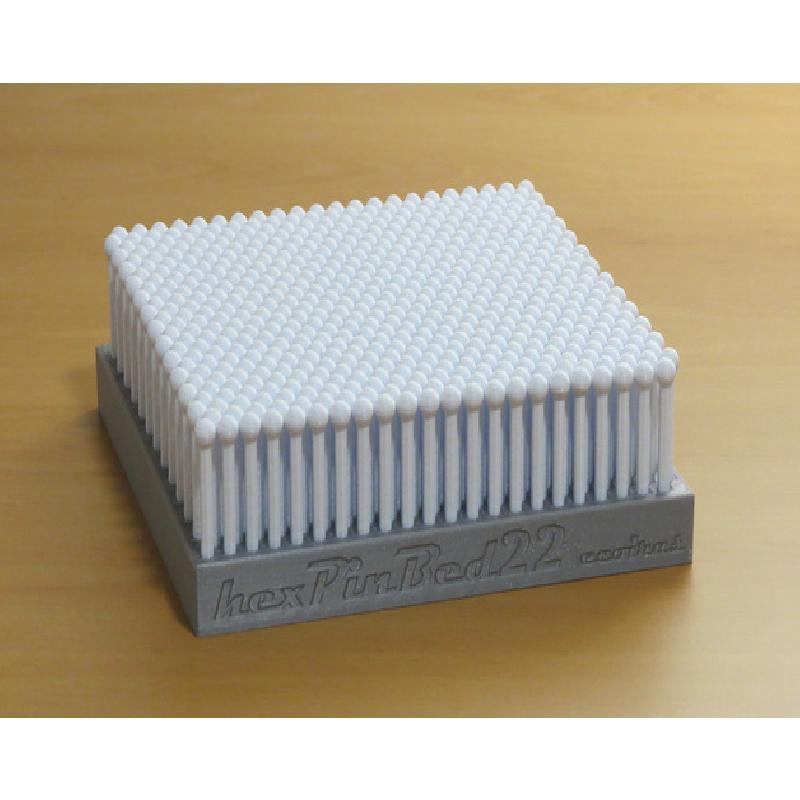
To make the pins strong enough for actual use they have to be reasonably thick, which means the bed is "low resolution" (not many pixels per square inch). To compensate a bit for that I used hexagonal packing for the pins, which increases the density about 12% over a square grid pattern.
I experimented with different filament materials and the best combination I have found is PLA for the bed and PP (polypropylene) for the pins. PETG is also not bad for the pins; less tough but better looking. PLA or ABS pins are too brittle for playing with the thing, but for ornamental use they will work OK.
If you plan to print this thing to play with it go for PP filament: the pins can bend a lot without breaking. Unfortunately PP warps a lot, so using it for the bed is not a good idea.
On the other hand, PLA will give you the best possible finish and zero warping so it's best for printing the bed. Also, most curiously, it will give you the best sound: the pins moving as you tilt the bed make a sound that I find quite satisfying; kind of like ringing sea waves maybe?. Best sound is for PLA bed and pins, then very far behind ABS, PETG and PP.
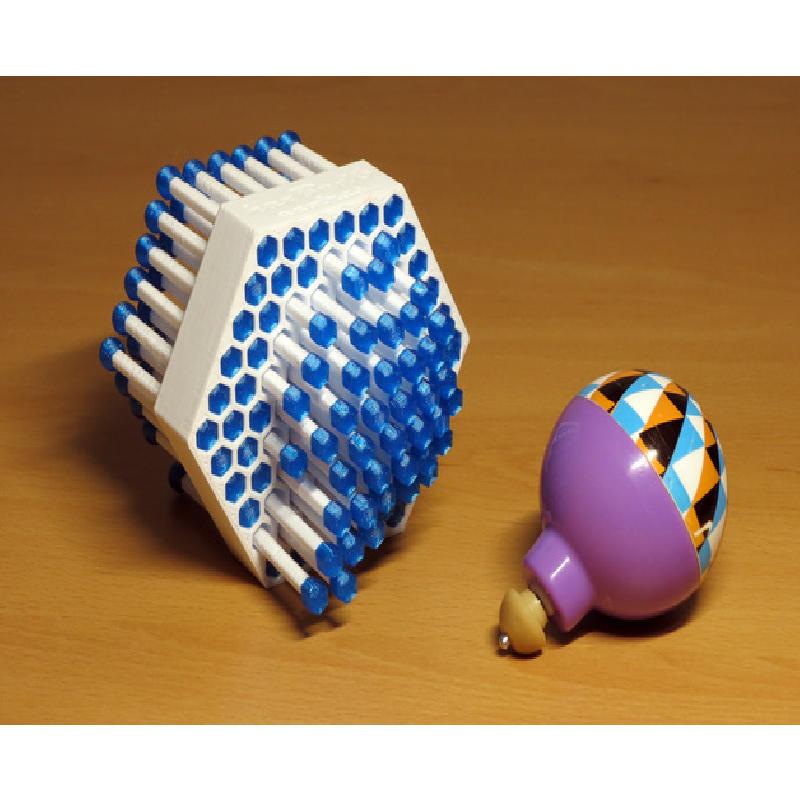
What's on the photos:
The square purple bed is PLA and the black and white pins are PP.
The square silver bed is PLA and the white pins are PETG.
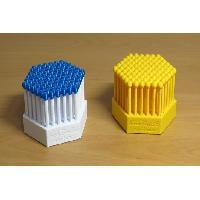
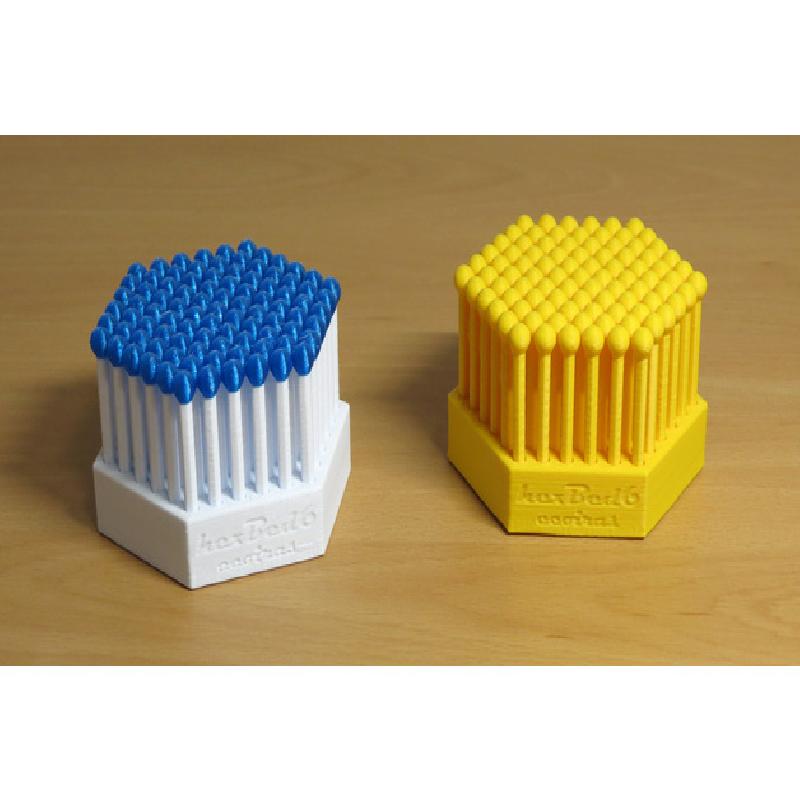
The hexagonal yellow bed and pins are all ABS.
The hexagonal white bed and the white and blue pins are all PETG.
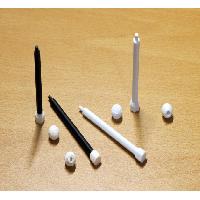
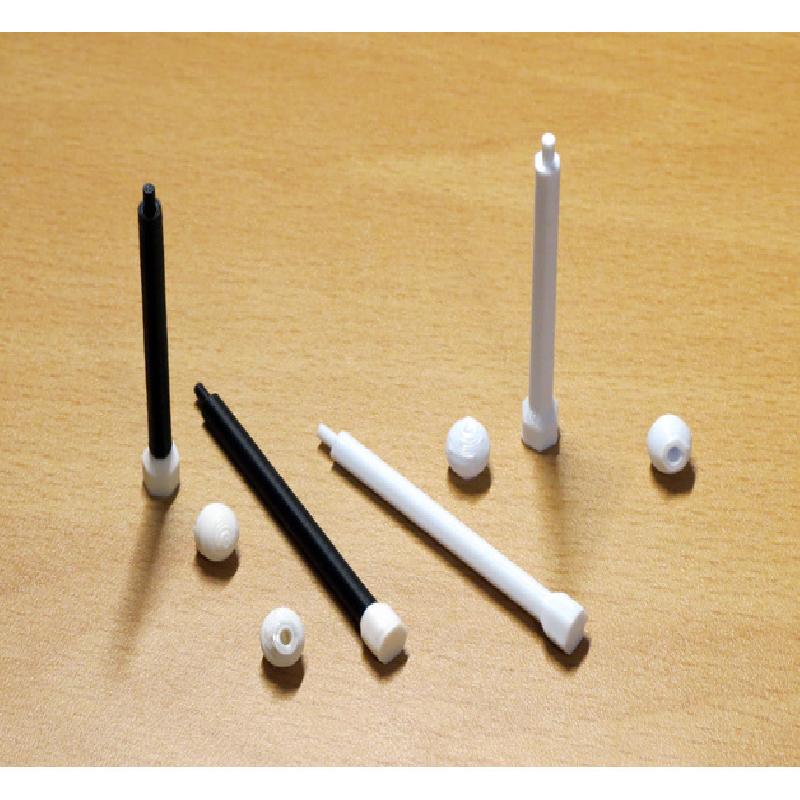
The black and white replacement pins are PP, the all white ones are PETG.
How to print:
The first thing to determine is if your printer and its settings will be ok to print these models. To do that print the test_bed_2x2.stl file. If the pins can move freely as you flip the bed then your printer can handle the 0.3mm spacing between the pins and the bed. If not, you will have to scale up the model or edit the included Fusion360 project and change the parameter slack to 0.5mm or more.
You can also use the test_bed_2x2 for trying different filament materials and printing parameters to see what works better for you. I found 0.3mm layer resolution with 10% infill best for printing the bed, and 0.3mm 0% infill with 3 perimeters best for the pins.
The hexBed6 hexagonal bed is probably too small to be useful for pin art. I did it as a test while deciding bed shapes and parameters but it's kind of cute, so there it is. Should be reasonably easy to print if the test_bed_2x2 went OK.
The big hexPinBed22 square bed is a very demanding print. It took me about 3 days to print at 0.3mm layer resolution and normal speed. That meant printing the bed in PLA, then printing half the pins in PETG/PP, pausing for inserting the bed over the half pins, then printing the rest of the prints. If you print the whole thing at once you might save some time.
In any case, make sure you have enough filament before starting. Your slicer will tell you exactly how much will be needed (about half a roll for the pins and perhaps a bit less for the bed).
Also, make sure your nozzle won't die mid-print, as it happened to me while printing the black pins for the purple bed. I had to change the nozzle while pausing the two day print, with very little space to work and hoping the head wouldn't be displaced too much that the whole thing was ruined. I had to replace about 40 pins in the end.
Replacement pins should be printed standing up as well. Putting them together usually means just inserting the pin head on the body, with no need for glue or anything.
A technical note in case you don't have multiple extruders but you still want to print the bed in one material and the pins in a different one: probably you should replace the M600 commands for filament swap in your gcode by M600 Z40.0 so that the printer head moves up high enough for you to have enough clearance to insert the bed over the half-printed pins without touching the extruder nozzle.
Enjoy!
Printer Brand:
MK3
Printer:
Rafts:
No
Supports:
No
Resolution:
0.3mm
Infill:
10% bed, 0% pins (3 perimeters)
Filament: PLA for bed, PETG or PP for pins