by lulu109
This project started when I saw this type of Wheel in Hardelot few months ago.
It made sense to make a big project with a small 3D machine to show it is possible.
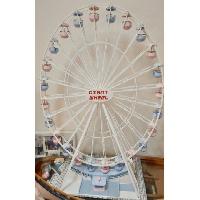
After a few evening to look on internet to find some drawings and pictures of real things, my choice was made for the RR35 from mondial Rides in Netherland.
This company made the Paris Wheel owned by Marcel Campion.
RR35 is the smaller model of this company but then have the type of pod I was looking for.
RR35 is 35 meter high then I decided to make mine scaled at 1/35.
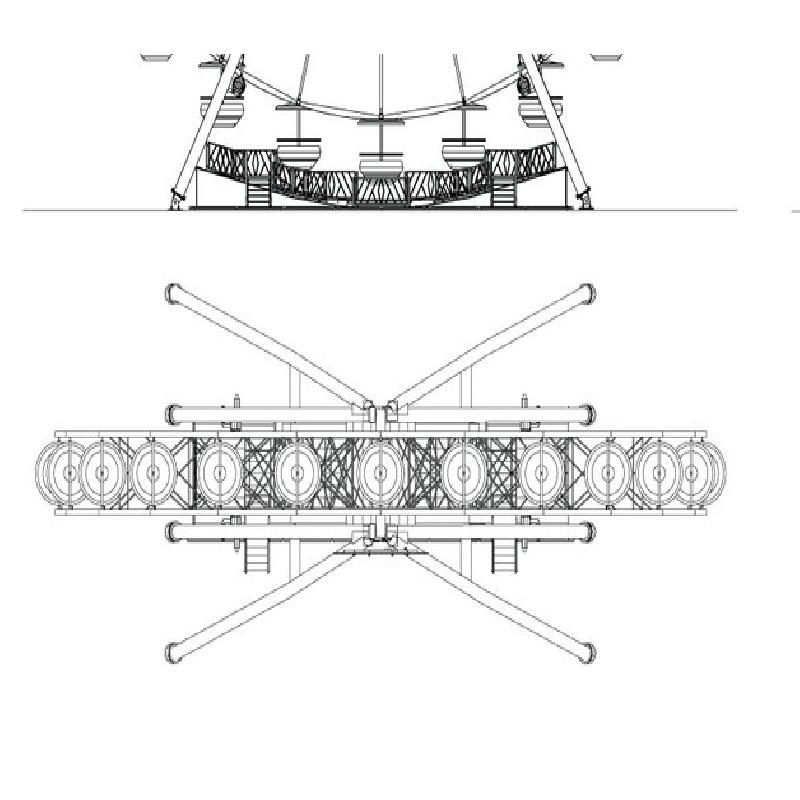
My project was made on SOLIDWORKS for the design and printed on my stock CR10.
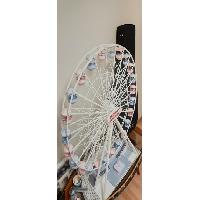
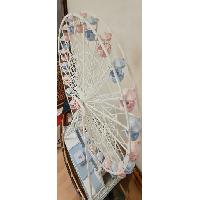
The wheel is quite big 1 meter tall and almost the same width.
For those who always tune the bed leveling, be aware that I made the bed leveling before starting the project and never tune it again after the hundreds of parts printed. Tuning was made with paper sheet and that’s all. Leroy Merlin Mirror is on the bed.
For those who always complain with part adhesion on the bed, be aware that I use Scotch glue stick on the bed : one time before starting and a second time on top of the first one after the wheel and legs before starting the pods and ground structure. That’s all.
This machine do not require so many adjustment from my point of view.
All prints were made with PLA @ 0.2 mm layer. speed 45 mm/s, bed 60 °C and depending of the filament, around 225 °C. Pods required support. Infill should be 20% most of the time and should be increase for the legs. Mine seems to me a little too much flexible with 20% but it works.
Most of the assembly is made with Screw M2 x 12 mm 45° head. You need quite a huge number but it is not so expensive. French supplier here : https://www.bricovis.fr/std/accueil.php
You need also some M2x20, some nuts M2 and a few M3 screws for the legs if you want to use screws. You can also design some 3m rods to fit inside the assembly.
You need also some M3 x 8 mm no head screw to join both parts of the wheel spokes.
This project is design with holes for screws a little bit too small because I prefer to drill at the exact dimension. Then you will need 2 & 2,5 & 3 & 4 mm drills.
There are some ball bearings, for pods vertical rotation, for pods rotation during wheel rotation, and for wheel rotation.
On the pods you need 48 : 604ZZ 4x12x4
On the wheel junction connectors you need 48 MR63ZZ 3x6x2.5
On the wheel main rotation 2 604ZZ 4x12x4
These can easily be found on Ebay
You will nedd also some 4mm Rods an 3mm rods
This project is not finished on the Electronic point of view but complete on the construction point of view. It can run with 5V power from a small cell phone power pack or plug to a cell phone USB charger. the USB power pack is located in the ground structure.
Rotation is made with a small geared motor already used in the wind turbine project. This time gear ration is different to provide 2 RPM which is the maximum speed on the RR35 data sheet.
You can find it on Ebay : N20 Micro Gear Motor 6 V -100 tr/min
In the files, parts are stored in Zip files per function then you can identify which parts is going where. Looking to the pictures it will also help.
For final assembly you should use a plate to have a good positioning of the leg. I suggest printing the ground structure also before fitting the ground connectors definitively. It required moving some leg ground plates to adjust with the ground structure.
I would like to add some people scaled at 1/35 but did not found yet. Playmobil people should fit then if you have childs playing with playmobil, and enough space ...
I will add some files when Arduino nano will be ready to control some lighting and rotation speed. I want a ramp up and down and stop always in same position like the real thing.
Hope you will enjoy this project.