by jim2386
I was asked to test IC3D Printers new prototype UV resistant PETG. I decided to create a birdhouse to hang outside. The claim is that is resists UV breakdown for 3 years. If you'd like to print and build your own birdhouse, now is your chance.
See the video in the instructions below to see how to print the parts and assemble them. I think it turned out really well! If you print it and/or have success in getting birds to nest in it, let me know!
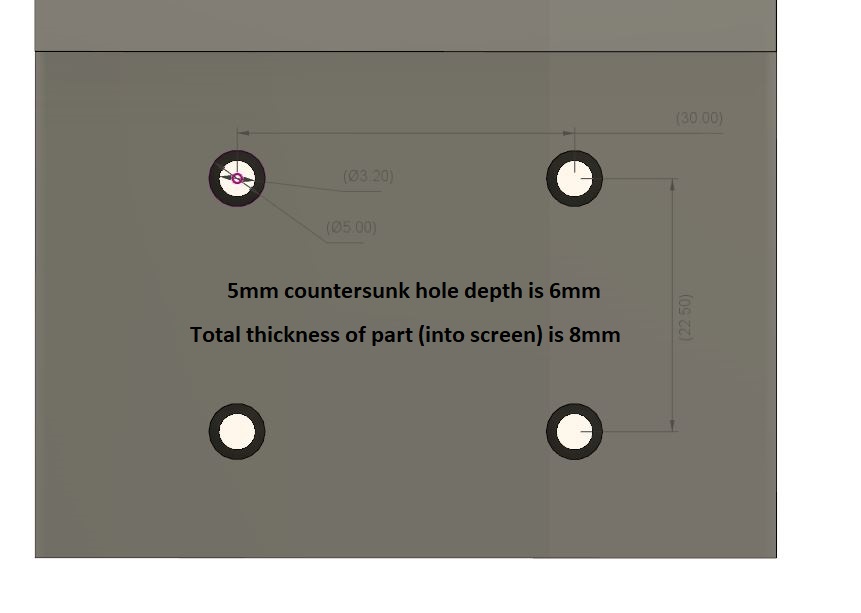
I've also included the bracket hole spacing dimensions and bracket thickness so you can create a custom mounting bracket to assist in hanging your birdhouse wherever you want!
Printer Brand:
LulzBot
Printer:
Mini 2
Rafts:
No
Supports:
Yes
Resolution:
0.2-0.3
Infill:
20%
Filament: IC3D UV Resistant PETG Grey
Notes:
The only part that needs a tiny bit of support is the roof. Stand it up on end on your build plate and the screw hole is the only area that needs a small amount of support. The rest of the parts, when oriented correctly, do not require support.
Cap.stl needs to be printed twice. All other STL's need to be printed once.
Perch installation is optional depending on how you want your birdhouse to look. I've also researched and found some bird prefer no perches since this is a place for predators to grab onto.
Additional Parts Needed
10 x M3 heat inserts: https://www.mcmaster.com/94180a331
6 x M3 x 6mm SHCS: https://www.mcmaster.com/91290a111
4 x M3 x 10mm SHCS: https://www.mcmaster.com/91290a115
Tools:
-Soldering iron for installing heat inserts
-M3 Allen Key
~5.1mm and ~3.2mm drill bits or something close.
If using PETG, you'll want Scigrip Weldon #4: https://www.amazon.com/SCIGRIP-Acrylic-Solvent-Cement-Water-thin/dp/B000KZUTEM
If using PLA or other materials, epoxy or super glue should be fine.
Assembly Video
Watch the video below as I show how to assemble the birdhouse.
The back of the birdhouse uses a bracket specifically designed for my fence in my backyard. If you'd like to make your own bracket, the hole spacing is shown in the image below.
