by TheMaker77
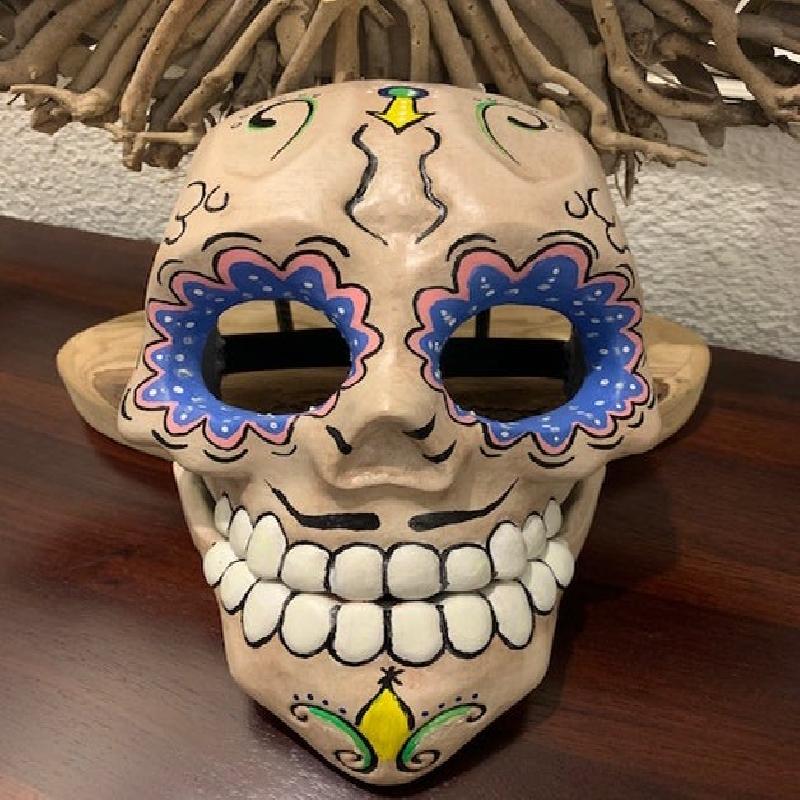
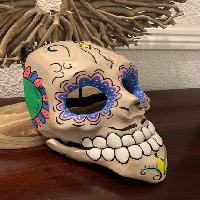
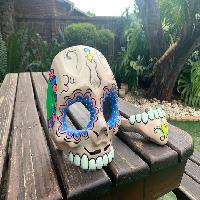
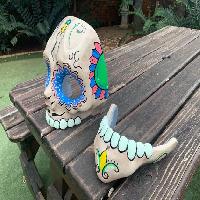
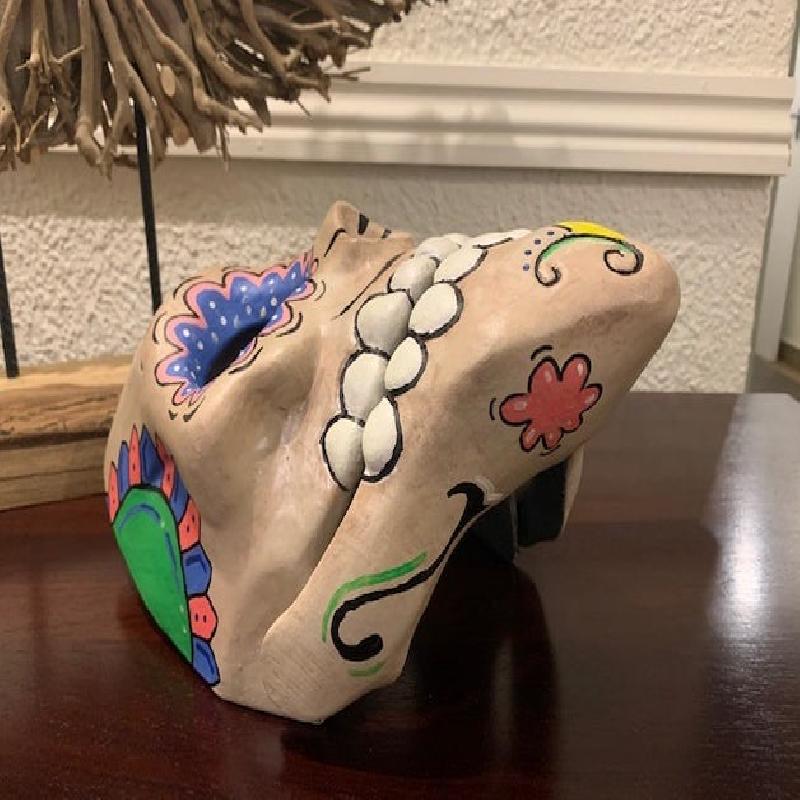
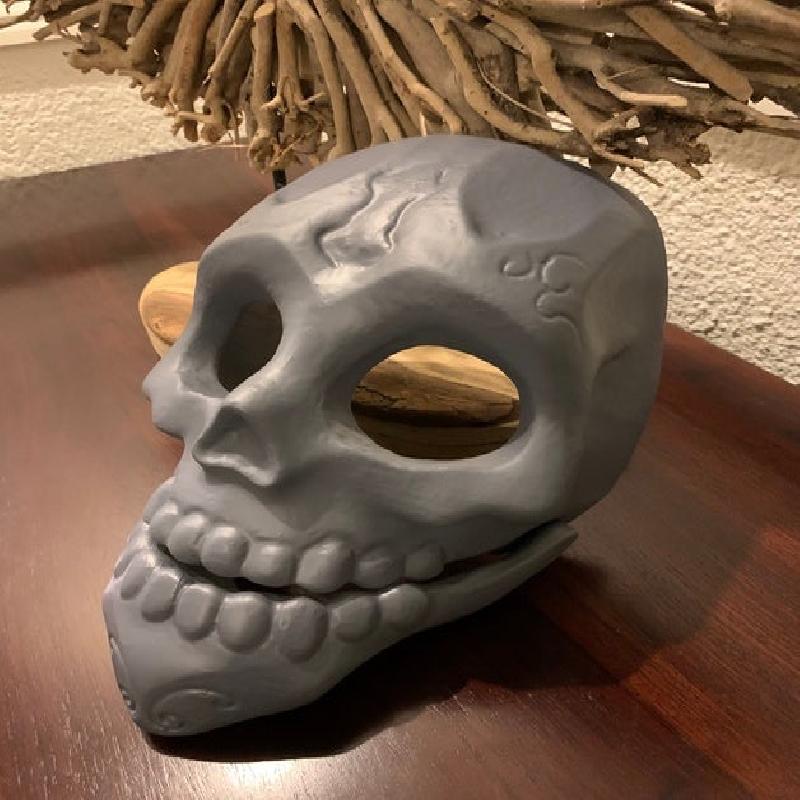
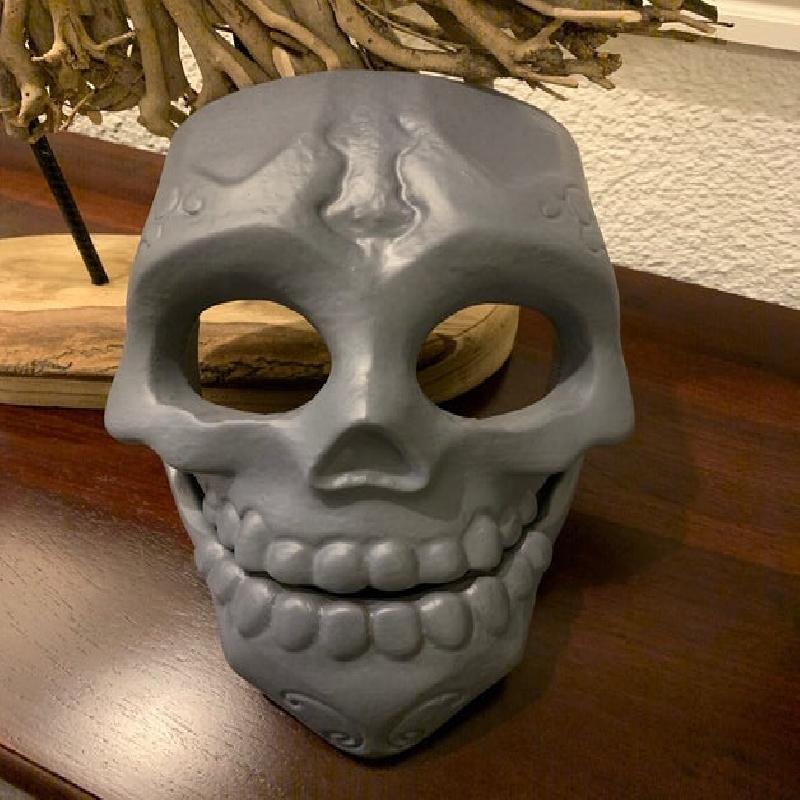
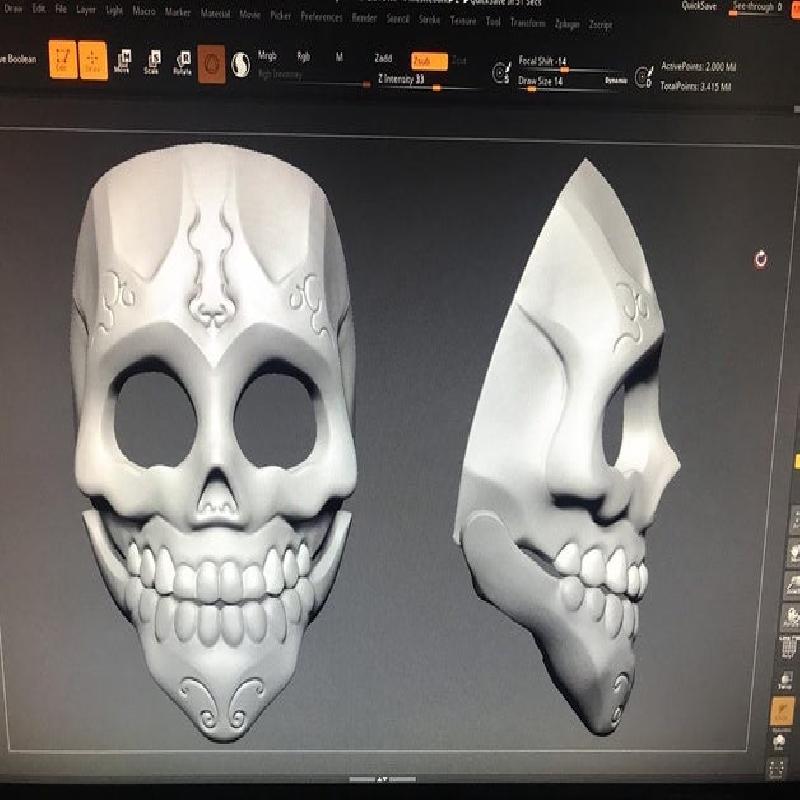
Designed by a very talented game designer friend of mine, this beautiful day of the dead mask will suit any day of the dead festival ! decorate as you please, wear with pride and show off to all family and friends.
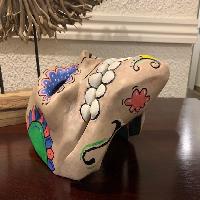
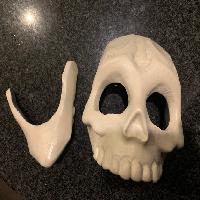
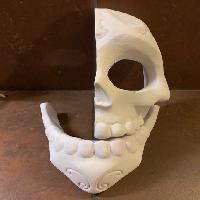
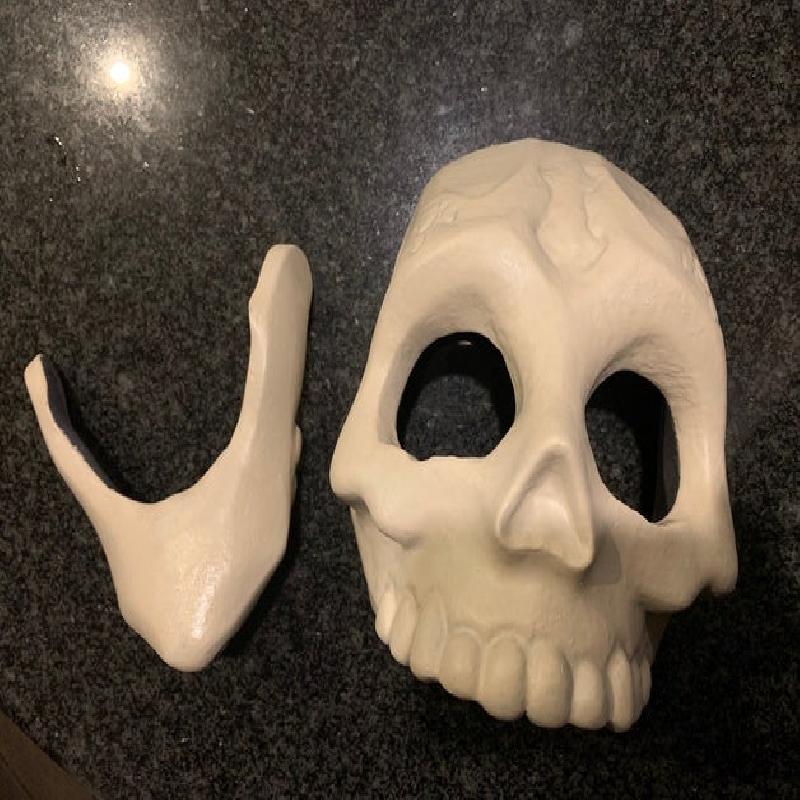
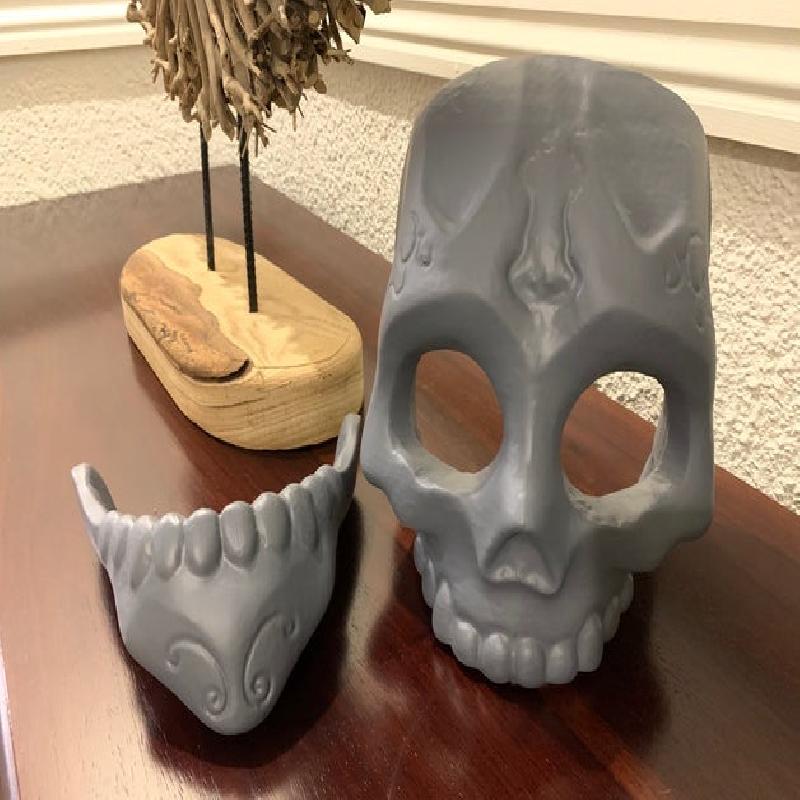
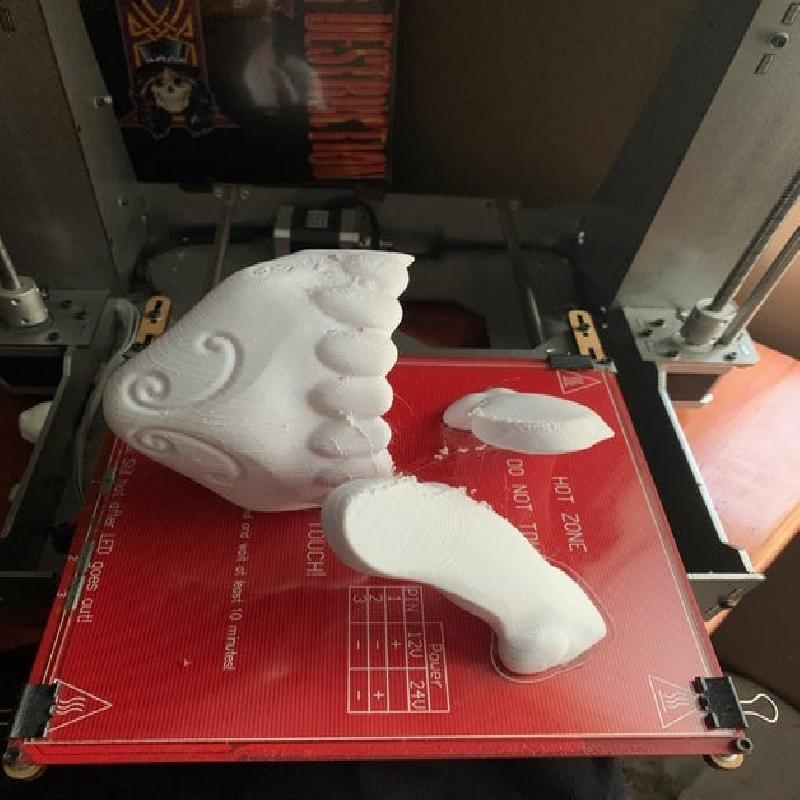
This design features a head and separate jaw that can be brought together with a hinging mechanism of your choice, providing you with a dynamic mask design to wow anyone and all. The files of the mask are rather large and I found that printing the mask at 60% scale allowed for a perfect fit for a head size that has an ear to ear dimension of 170mm and a chin to top of head dimension of 250mm.
View his work visit: https://www.artstation.com/xvii
Feliz Día de los Muertos!
Printer Brand:
Prusa
Printer:
Rafts:
No
Supports:
No
Resolution:
0.2 mm
Infill:
10 %
Filament: Cron PLA white
Notes:
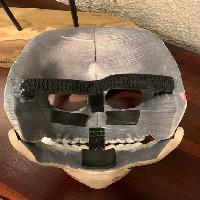
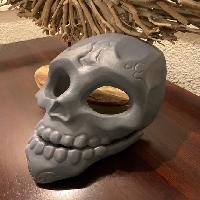
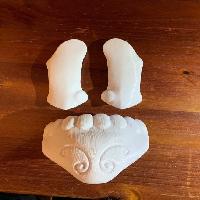
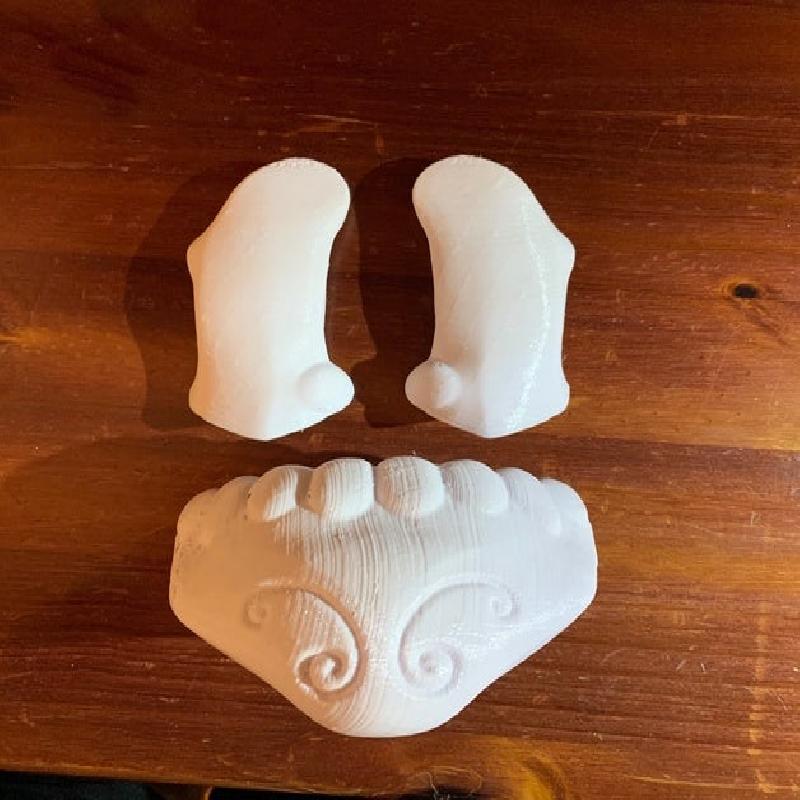
The uploaded files include the full mask and jaw files. Depending on your print volume this file can be sliced into smaller components or be printed as one part. Clever slicing of the files into smaller components will allow the mask to be printed without the need for support material; this will save a lot of filament but will require seems to be closed off for aesthetic appeal.
printing in PLA will make sanding easier and will make the mask more durable and resistant to sunlight if the mask is worn during a hot day.
Post Processing Procedure
My aim for the post processing was to obtain a smooth injection molded look, and I was able to achieve this by following the following steps:
Step 1:
Print the files in a manner that bests suits your print bed size. In my case the print files were sliced up to allow the mask to be printed on my 210mm x 210mm print bed.
Step 2:
Sand the parts for a clean finish. various grits of sandpaper was used until a desired finish was obtained. Wet sanding is a good method to use to obtain a smoother finish. Making use of a rotary tool can also help speed up the process. the individual pieces were sanded before fixing them to one another for handling convenience.
Step 3:
Glue all the parts together using your bonding method of choice. For PLA I found that using cyanoacrylate yields the best result. Should you print the mask in ABS, some acetone could be applied to both of the bonding faces, and once brought into contact with one another the two parts should fuse together.
Step 4:
Cover the parts with a flexible wood filler to close off remaining blemishes left after sanding and to close off all seams. Apply generously, but not too much as it will become a pain to sand if woodfiller was applied in too thick of a layer. Other fillers such as bondo or spot putty could also be used to obtain the same result, I found wood filler to be the cheapest and easiest to sand.
Step 5:
Sand all surfaces smooth. Once again varying grits of sandpaper, and both dry and wet sanding methods work well.
Step 6:
Apply one to two layers of Smooth On XTC3D. This helps create a beautifully smooth, durable finish; and covers all remaining gaps and layer inconsistencies. A fantastic product for all prop making uses.
Step 7:
Apply a layer of Rustoleum (Rattle can) primer. This is optional, but helped create a clean surface onto which to apply the final paint layers.
Step 8:
Paint the mask in any fashion that is desired. I made use of water based PVA paint as this dries quickly, cleans easily and creates an even surface on all parts without showing brush strokes. Of course there are many many methods by which paint can be applied. Air brushing, spray painting, paint rubbing, etc. Find a method that suits you or combine them to obtain any finish desired. get creative.
Step 9:
Apply a layer of clear lacquer to seal in the paint finish and protect the finish from scratches and handling damage.
Step 10:
Fasten the jaw piece to the face piece. I wanted a dynamic jaw and as such fastened the sides of the jaw to the sides of the face using velcro (hook and loop) that was hot glued into position. On the inside of the mask an elastic tape was hot glued to both the face mask (behind the teeth) and the jaw (behind the teeth). When worn the chin seats on the inside of the jaw and by opening the mouth the jaw will move down, and by closing of the mouth the elastic tape will bring the jaw back up. The velcro hinge was a shot in the dark, it was meant to be a temporary solution to a more permanent hinging mechanism, however this turned out to work extremely well, and won't be changed in my design.
Step 11:
Fit the mask to your face and run elastic tape from the left side of the face to the right side of the face. Glue the elastic tape in place to create a band that will allow the mask to remain on your face when being worn. Should there be any spots of the inside of the mask that puts unwanted pressure on any parts of your face, Glue some foam or soft material to the inside that will make wearing the mask a whole lot more comfortable.