by 4MULE8, published
In the words of AuntDaisy, "Comura looks fun!"
If you built a home made 3D printer you're probably already a nerd, but if not then printing a moveable model trilobite will definitely earn you some nerd points! (Nerds are sexy these days, right?)
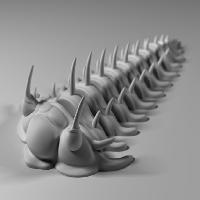
I spotted AuntDaisy's excellent "Trilobite Articulatum" design http://www.semaker.com/productdetail/2639about a week ago, and immediately thought about the other wacky and excellent trilobite fossils. Without having finished reading the description I was already looking at google images of Comura, then came back re-read the description and realised we'd had the same idea!
Assembly:
The chain clips are designed to lock quite strongly so the segments don't come apart easily, however this makes it a bit more difficult to assemble. PLA will probably snap if you try to force the segments together. ABS might be flexible enough but I haven't tested it.
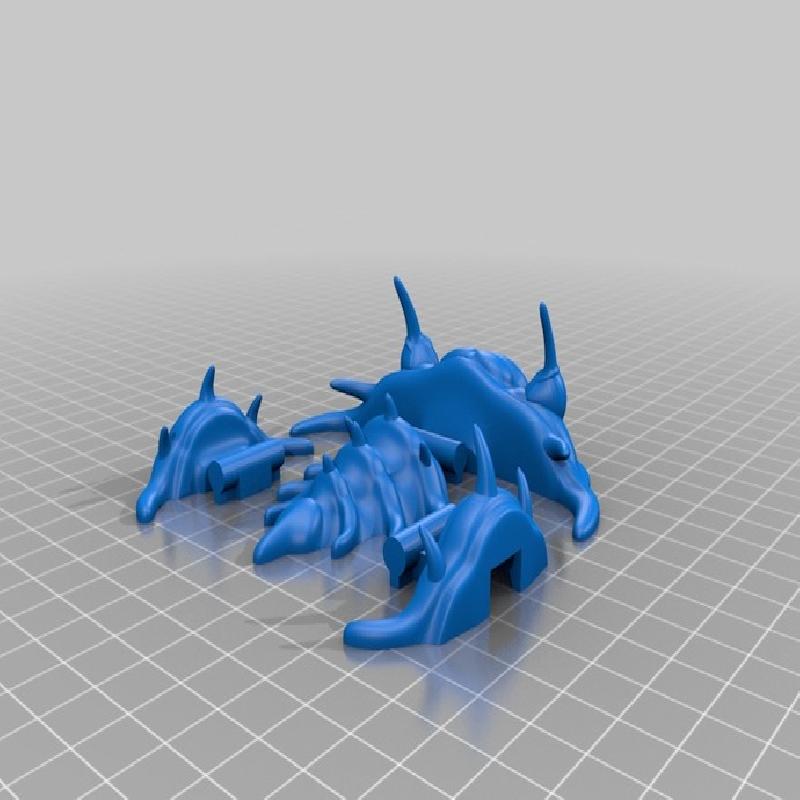
Starting with the largest body segment, heat the wall of the arch enough to soften the plastic slightly (about 60-70 Celsius for PLA, hotter for ABS). You don't want the plastic to melt, just to soften. If you have a heated print bed that's perfect, otherwise a hair dryer should do the trick. Place the head piece on a flat surface and firmly press the heated body segment down over its locking pin. This will slightly deform the tabs on either side of the arch. Quickly turn the model over and, while the piece is still warm, press the tabs back into shape (a small flat-head screwdriver will be helpful). Heat the wall of the second largest body segment and use the same technique to attach it to the other two. Repeat this procedure all the way down to the tail.
Printing:
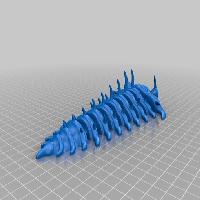
I've split the model into two prints, which are sized to fit onto a RepRap Huxley print bed. The pieces can possibly be rearranged to fit into a single Mendel print. The scale given in the STL files will produce an assembled Comura of 19cm long and 9.5cm wide at the head. I would suggest scaling this model to 100% or greater, as the chain clips might be too weak at smaller sizes.
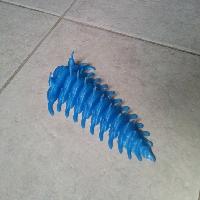
Some of the spines might come out a bit poorly and need some TLC to tidy them up. Printing at a slower speed might help. The spines are the last thing to come out of the printer, so it may help to use use a small fan to cool the plastic more quickly as it exits the nozzle during this last part.