by rodrigo_rc
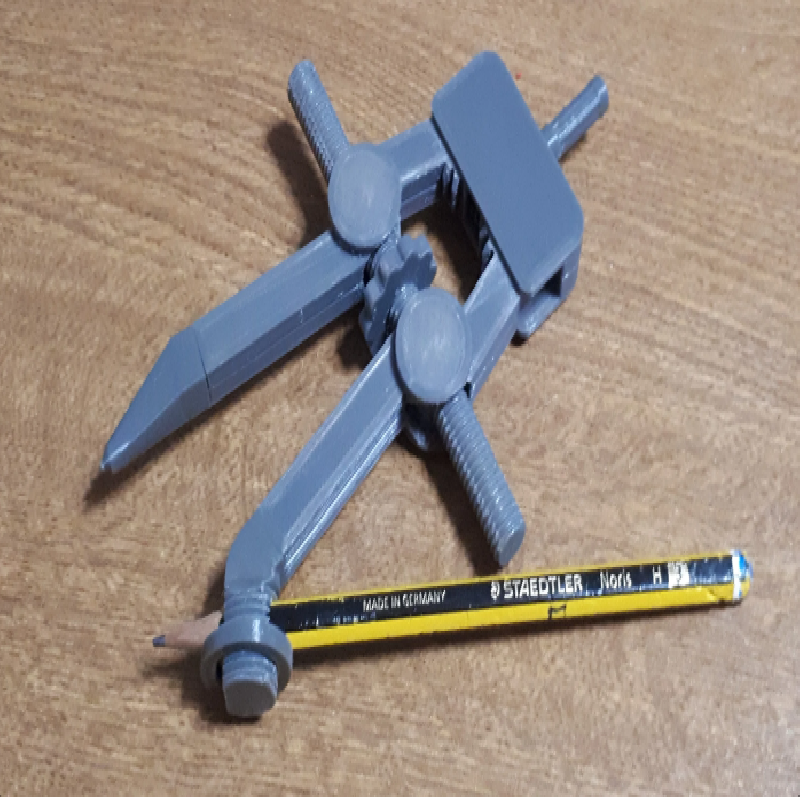
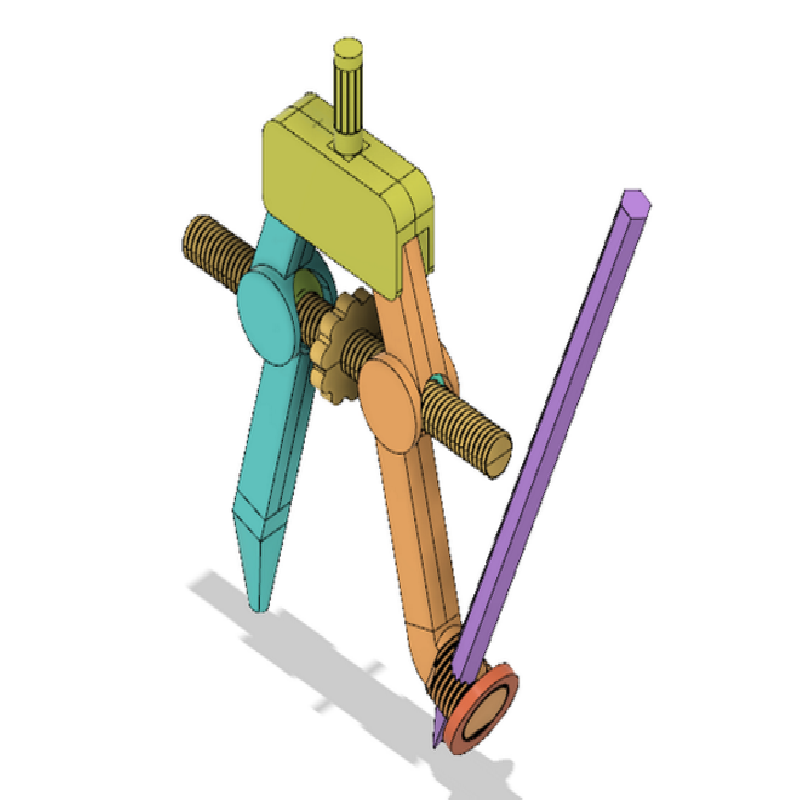
This is a drawing compass designed to be build only with the printed pieces (pencil not included). No need of glue or additional screws.
The pieces are designed to fit exactly, so a good calibrated printer is essential. You may even need to add a bit of horizontal separation to your slicer (-0.05 mm in my case) for everything to work properly.
For a fully assemble you will need one of each piece and 9 clips.
Print Settings
Printer brand:
Prusa
Printer:
I3 MK3S
Rafts:
No
Supports:
No
Resolution:
0.1
Infill:
20%
Notes:
Add a bit of horizontal spacing (XY size compensation) for everything to fix exactly, as there is no extra spacing in the design. Most pieces can be printed without support or brims. The arms may be tricky to print without supports, depending on your printer and your piece cooling. Also, the pen holder can be printed on many orientations.
Post-Printing
Building instructions.
First print the axis: it is split into two pieces: AxisTop and AxisBottom. Use three of the clips to fit them together. Beware! the screw thread on one side is right-handed, on the other side is left-handed. When putting the axis together take care so that the matching screw threads are properly aligned. Then print the left-joint and the right-joint, two pieces each. Screw them on the axis so that they form small cylinders. One of the joints is left-handed and the other right-handed, so they will only fit on one side of the axis. Next the arms. Each arm is split into two pieces and need three clips. Before you put each arm together make sure that the joints fit in the appropriate game in the middle and that it can rotate freely. If they cannot move, use a bit of sanding until it does. It doesn't matter what joint goes to what arm. But be sure that the gear end of both arms are oriented to the same side. The holder is composed of three pieces, without any additional clip. Move the axis until the arms are as near as possible, and put the gear ends in the handle-back axes. Then put the handle-top in its hole and force the handle-front on top until it clicks. Lastly the needle, the pen-holder and the pen-nut are simply screwed into place.