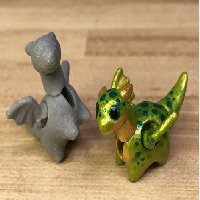
by GreyFluffs
A very small friend for you to print and assemble!
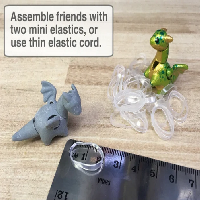
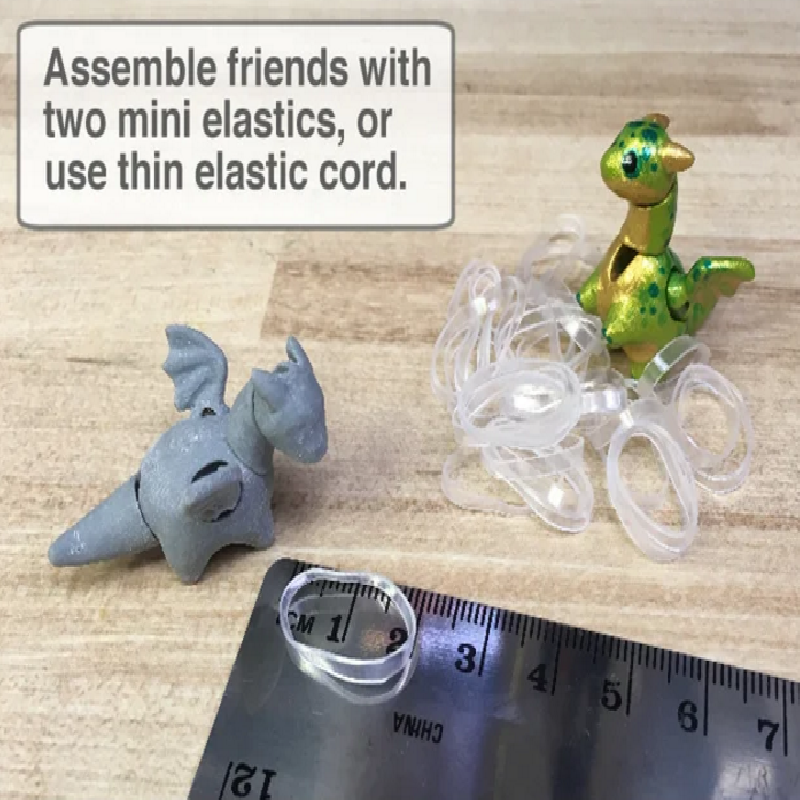
Roughly 5cm from nose to tail, this tiny dragon can be strung together with mini hair elastics, or your choice of thin elastic cord. A nice size for doll houses, hiding in Easter eggs, or keeping you company at your desk.
If you require a larger friend for easier handling and assembly, I would love to see how it turns out!
Print Settings
Resolution:
0.1~0.2mm
Notes:
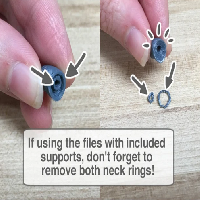
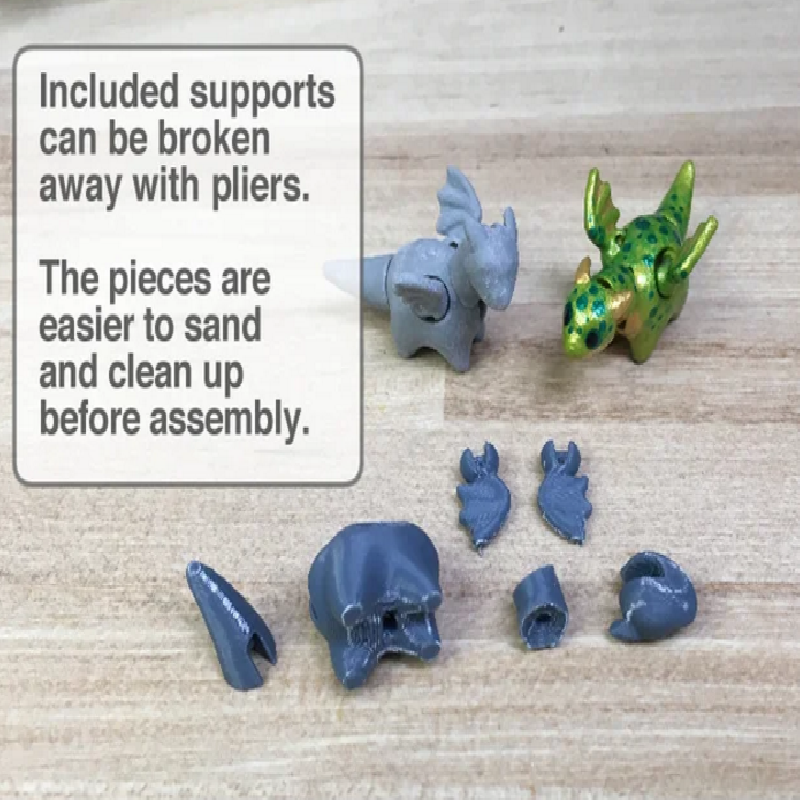
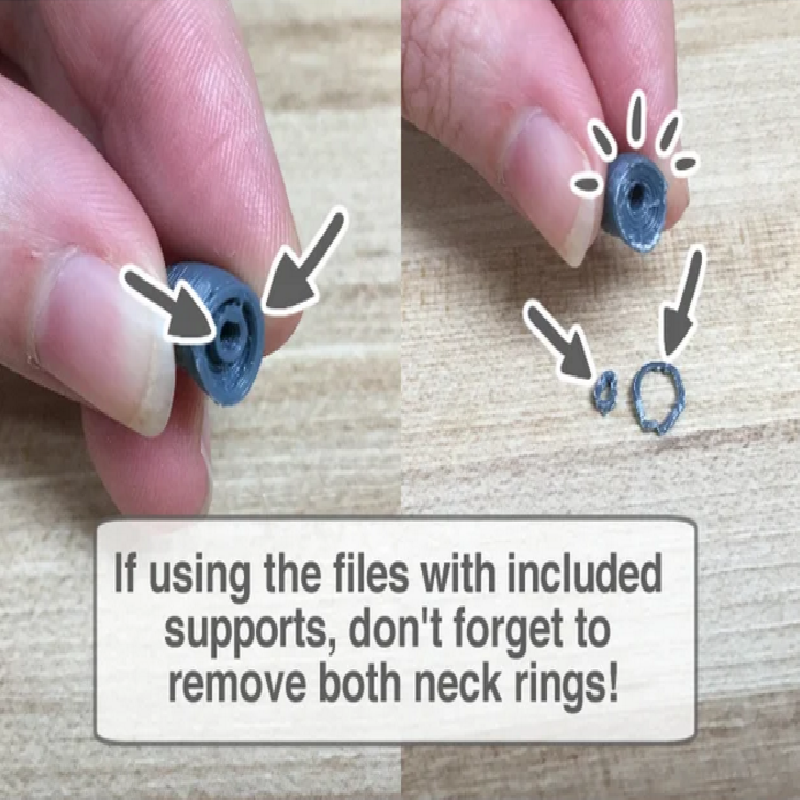
There are two files included for this dragon, the first includes break-away supports I've used on my own ABS and PLA prints. This file will only need a brim or raft, no additional supports, and all six pieces are included. The second file has no supports built in, this can be useful for other types of printers, or if you want to try printing a larger dragon. In addition to the brim or raft, supports will be required, and the elastic channels might have to be cleaned out after printing.
Assembly
After printing and removing the supports it's possible to assemble your little friend right away, but it is easier to sand, paint, and finish the surfaces before you assemble it. I like to use acrylics with a durable gloss coat over top to keep the paint from rubbing as the joints move.
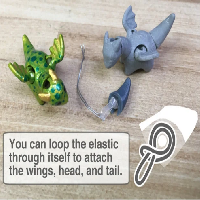
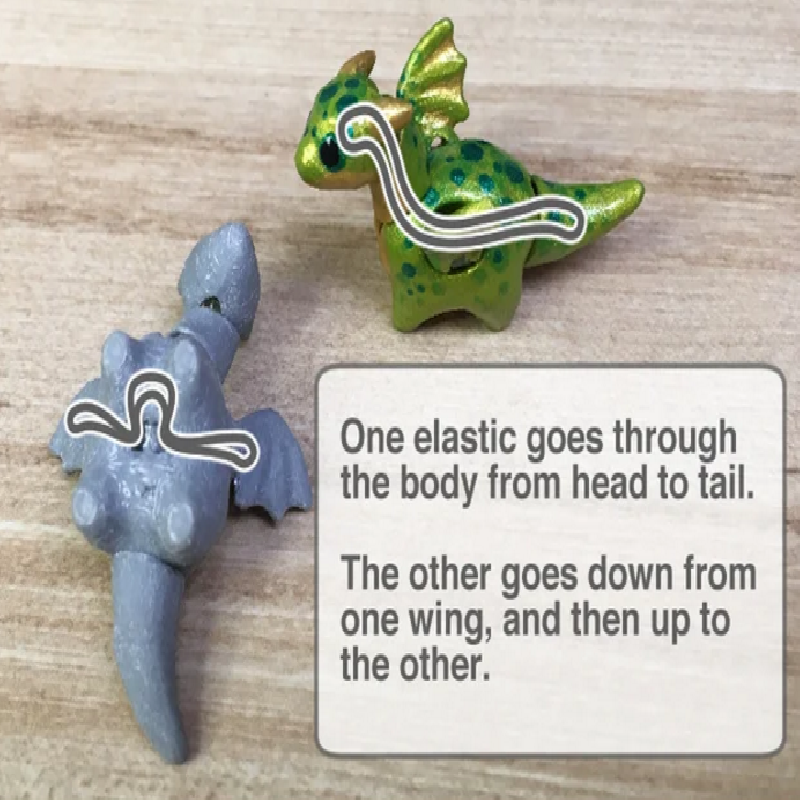
The assembly itself is fairly straight forward, but it can be finicky if you are printing it at it's intended size. The hair elastics I use are roughly 2.5cm and stretch out to almost 7cm, and provide enough tension to hold poses without being tight enough to snap or damage the model. A bit of wire is a huge help for threading the elastics through each piece.
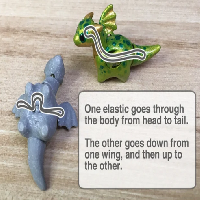
I start by attaching the elastic to the head, threading it through the neck and body, and then through the hole in the tail. To secure the elastic, you will have to take the loop sticking out, and stretch it up and over the entire tail piece. The wings uses the same sort of stringing method, attaching the elastic to one wing, passing it through the body piece and then through the other wing. Lastly, stretching the elastic loop up and over the whole wing piece to secure it. You can use the images included above to help you out with the assembly process! (If you are using elastic cord instead of elastic bands, there is a little bit of extra room under the tail and under the belly for tying your cord ends.)