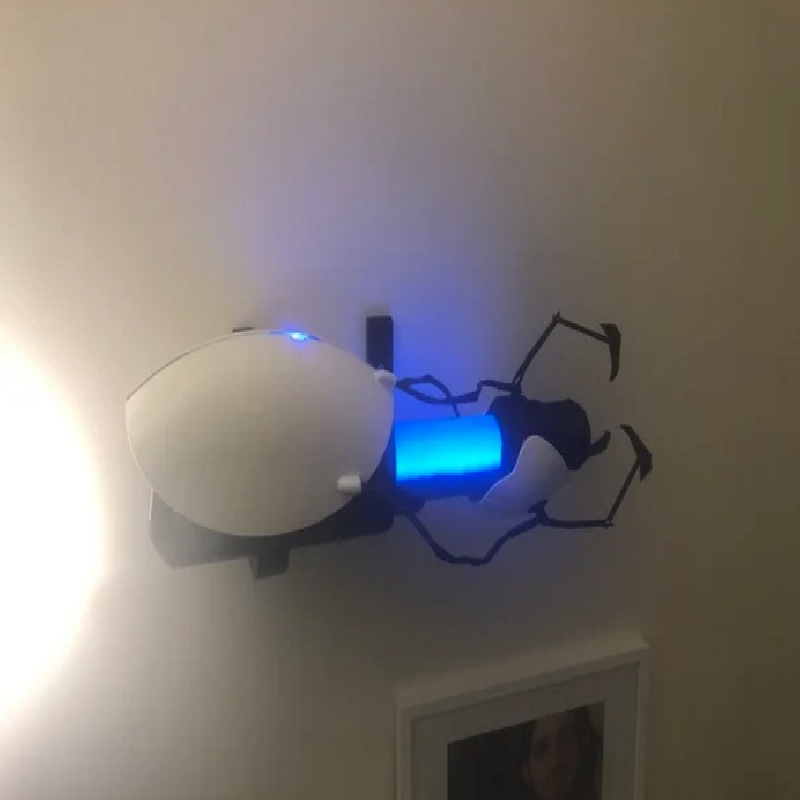
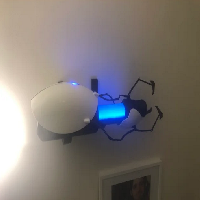
This is my portal gun design! I modeled the whole thing from scratch in fusion 360 and I'm really proud of the result.
The models are each arranged in the orientation in which I printed them, so the printing should be fairly simple, I used Cura's tree supports for everything as there are a few difficult to reach areas in the main body and the bridge.
The assembly is also hopefully fairly obvious, but I've included a full assembly file as well.
You'll need to print:
1x Main Body
1x Handle Cover
1x Bridge
3x Body Pin
1x Barrel
1x Shell Front
1x Shell Left
1x Shell Right
3x Claw Base
3x Claw Lower
3x Claw Upper
Optional:
3x Claw Pin (I used M20 bolts that came with my ender 3, but these cylinders should fit, and work with some glue)
1x Indicator Light (I used a transparent filament for this, if you don't have any, there should be other ways to accomplish the same effect)
The following is a list of the non-3d printed components that I used, but I'm sure there are many alternatives to a lot of the parts I used.
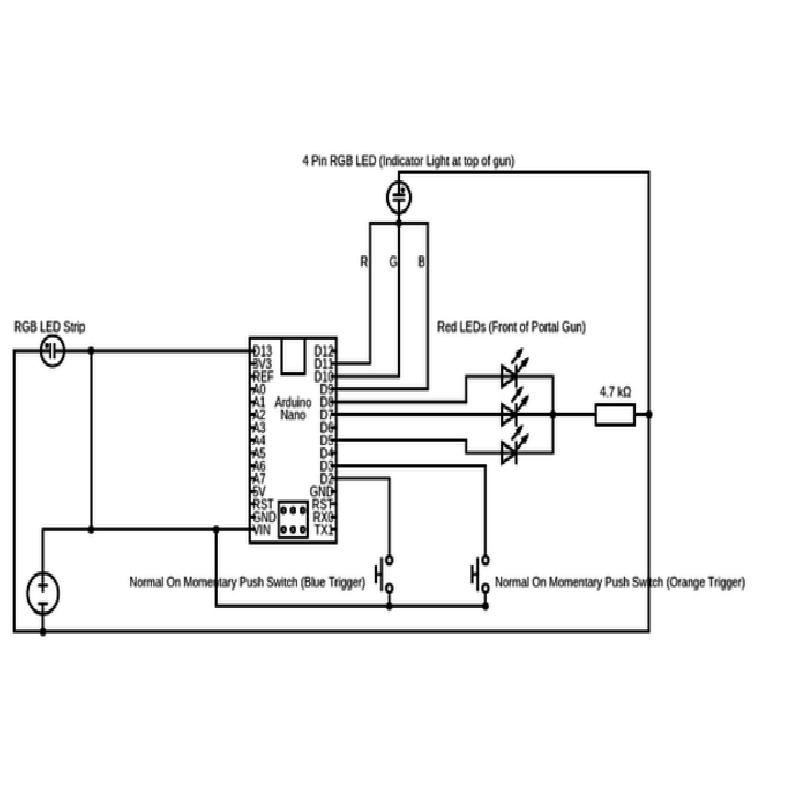
1x Arduino Nano: Any micro controller should be viable, I used the nano because I'm familiar with Arduino and the Nano is small and cheap. The included PortalGun.ino file is the code I used for my project)
1x 4-Pin RGB LED: Used for the indicator light on the top of the portal gun
1x Acetate Sheet: This is for diffusing the LED strip on the bridge of the portal gun. One sheet should be enough, but you may need more to diffuse the light coming out of the barrel
3x Red LEDs: These are used for the lights on the front of the portal gun. These are extremely optional, as they only show as pinpricks of red (mine have stopped working and I am not going to fix them), that said they do give you an excuse to add wires coming from the main body, I put heat shrink on mine to make them look more like the actual gun.
2x Normal Open Momentary Push Button Switch: These are used for the triggers, I bought mine on ebay, and it was a little tough to find any that would be short enough to fit in the handle, so here's a link that hopefully works: https://www.ebay.com.au/itm/10-x-AC-125V-3A-N-O-SPST-Momentary-Green-Round-Push-Button-Switch-OFF-ON-/392262775184?hash=item5b54aef190
1x Power Source: For my project I used a 9 volt battery with a step-down unit, and a toggle switch (which there is a hole for in the main body), but there are a lot of options for powering the electronics
1x WS2812B RGB LED Strip: This strip is used to create the firing effect through the bridge of the portal gun. I cannot recommend these enough, they're easy to use and really cool, if you're into electronics you'll find some uses for these. Make sure they're individually addressable
Lots x Wire: I used quite a lot for this, and it really got far too messy, so try your best to keep things organized, and do as much of the soldering as possible before you start gluing things together. I've also included a wiring diagram (I know it's not perfect but hopefully it's a little helpful)
Lastly there are also two mounting pieces included for mounting your portal gun on the wall!
Good Luck!
Print Settings
Printer brand:
Creality
Printer:
Ender 3
Rafts:
No
Supports:
Yes
Resolution:
0.2
Infill:
20%
Filament brand:
Prusament
Filament color:
Grey
Filament material:
PLA
Notes:
Any material does the trick.