by Pawpawpaw85, published
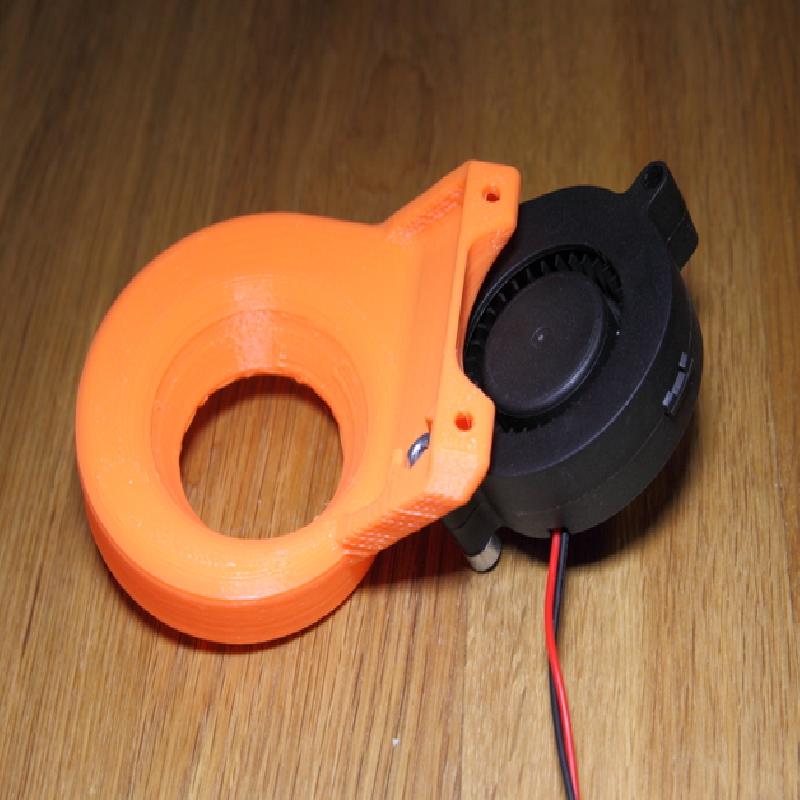
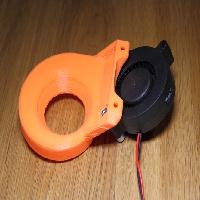
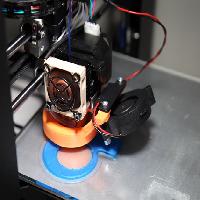
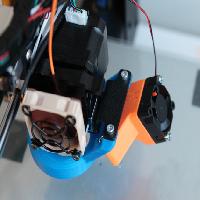
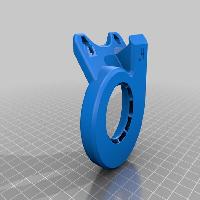
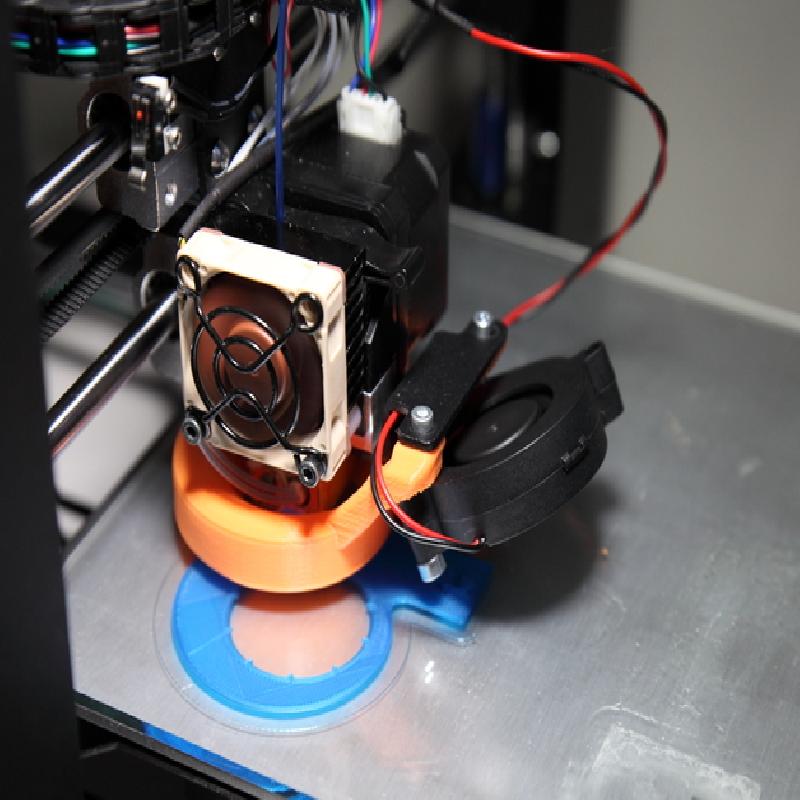
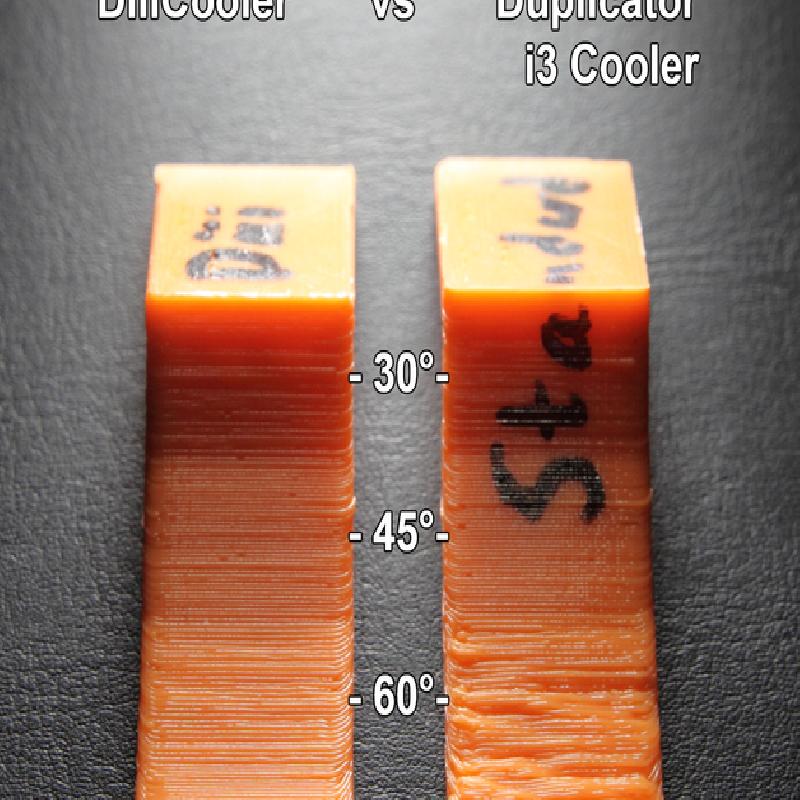
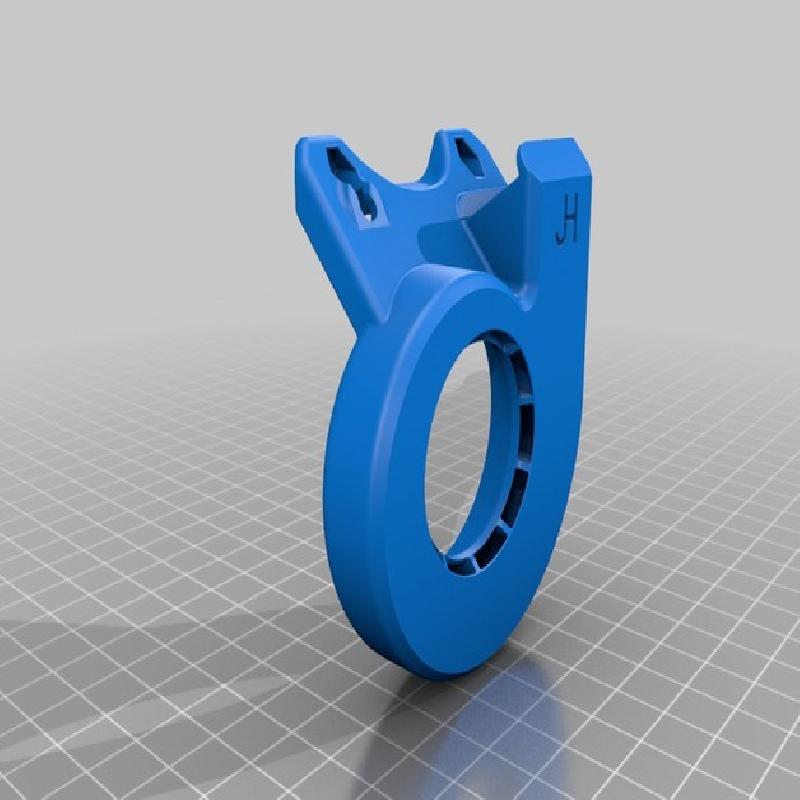
The DiiiCooler is a cooler that is to be mounted around the hotend of the Wanhao Duplicator i3.
It provides a 360 degree field of cooling around the hotend for the part being printed.
Print this item without support; in ABS, PET-G or other filaments that can stand a bit of heat.
(PLA has worked when testing the prototypes, but use it at your own risk.)
[REQUIRED HARDWARE]
1 pcs M4x20 screw (or longer)
2 pcs M3x10 or M3x12 screw
1 pcs M4 nut (or locknut)
2 pcs M3 nut (or locknut)
1 pcs 51x51x15 mm radial fan
(Look at Delta BFB0512HH for dimensions datasheet, A cheap noname radial fan of the same size work fine, for example: http://www.banggood.com/3D-Printer-12V-DC-50mm-Blow-Radial-Cooling-Fan-p-980653.html )
[MOUNTING INSTRUCTIONS]
1) Use the M3 screws and nuts to fasten the cooler in the two holes used by the stock cooler.
2) Use M4 screw and nut to fasten the radial fan to the cooler.
3) Connect the fan to the 3D printer where the stock 30 mm fan was connected.
[PID HEAT MANAGER] (use for best hotend performance)
This describes how to make your Duplicator i3 use PID heat management for best temperature control of the hotend, no matter which cooler you use.
(For best results, perform your own PID-tuning.)
Using Repetier-Host, go into [Config] -> [Firmware EEPROM Configuration]
Change the following parameters:
Extr.1 heat manager [0-3] = 1
Extr.1 PID P-gain/dead-time = 7
Extr.1 PID I-gain 0.5
Extr.1 PID D-gain 25
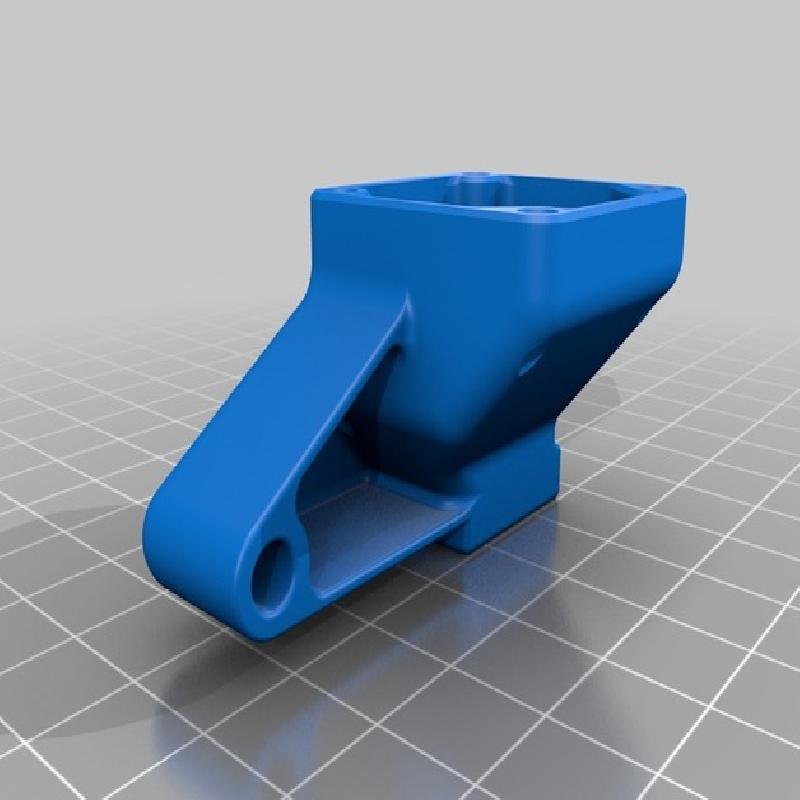
[STOCK 30 mm FAN ADAPTER]
Added an adapter for the 30mm stock fan. It will not perform as well with the 30mm fan as with a radial fan, but it still performs better than the stock cooler, and no soldering required.
[BLUEPRINT FOR ADAPTERS]
I have created a blueprint drawing of the cooler, where to mount it in relation to the nozzle tip. This should make it easier for all you folks out there that want to adapter this cooler to your 3D printers that are not the Duplicator i3.
[ADAPTERS FOR OTHER PRINTERS]
TAZ5 - http://www.thingiverse.com/thing:1306388 (By KillaCycle)
TAZ5 - http://www.thingiverse.com/thing:1462875 (By KillaCycle)
FolgerTech 2020 i3 - http://www.thingiverse.com/thing:1222121 (By The_Cheat)
Rafts: No
Supports: No
Resolution: 0.2 mm
Infill: 20-100%
Notes:
Print with the flat bottom down.
Design process
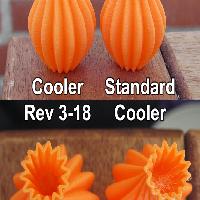
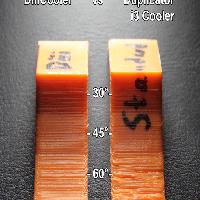
I noticed that when printing parts on the Duplicator i3 the cooling performance was uneven and poor, everything facing the stock cooler turned out alright most of the times, but everything facing away from it had a very poor finish, tolerances and the surfaces was everything but smooth.
I work with designing hydraulic meters and flow design for liquids at work so I figured I would give it a try both at designing a cooler with an even cooling around the hotend, and one that only required one printed part with as simple design as possible.
Took a lot of work to get the internal flow structure to work properly (air works differently than liquids) but once I figured out how to get the air to divide into an equal portion for every exit I knew it was going to work well. Required around 40 iterations of flow design in total and 8 printed prototypes to get the flow of air to behave as I wanted.
I did get feedback that some of the structure was just a little off from being able to be divided by 0.4 mm (as most nozzles are this size) so the version available for download has now been updated with a structure that will work best being printed with a 0.4 mm nozzle.